In the previous post, we covered the basics of Transit Gateway, what it is, what problem it solves, and we also looked at how to create one. We walked through attaching two VPCs to the TGW and establishing connectivity between them. We also covered the important concepts of TGW attachments, associations, and propagations.

In this post, we will build on that knowledge and look at
- Creating and attaching a Site-to-Site VPN to the Transit Gateway.
- We will also cover sharing a single Transit Gateway across different AWS accounts using Resource Access Manager.
As always, if you find this post helpful, press the ‘clap’ button. It means a lot to me and helps me know you enjoy this type of content. If I get enough claps for this series, I’ll make sure to write more on this specific topic.
Transit Gateway AWS Site-to-Site VPN Attachment
We have already seen how to create a Site-to-Site VPN and attach it to a Virtual Private Gateway (VGW). If you are complete
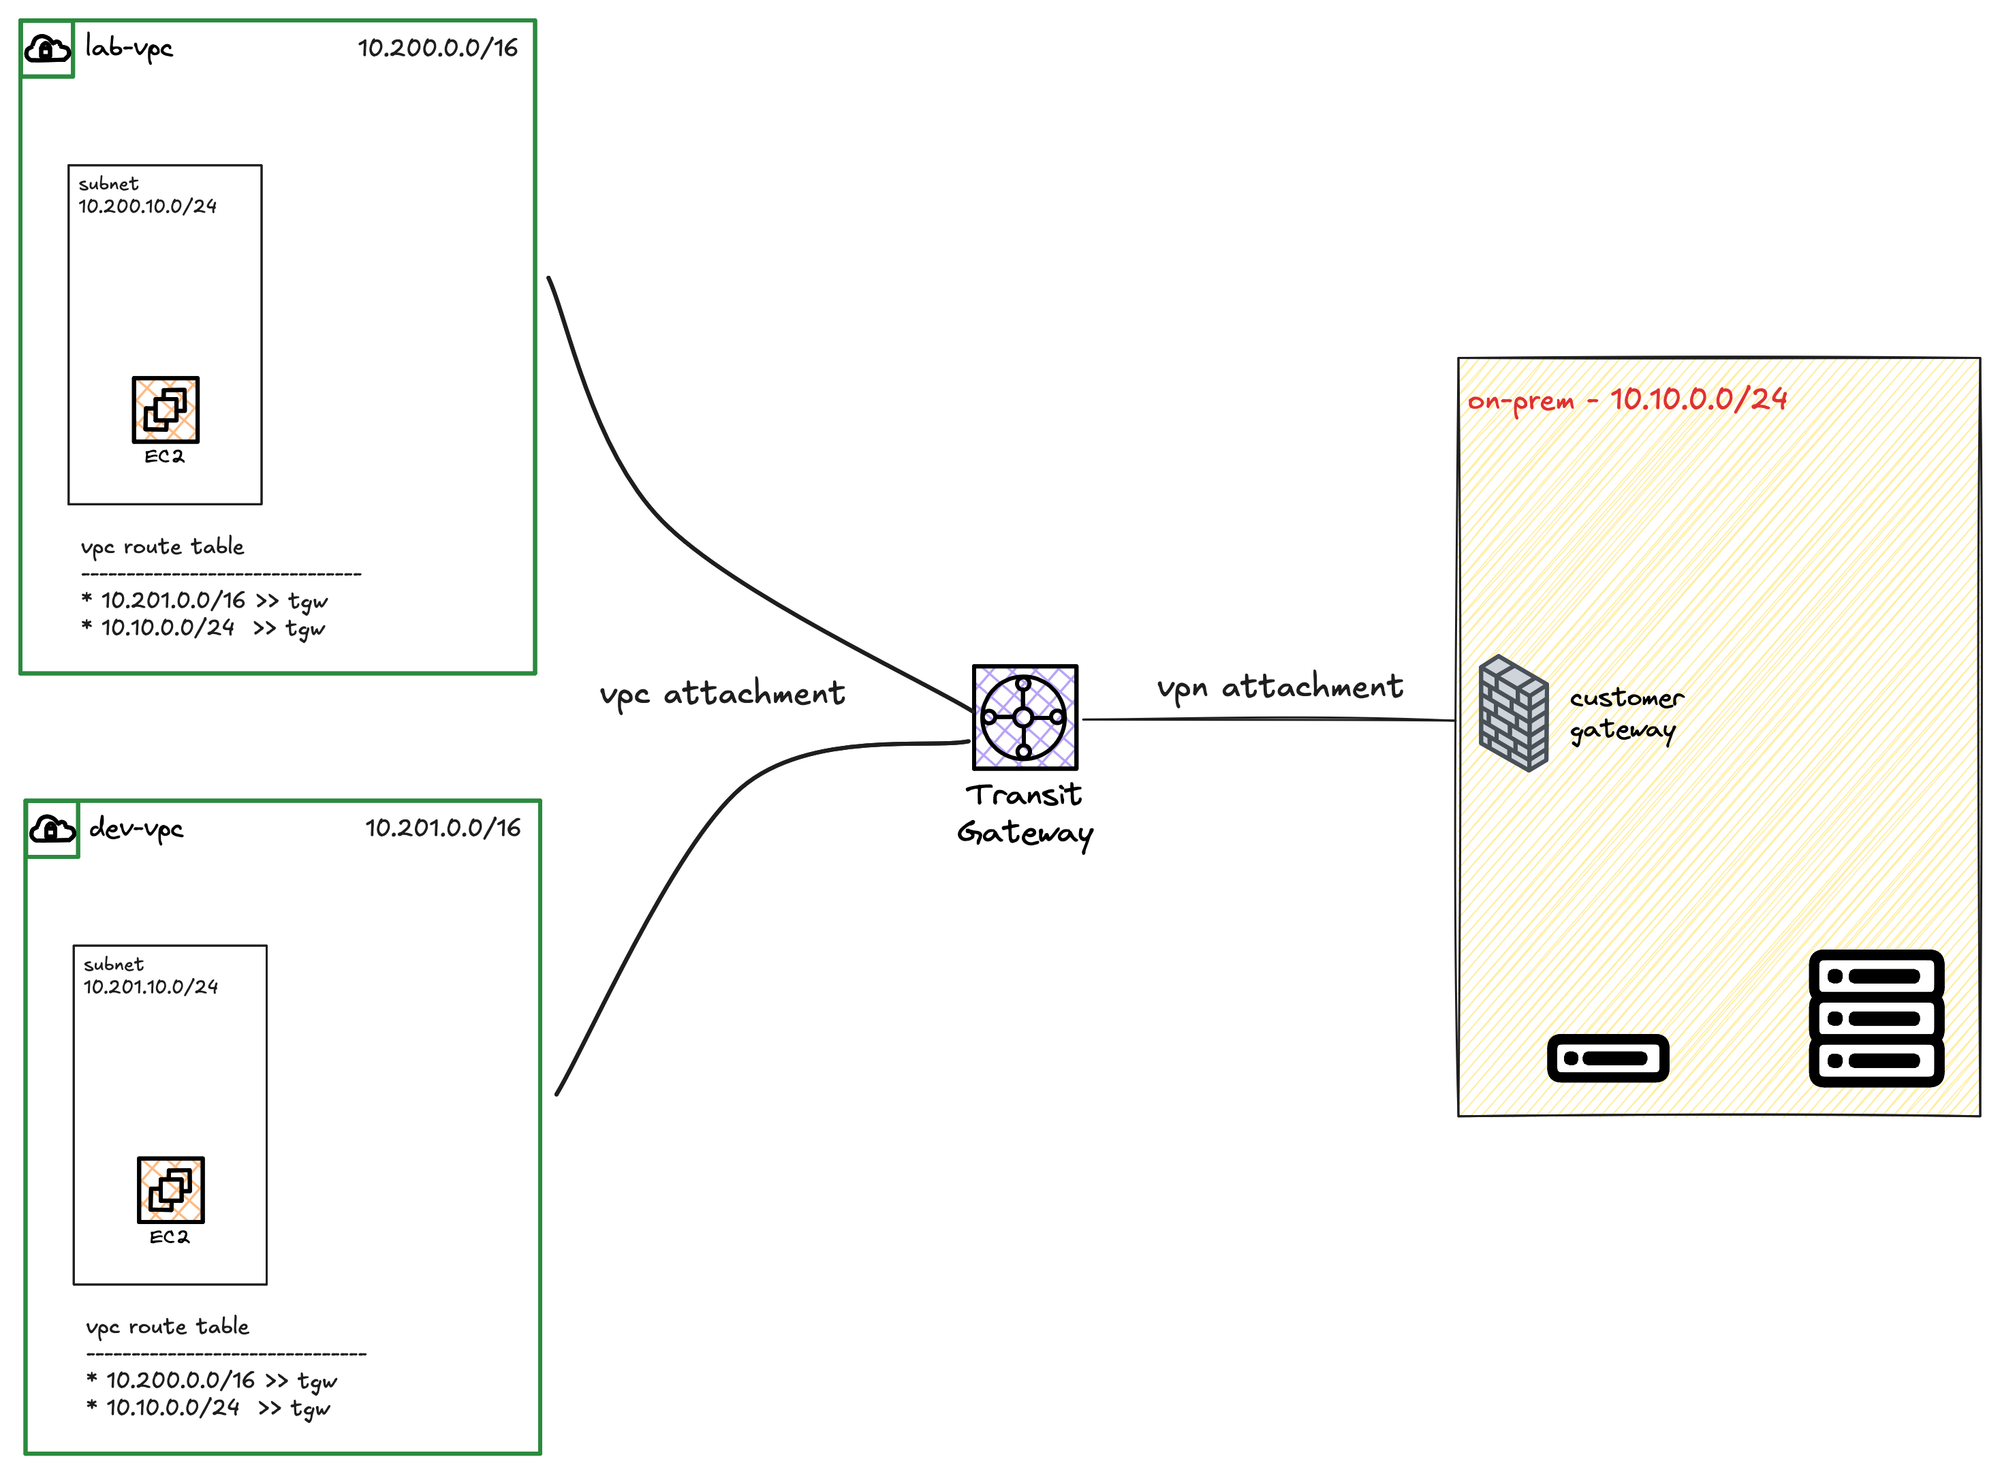
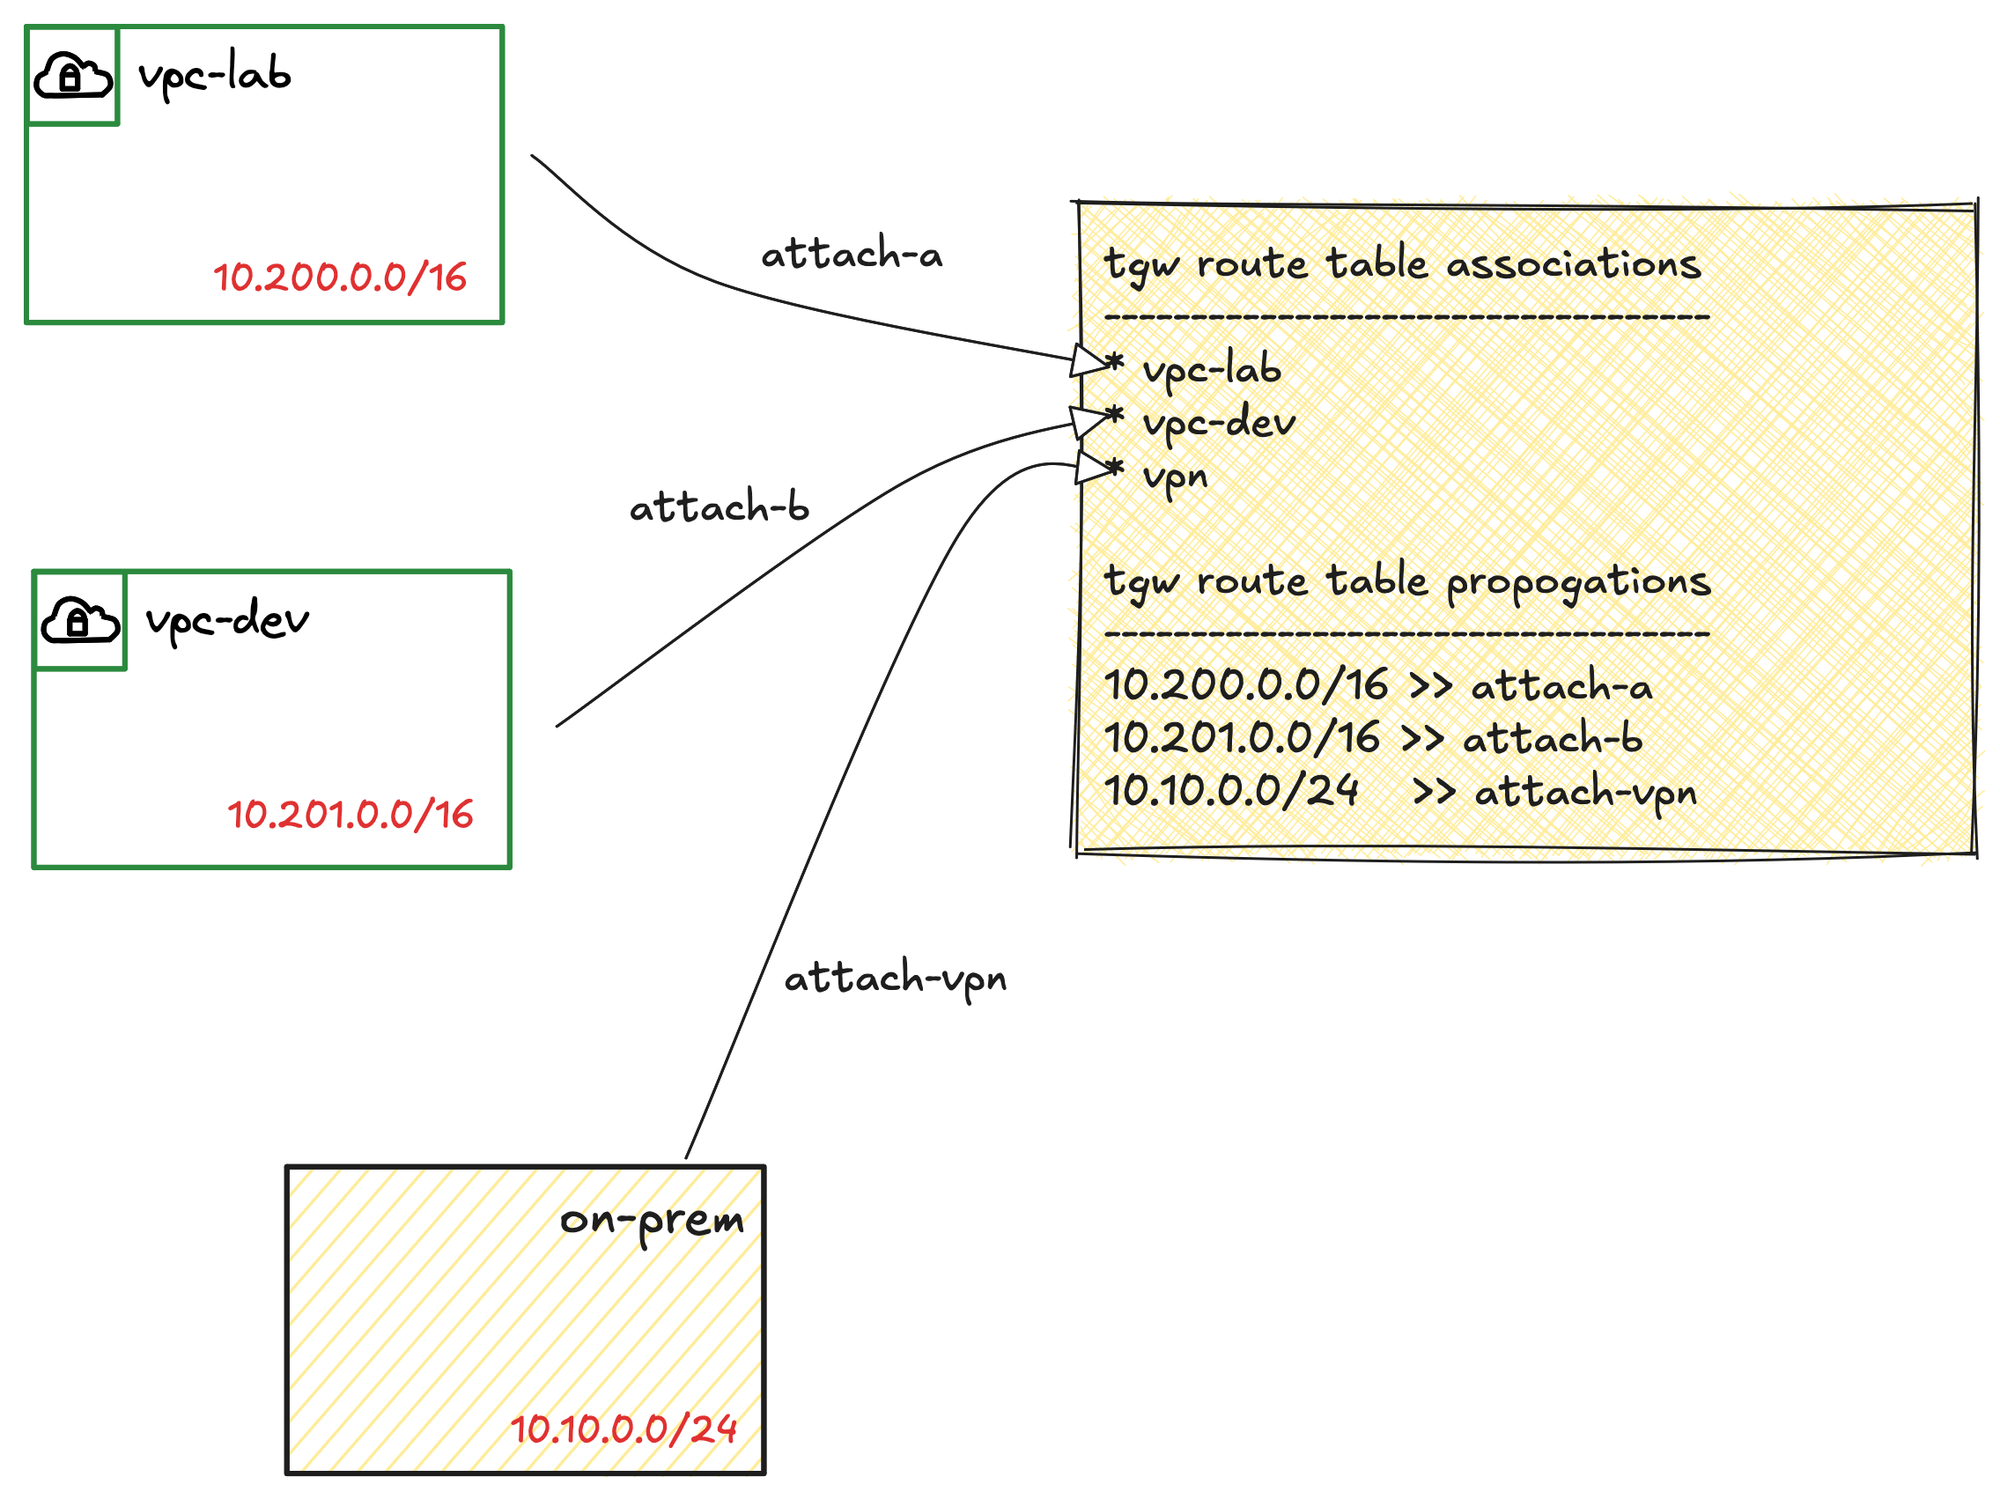
In the previous post, we created a Transit Gateway and attached two VPCs to it. In this post, we’ll take it a step further and attach a VPN connection to the TGW, as shown in the diagram.
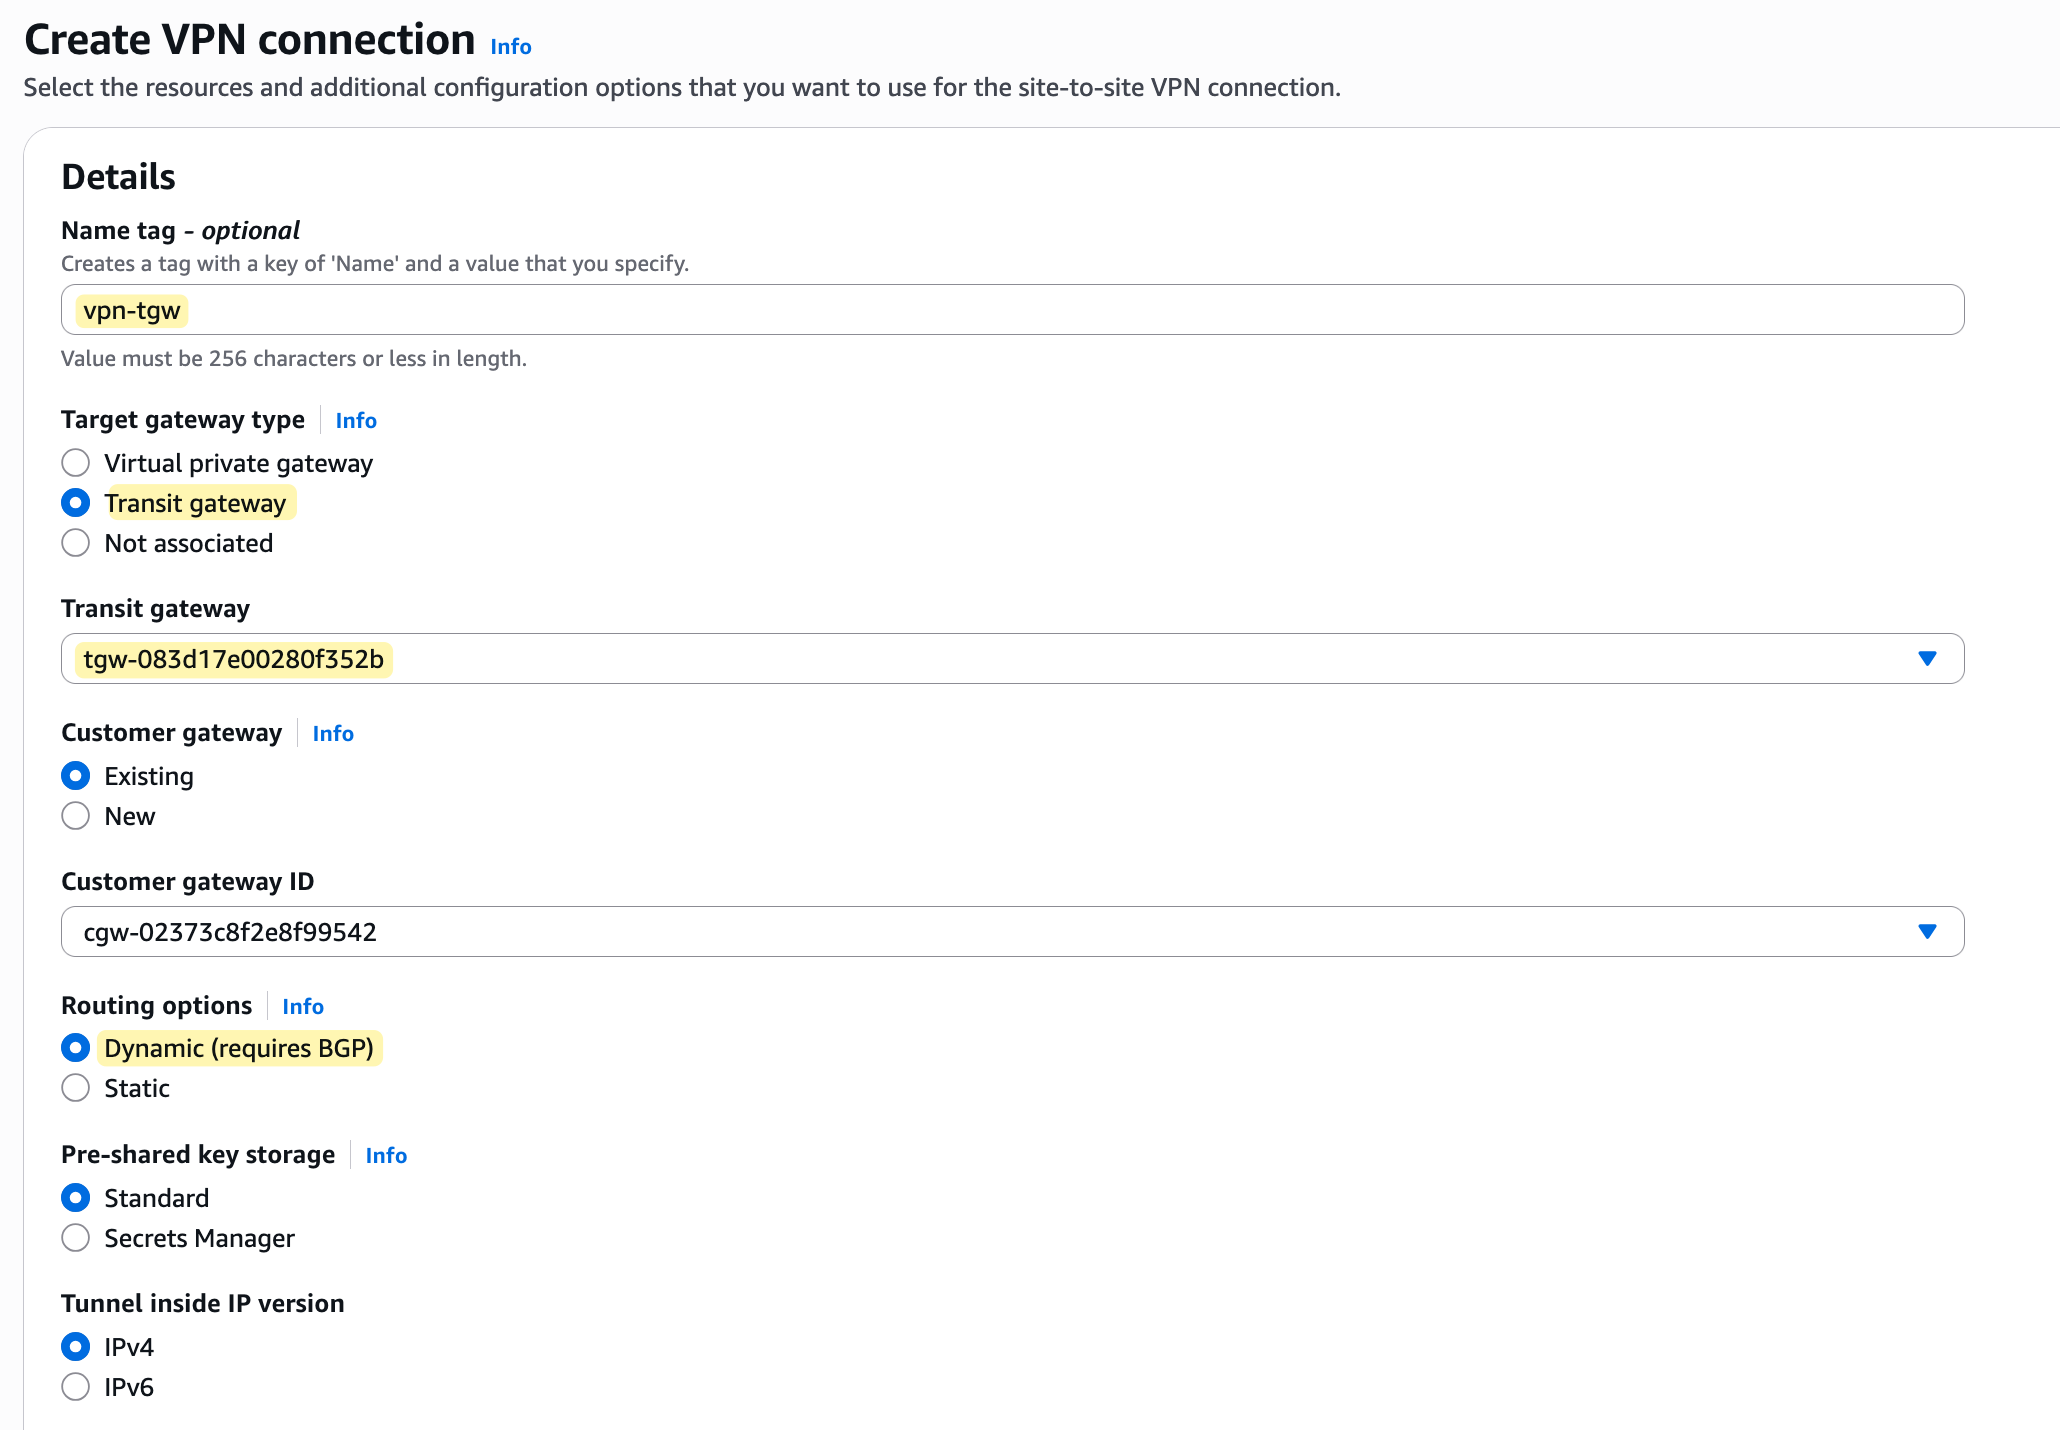
The process is very similar. The only real difference is that when you create the VPN connection, instead of choosing 'Virtual private gateway' as the target, you must choose 'Transit gateway' and then select your TGW from the list. From there, everything else in the VPN creation wizard is the same.
Once the VPN connection is created, you need to tell the Transit Gateway how to use it. The process is exactly the same as it was for the VPC attachments. You go to the TGW route table of your choice, create a new association for the VPN attachment (you will see there are already two attachments for the two VPCs), and then create a propagation for it so the TGW can learn the routes from your on-premise network.


Finally, you also need to remember to go back to the subnet route tables inside your VPCs and add a route for your on-premise network, pointing to the Transit Gateway as the target.
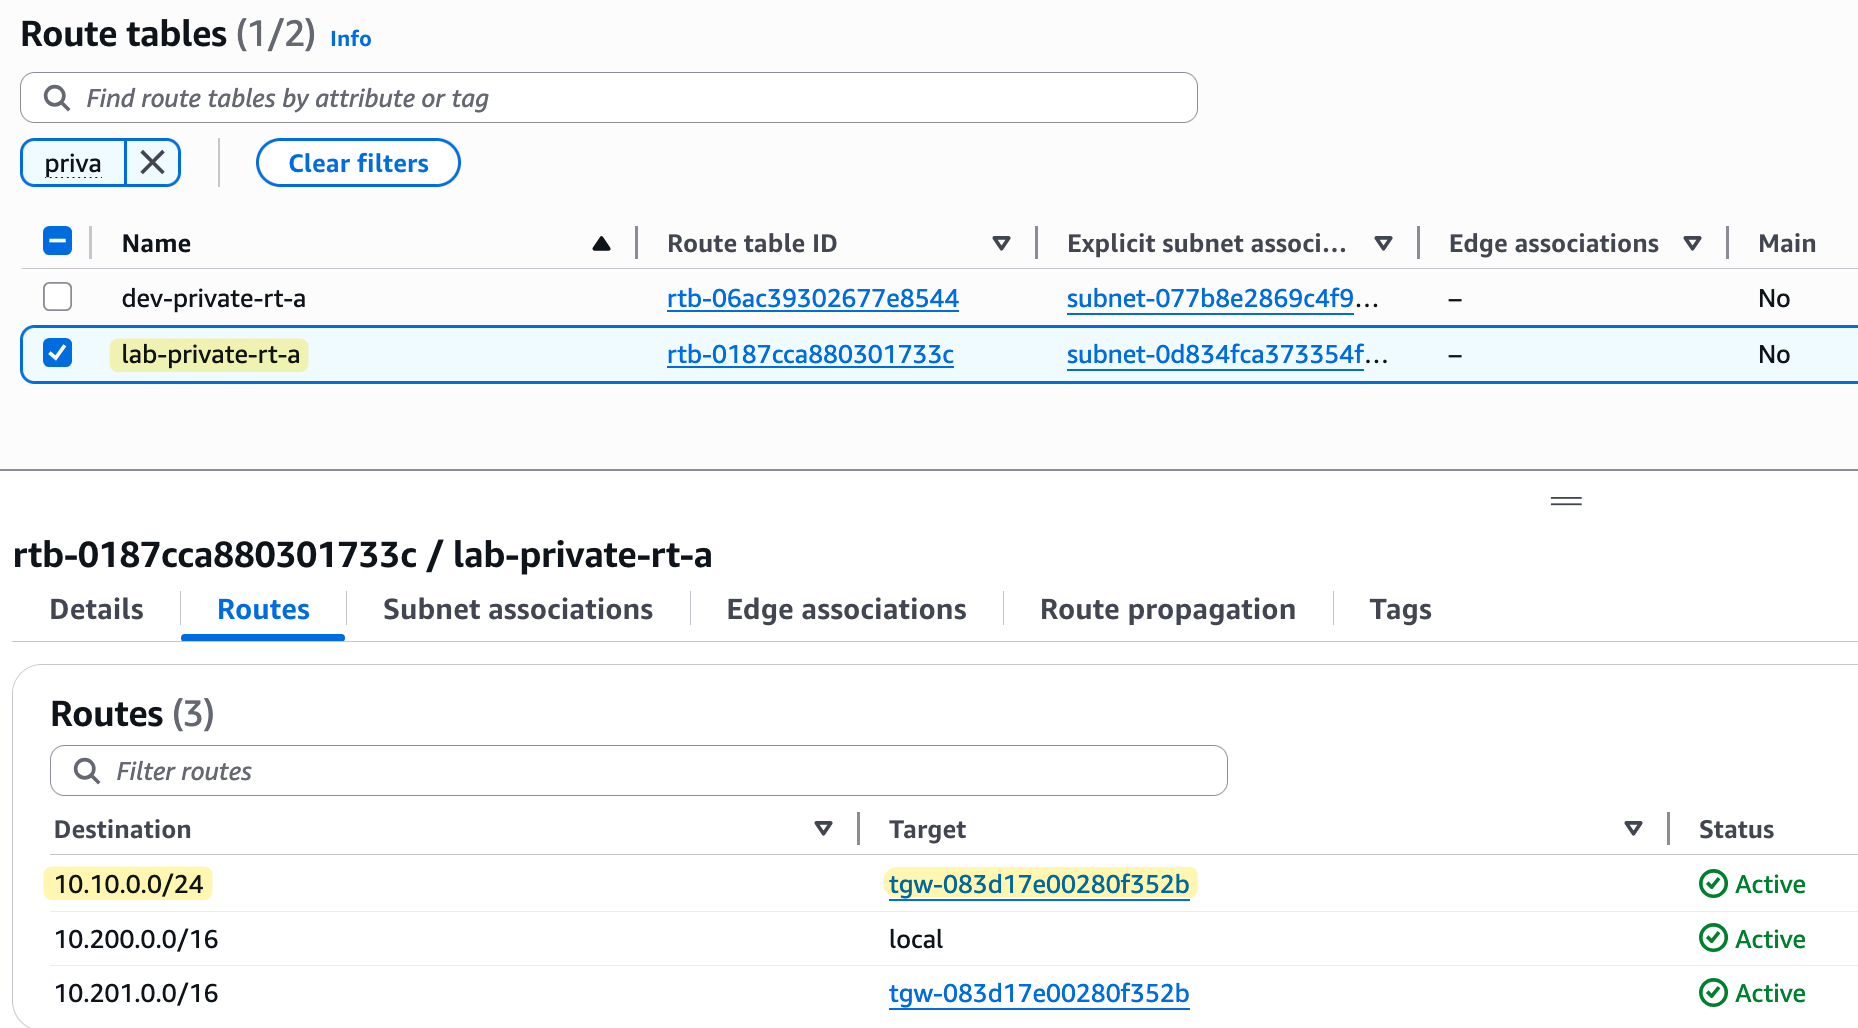
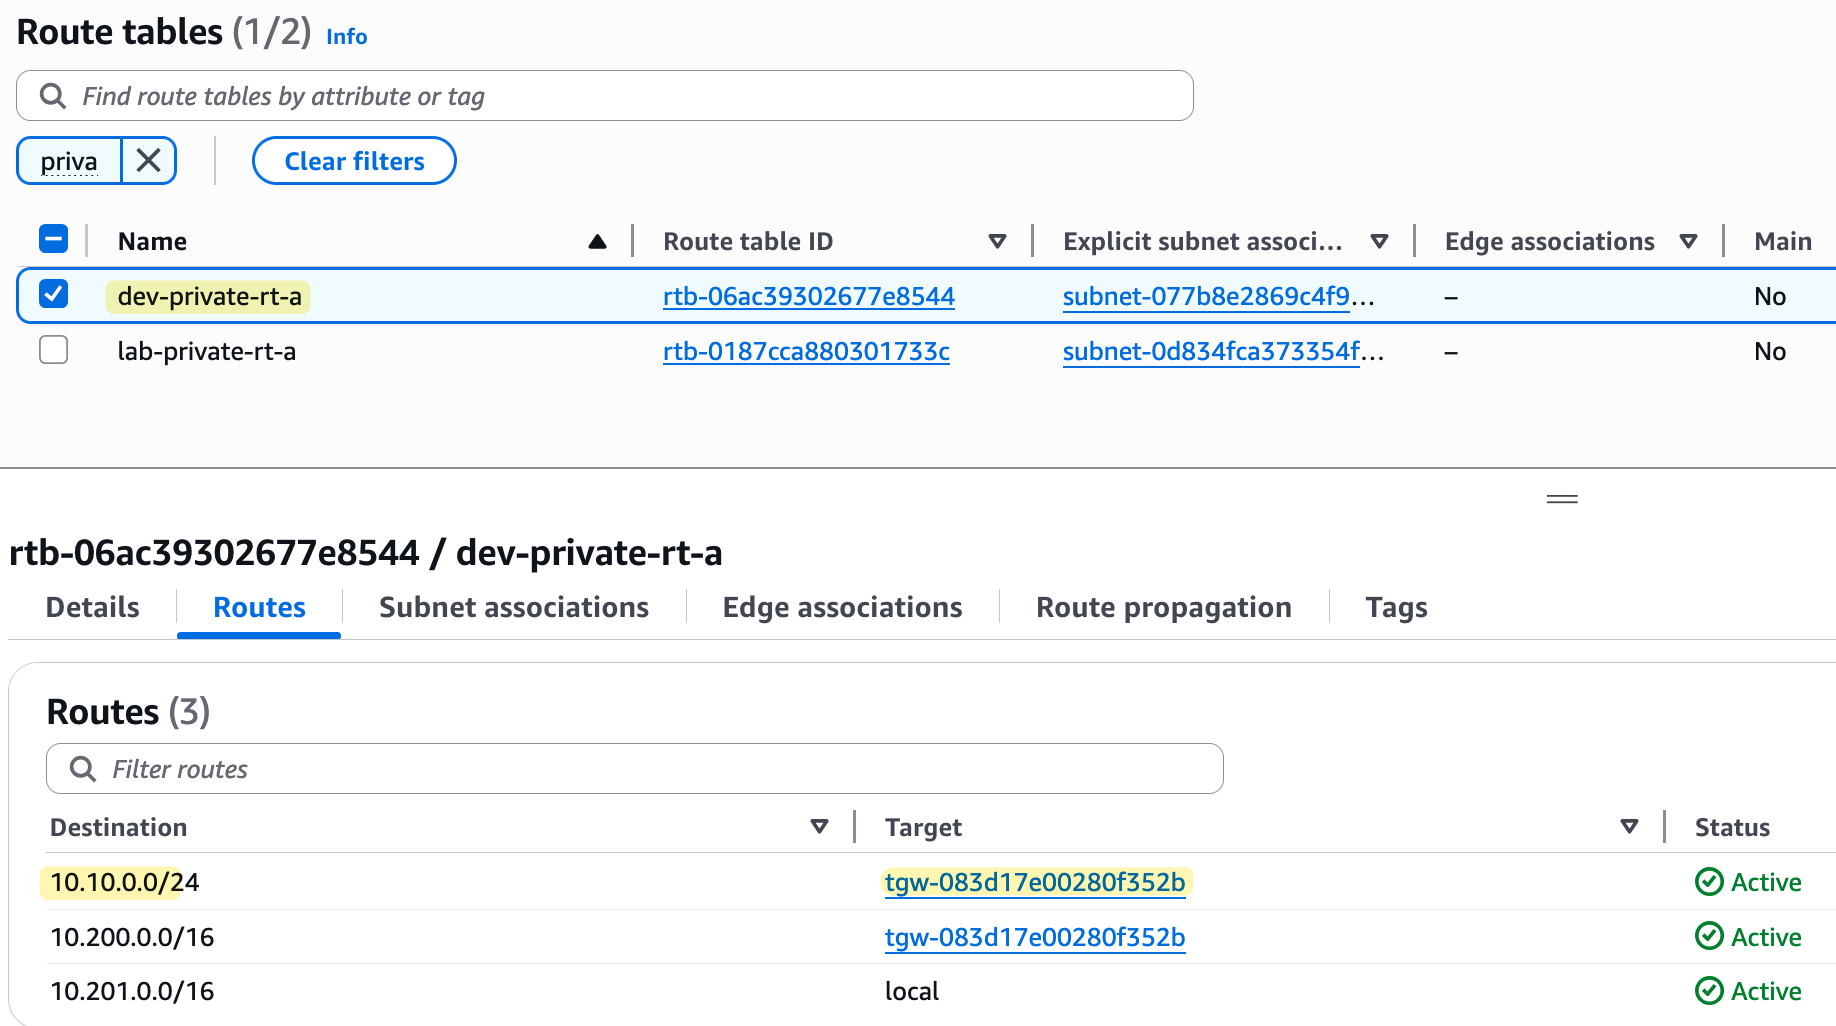
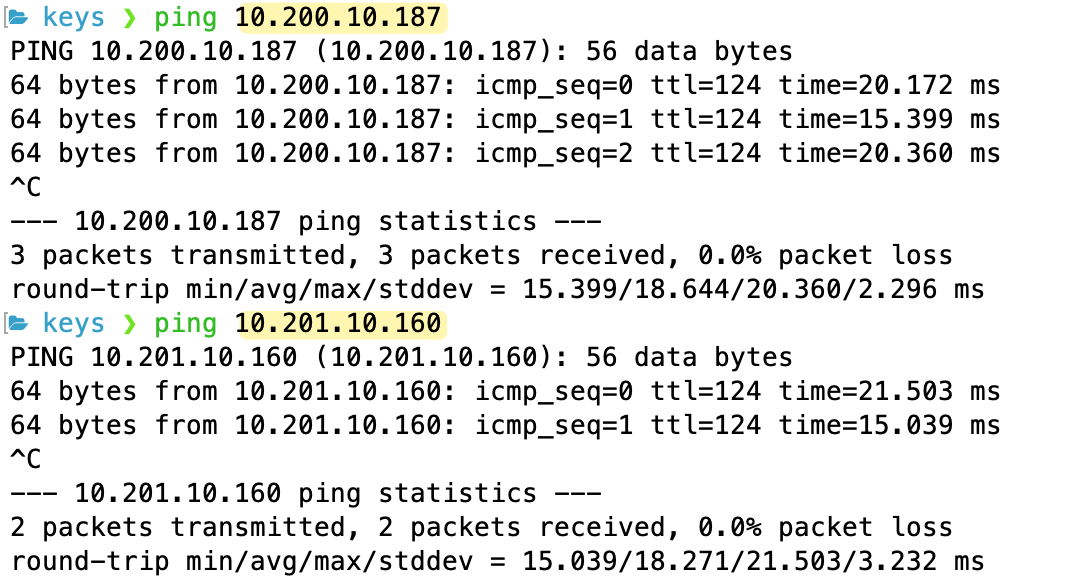
As you can see from the screenshots, our VPC route tables now have routes to the other VPC and to the on-premise network, all pointing to the TGW. Because all our attachments (the two VPCs and the VPN) are now associated with and propagating to the same TGW route table, they can all communicate with each other. Here is the ping test from on-prem (10.10.0.x) to both VPCs.
AWS TGW VPN ECMP Support
When you create a VPN connection with a Transit Gateway, it also supports ECMP (Equal-Cost Multi-Path), which is not available when using a Virtual Private Gateway (VGW). With ECMP enabled on both the TGW and your on-premise device, BGP can install multiple, equal-cost paths into the forwarding table. This allows your traffic to actively use and load-balance traffic across both of the VPN tunnels.
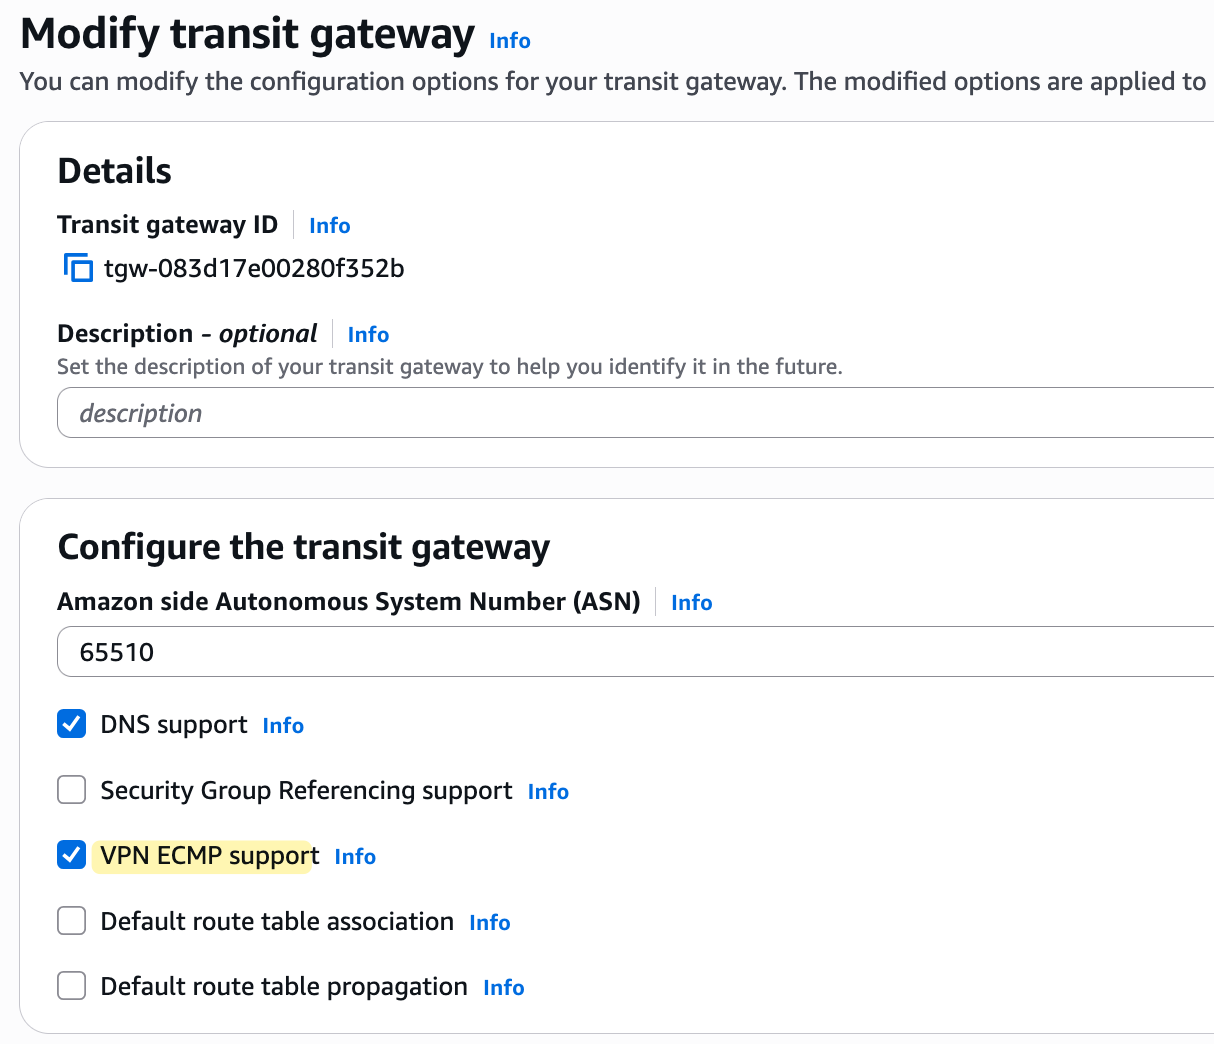
Normally, BGP selects only one 'best' path for each destination prefix and installs only that route into the forwarding table. When BGP ECMP is enabled, however, the device can select multiple equal-cost BGP paths to reach a destination, and all these paths are installed in the forwarding table for use. You can enable this feature by simply ticking the 'VPN ECMP support' box when creating or modifying your Transit Gateway.
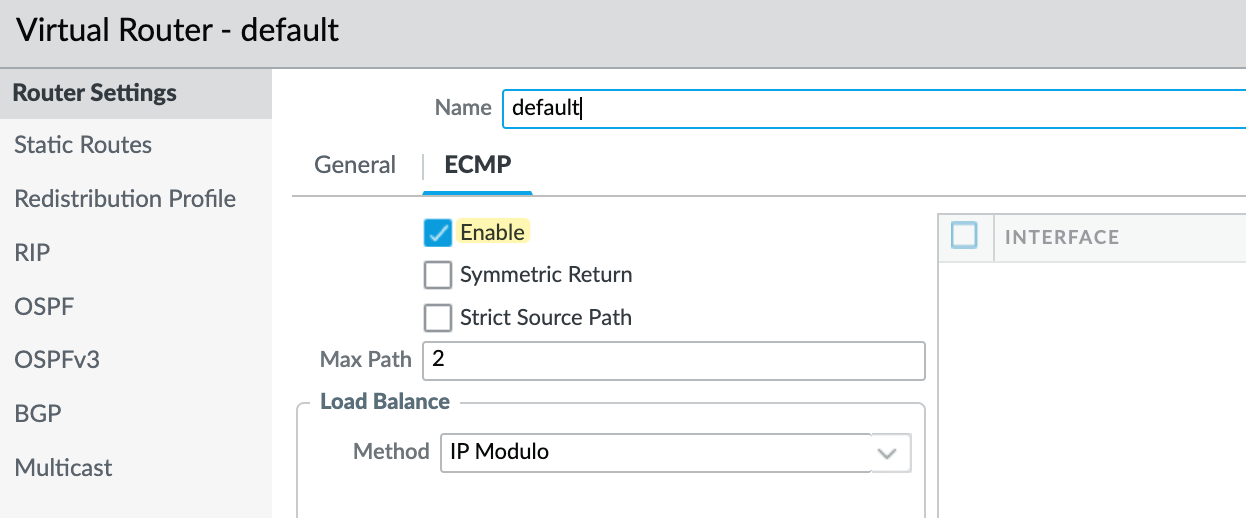
We also have to enable ECMP on the Customer Gateway device (Palo Alto in this case)
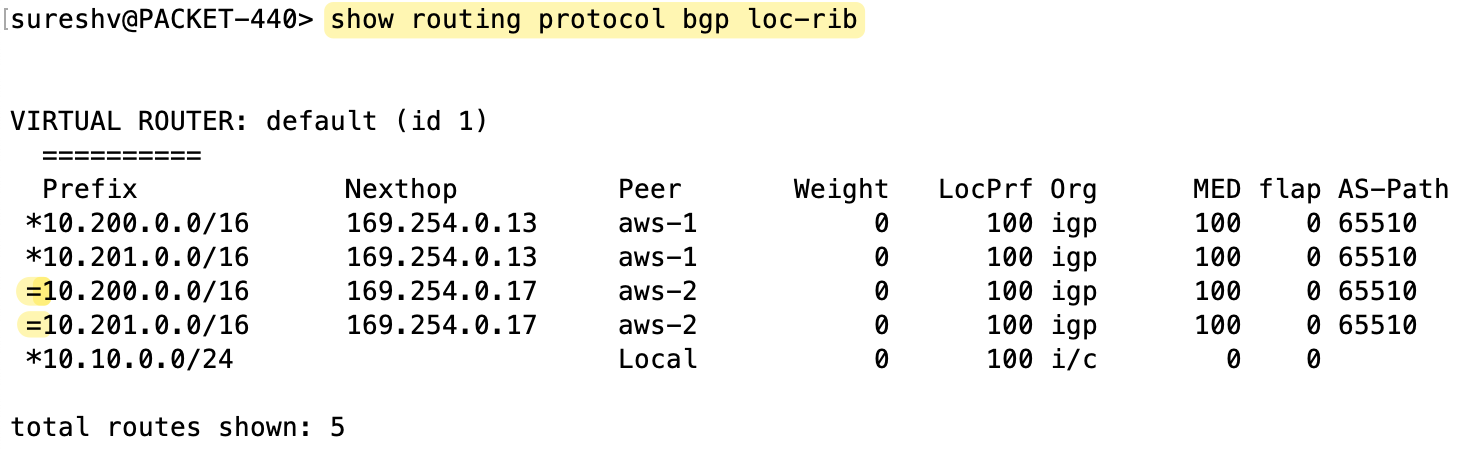
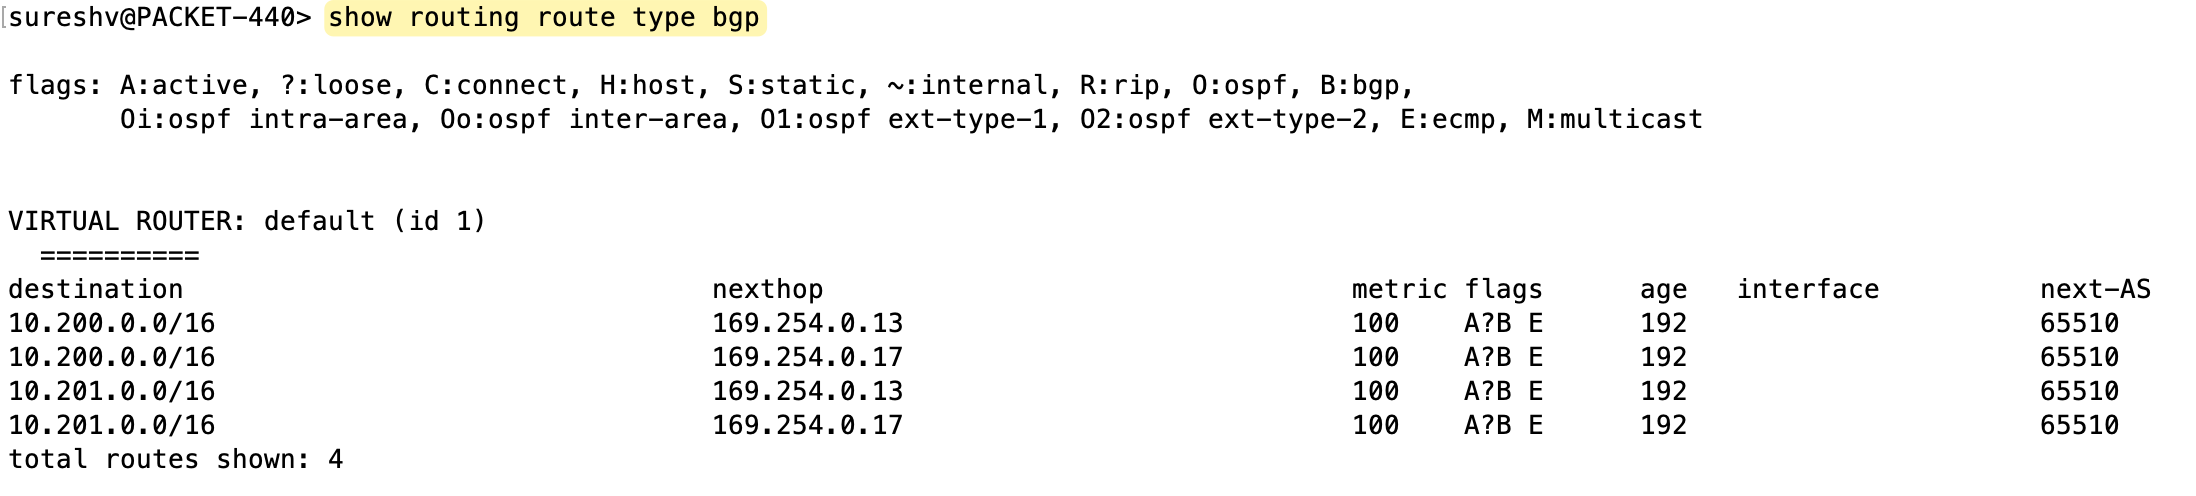
If I go and look at my on-premise device, I can see that for the routes to my AWS VPCs, both paths via the two different tunnel interfaces are installed and active in the forwarding table.
If we were to have the VPN terminate on a Virtual Private Gateway (VGW) instead, we wouldn't see this behaviour. With a VGW, you would only see one active route in your firewall's forwarding table.
AWS ECMP - A Few Considerations
By enabling ECMP (Equal-Cost Multi-Path), we can load balance traffic across both VPN tunnels. But keep in mind, a single flow will only ever use one tunnel. AWS uses a hash based on the protocol, source IP, destination IP, source port, and destination port to determine the tunnel. So once the flow matches the hash, it sticks to that tunnel.
I also noticed something interesting when using VPN with TGW. Regardless of whether ECMP is enabled or not, AWS sets the MED value to 100 for all prefixes. This is different from how it works with VGW, where the tunnels had MED values of 100 and 200.
Now, if ECMP is disabled on both the TGW and the customer gateway, AWS says that traffic from AWS to the on-premises network is sent over the "preferred" tunnel, which is randomly chosen by AWS. I find the word "random" a bit vague here. I haven’t found any solid explanation on whether AWS follows BGP path attributes when selecting the tunnel. For example, if everything else is equal, AS path, local preference, and MED, will AWS choose the oldest path? It’s unclear from the docs.
Anyway, if you plan to use ECMP, make sure you don’t modify any BGP path attributes. For ECMP to actually work, the AS path, local preference, and MED values must match. If you don’t want ECMP, then disable it on both the TGW and customer gateway. In that case, you can control traffic flow using local preference, MED or AS path prepending.

AWS Resource Access Manager
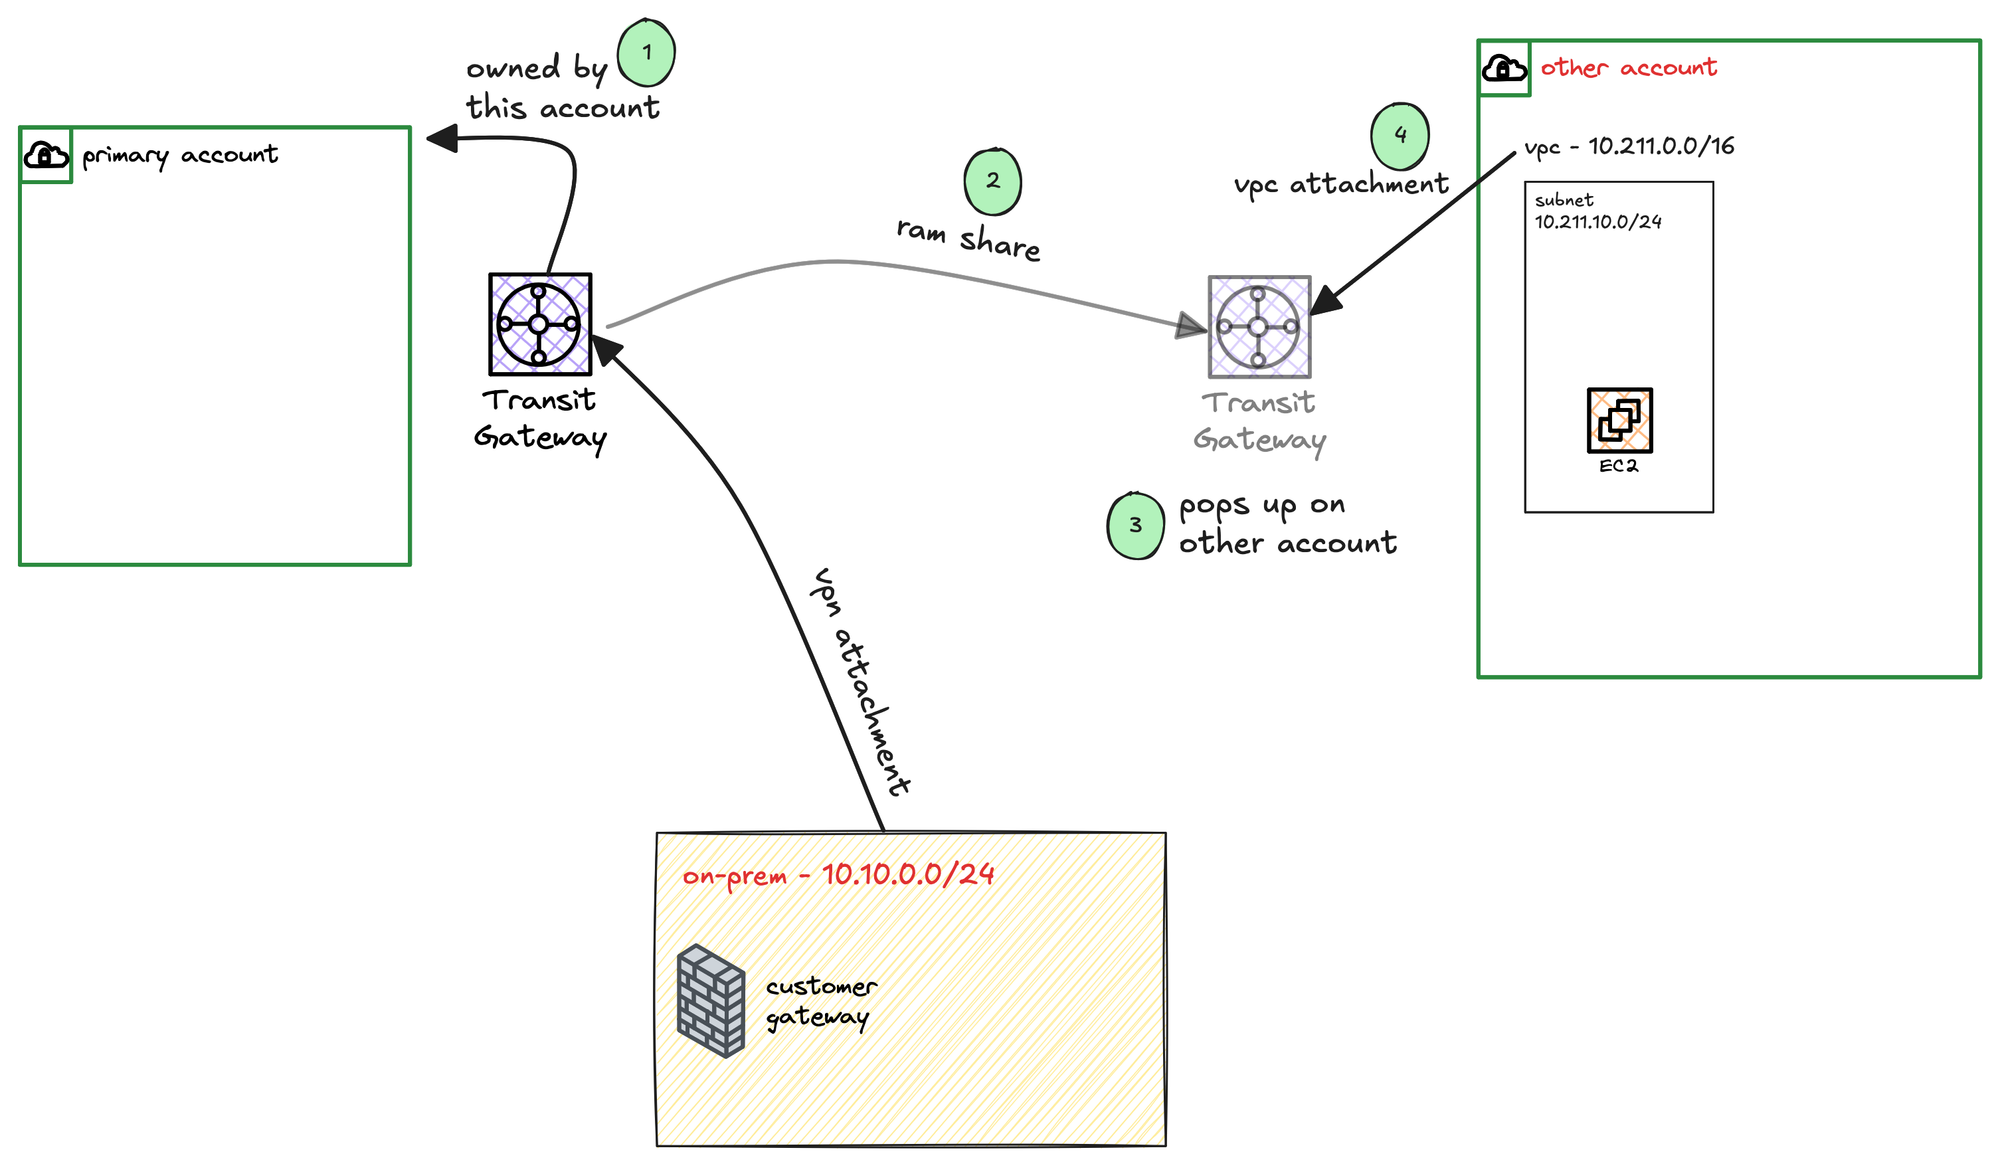
You can use AWS Resource Access Manager (AWS RAM) to share resources that you create in one AWS account with other accounts. In our case, we already have the Transit Gateway in our primary account. Suppose we have another AWS account which also has a VPC in the London region, and we want to bring this VPC into our TGW.
Remember, this VPC is in a completely different account. By using Resource Access Manager, you can share the Transit Gateway with other accounts. The TGW then just pops up in their account, and they can attach their own VPC to it.
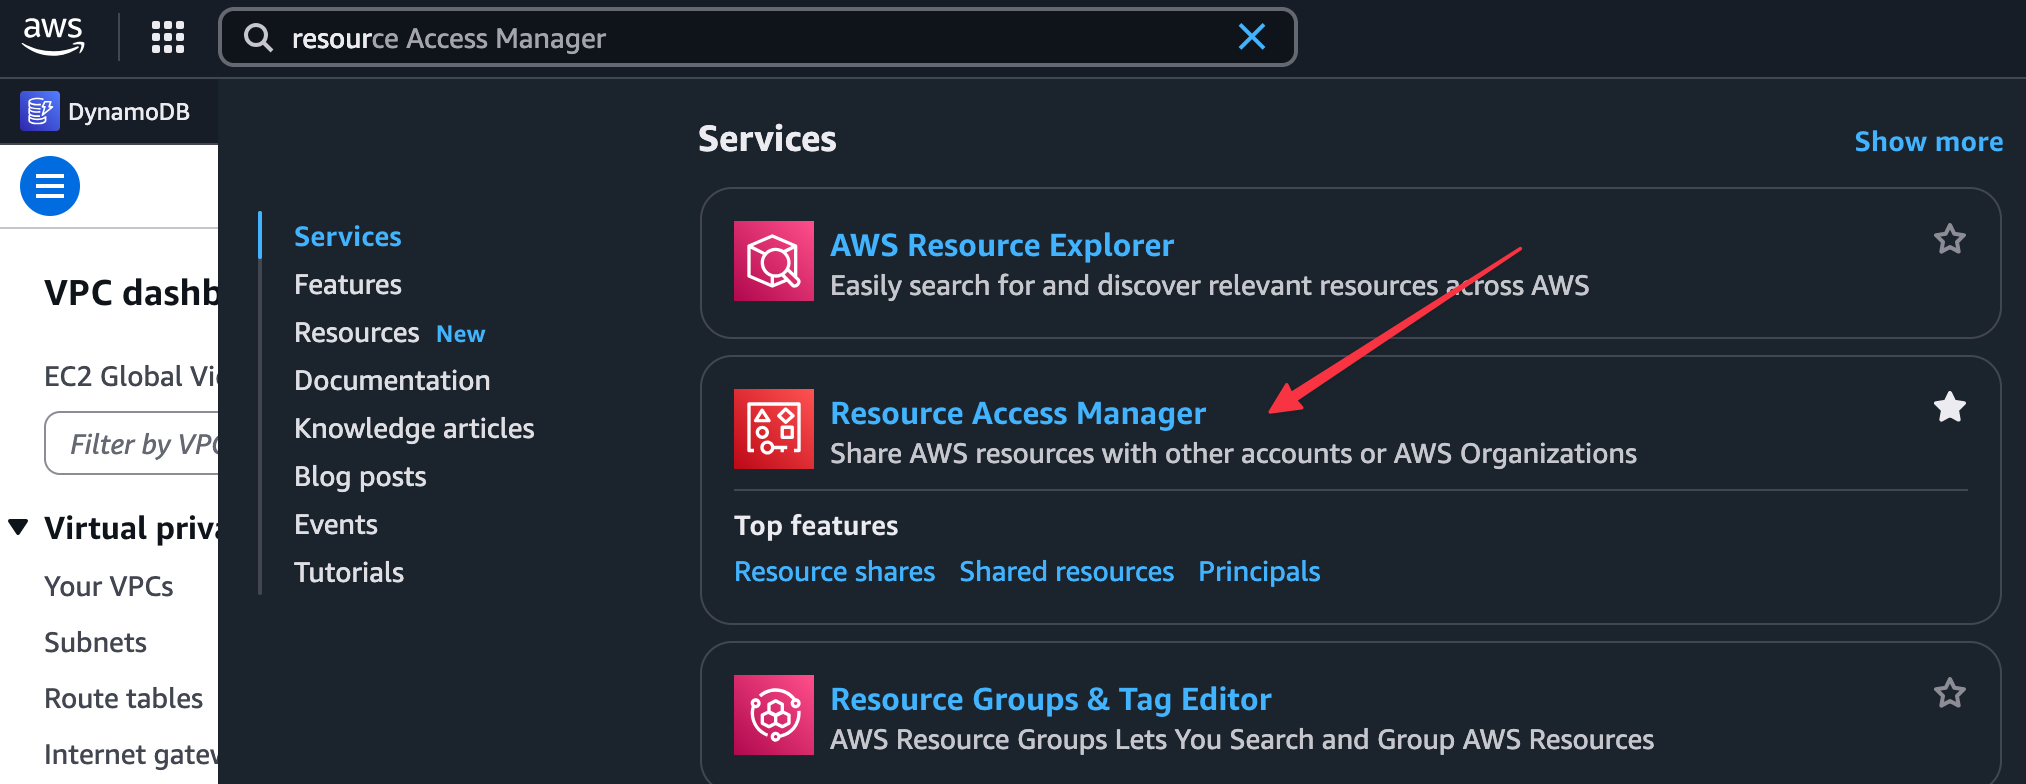
To do this, you first go to the AWS Resource Access Manager service console in the account that owns the TGW.
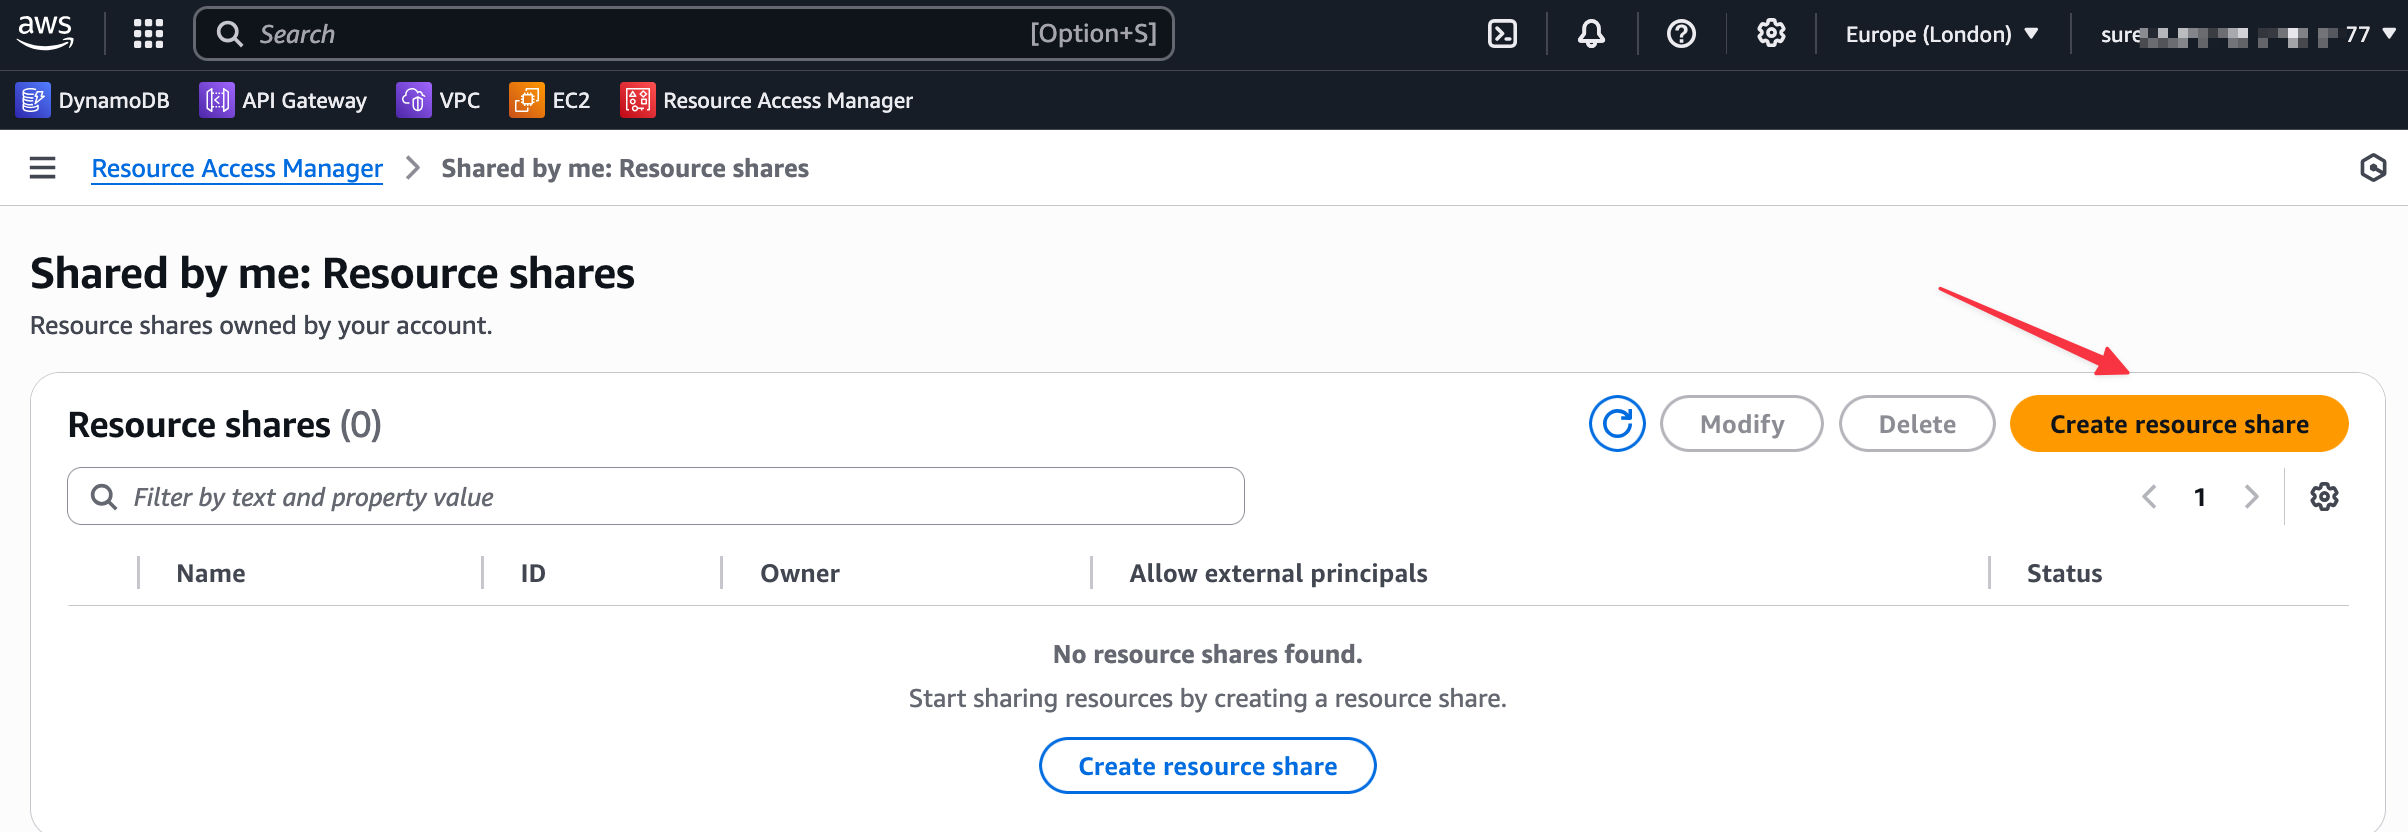
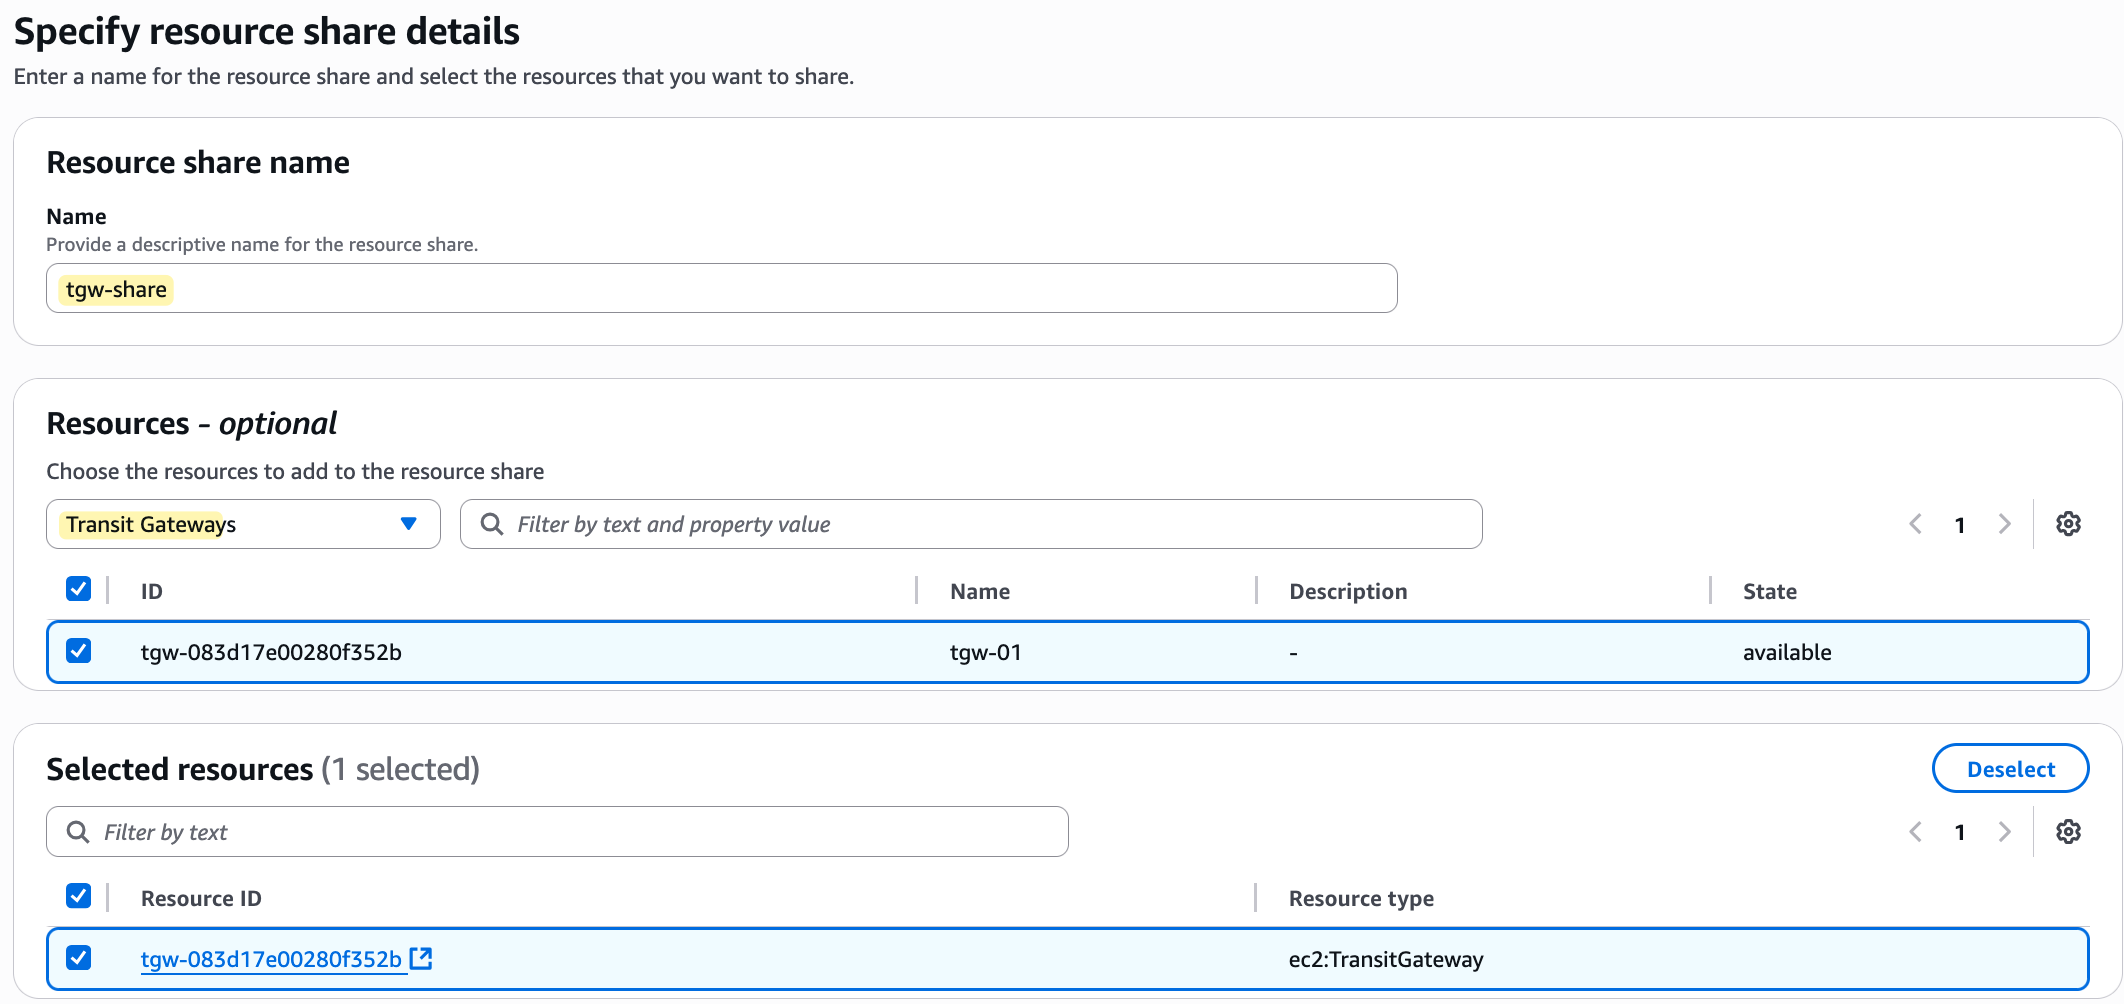
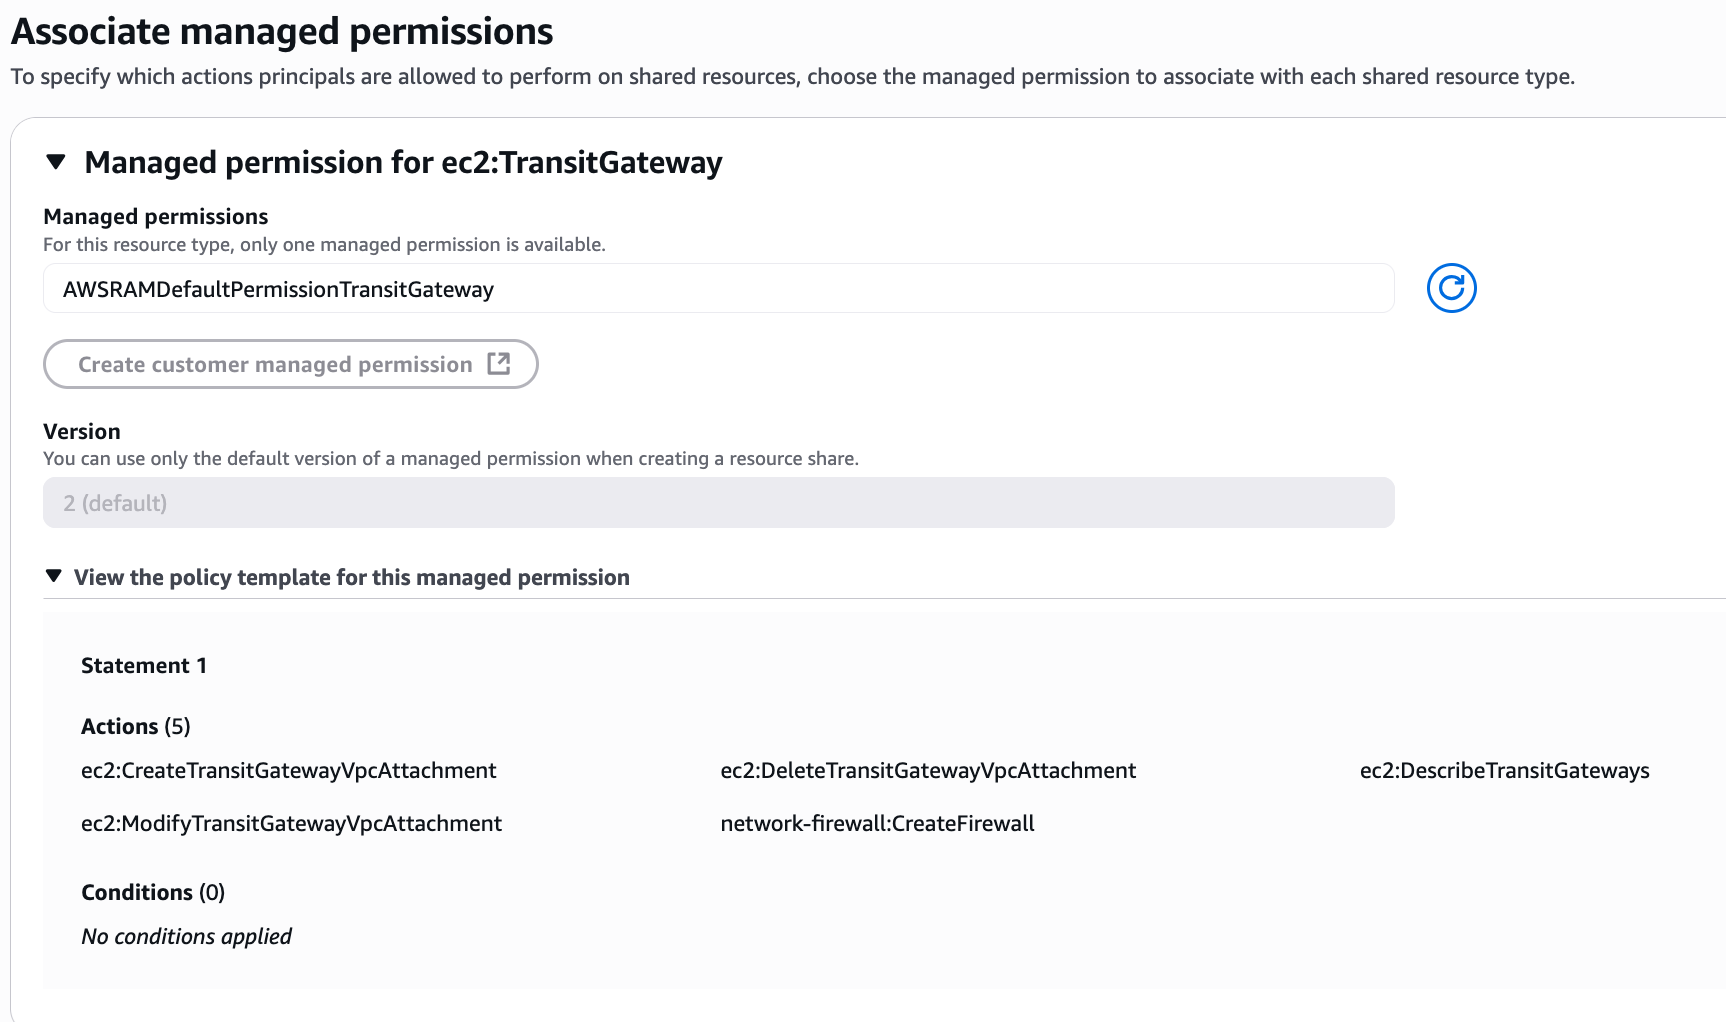
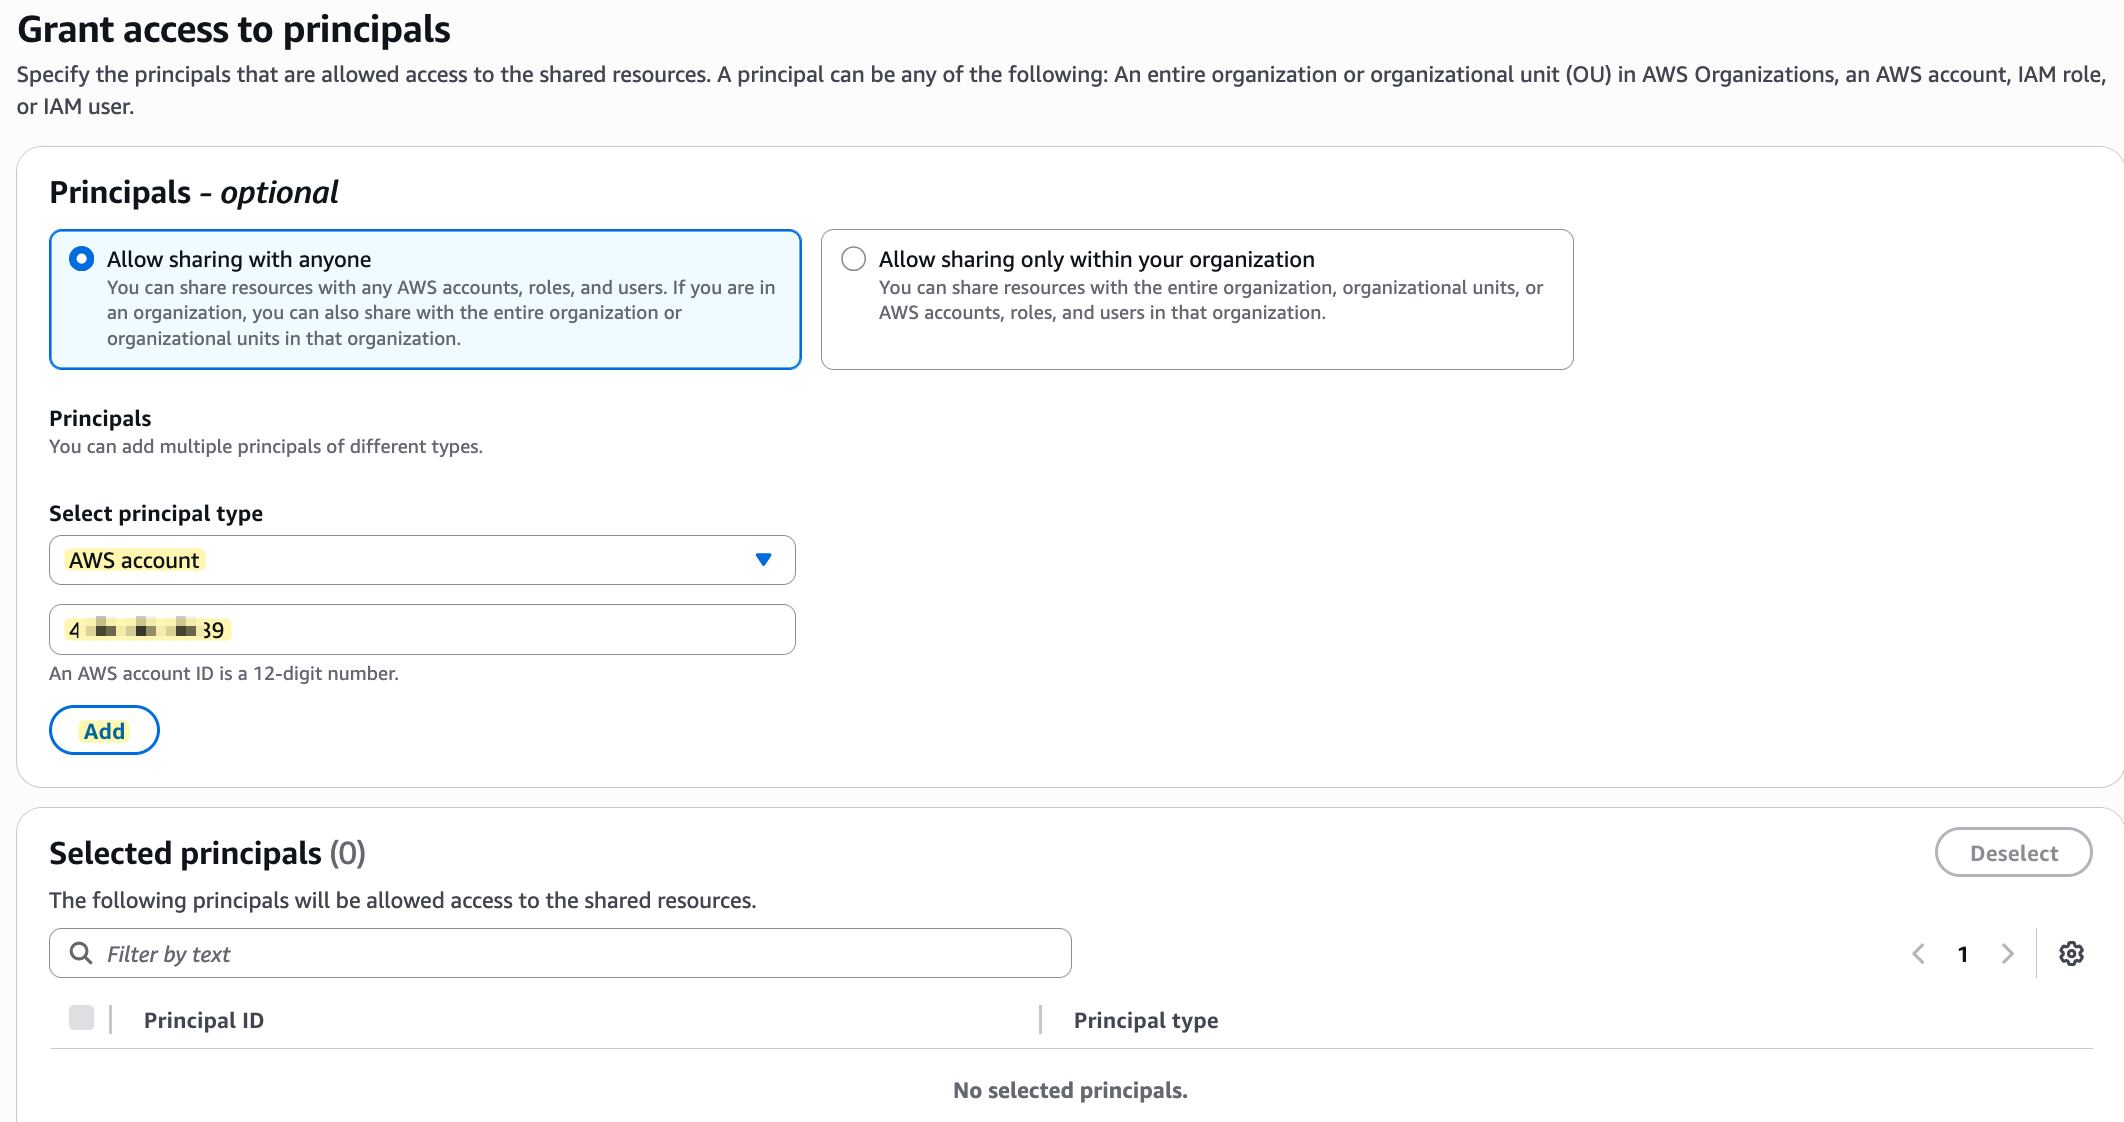
From there, you create a new 'resource share'. You will give the share a name, select the Transit Gateway as the resource to share, and then under 'Principals', you will enter the AWS Account ID of the account you want to share with. I'm leaving all the other values at their defaults for this example.
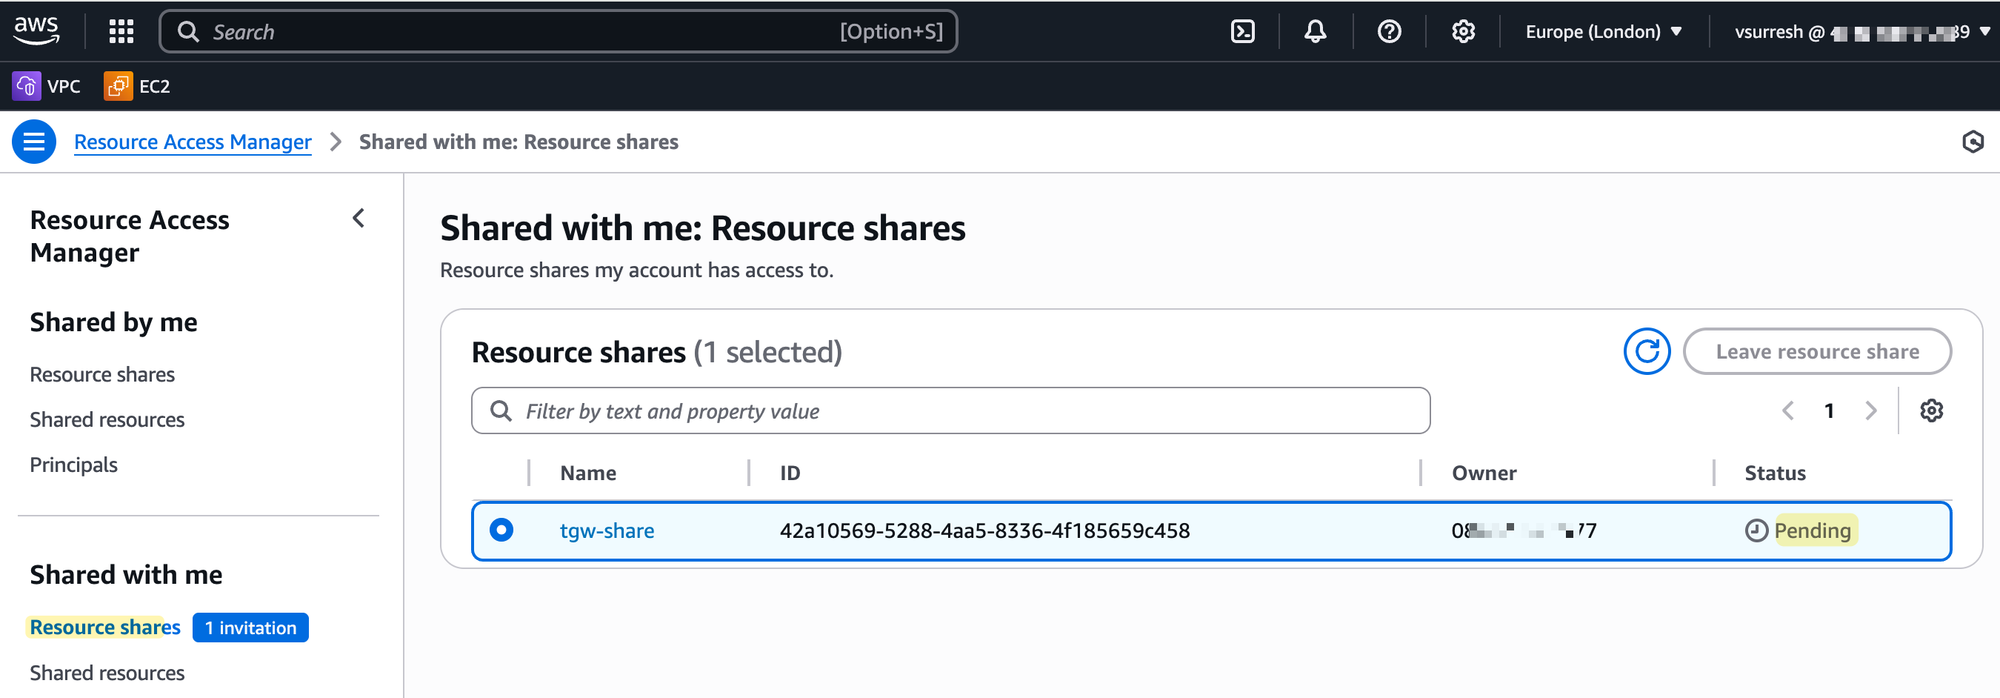
Once you create the share, an invitation is sent. The owner of the other account must then log in, go to the RAM console, find the pending invitation under 'Shared with me', and accept it.
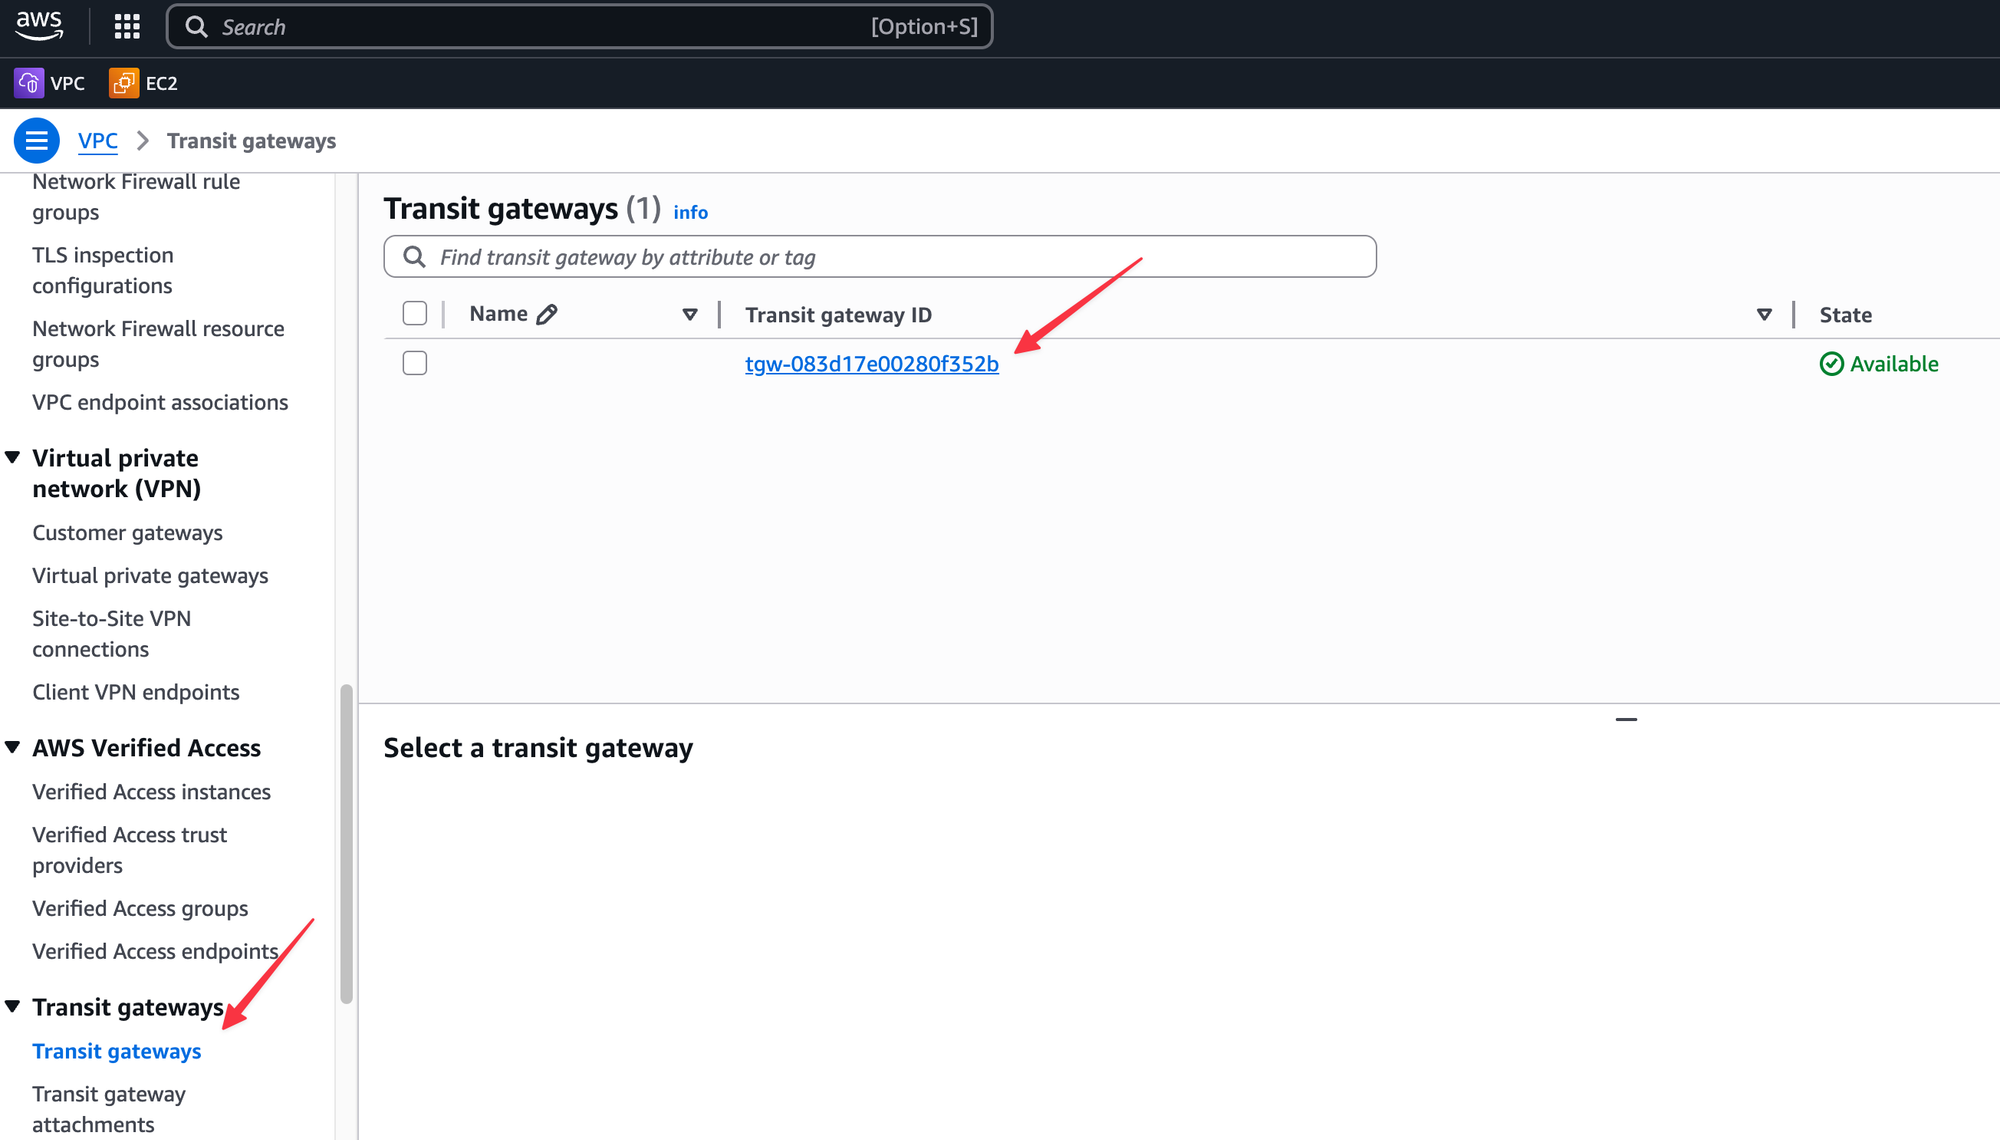
As soon as they accept, the Transit Gateway will show up under their own VPC console as if they had created it themselves.
From here, the process is more or less the same as before. The user in the other account can now go to their VPC console, see the shared Transit Gateway, and create an attachment for their own VPC.
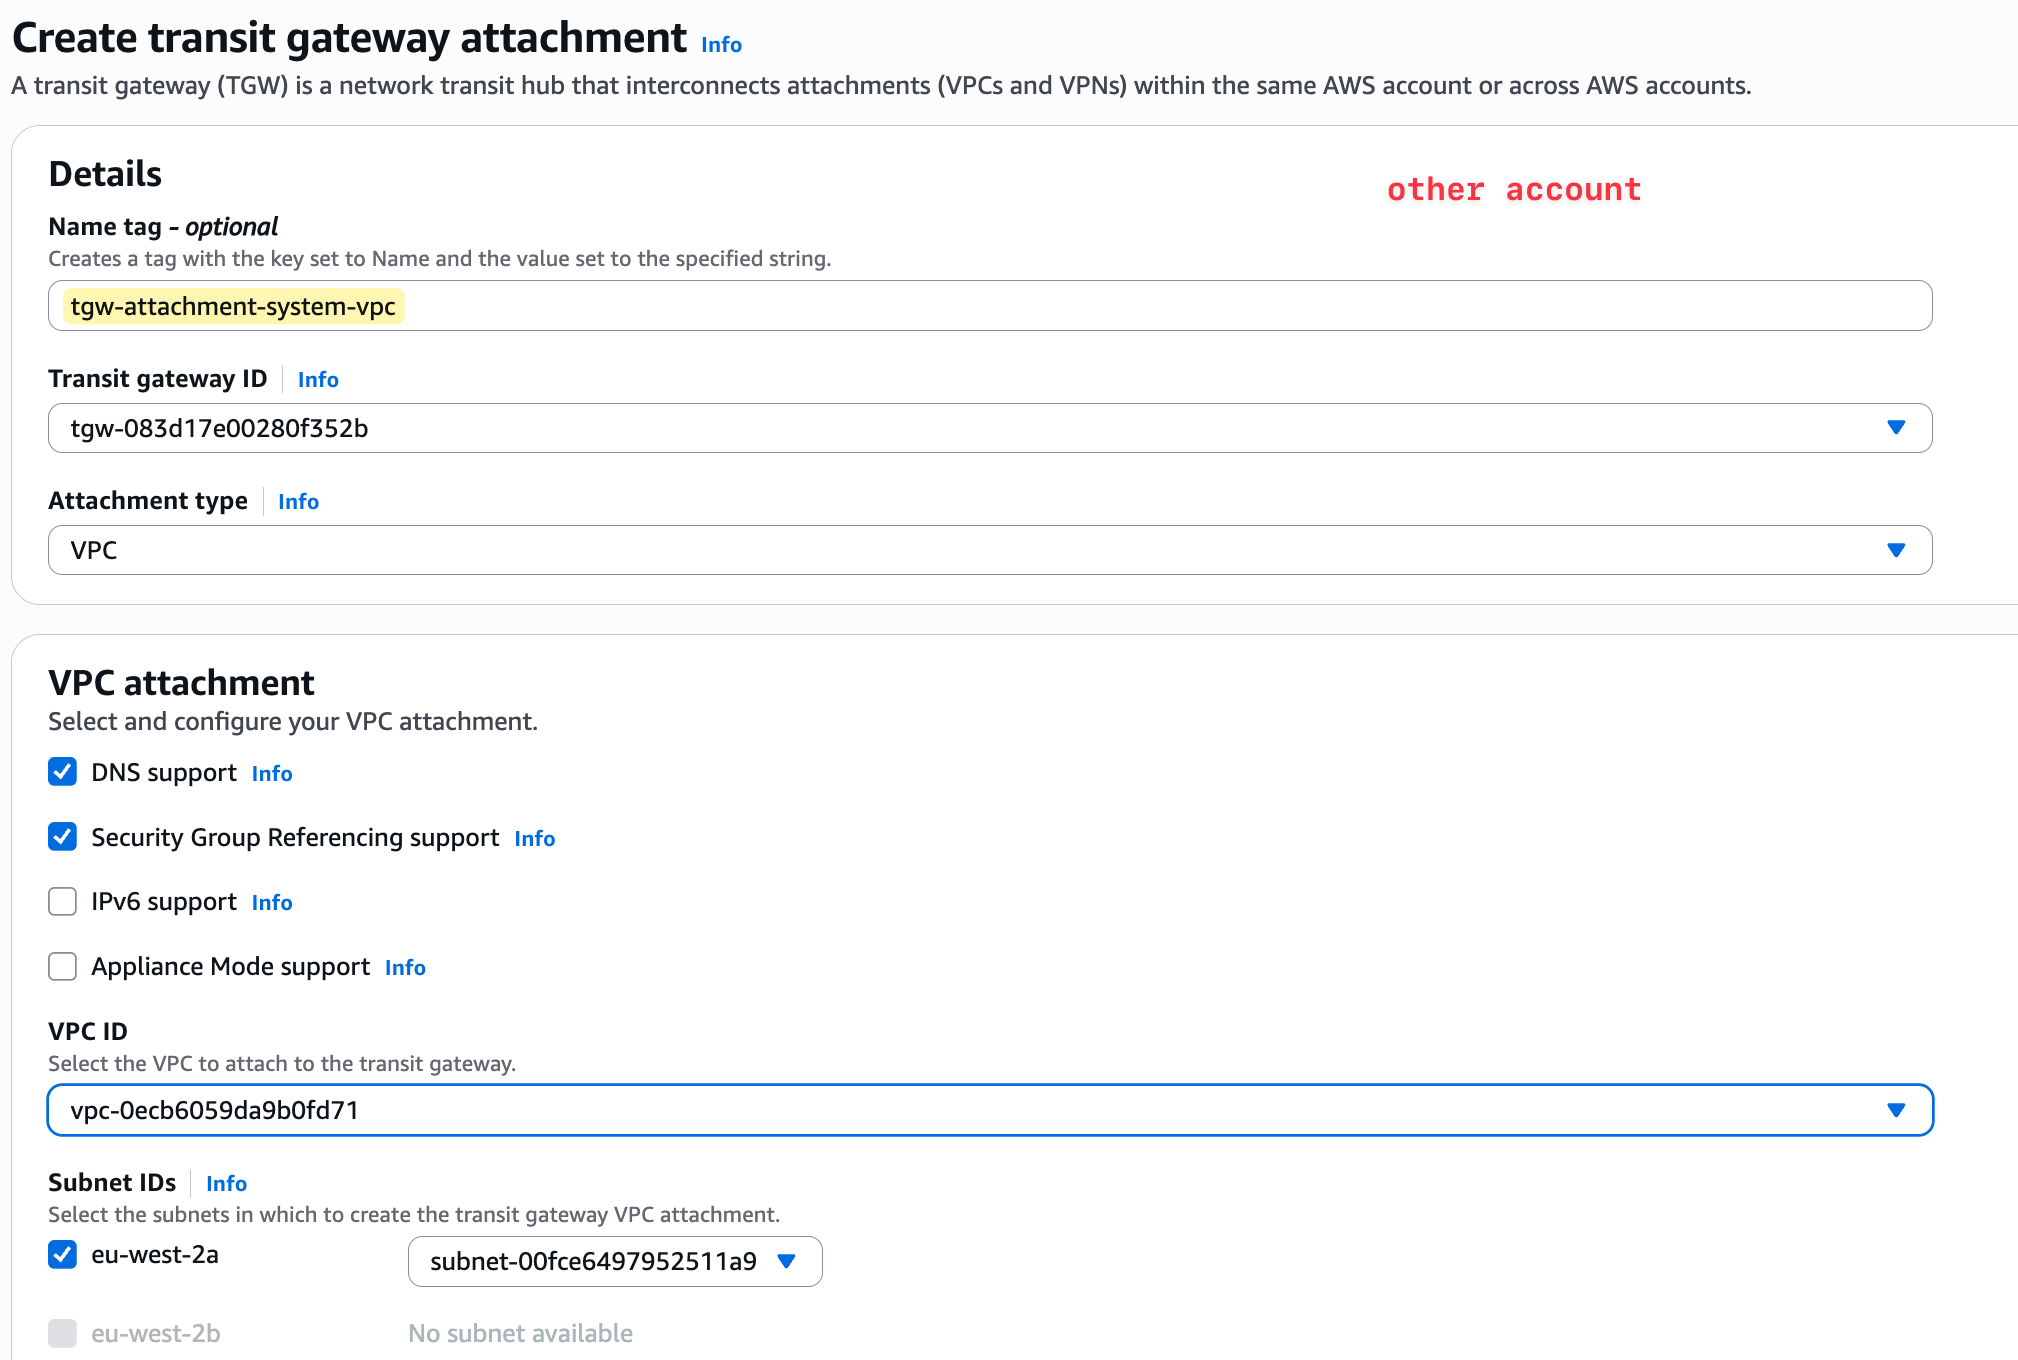

However, because the attachment request is coming from a different account, the owner of the Transit Gateway (our primary account) must explicitly accept this new attachment. In the TGW console of the primary account, the attachment will show up with a status of 'Pending Acceptance'. Once the TGW owner accepts the request, the attachment becomes active.

After that, the owner of the TGW is responsible for all the routing. They must go into their TGW route table, associate this new attachment from the other account, and set up the necessary propagations. The user in the other account does not have access to the TGW's route tables, nor can they see any of the other attachments.
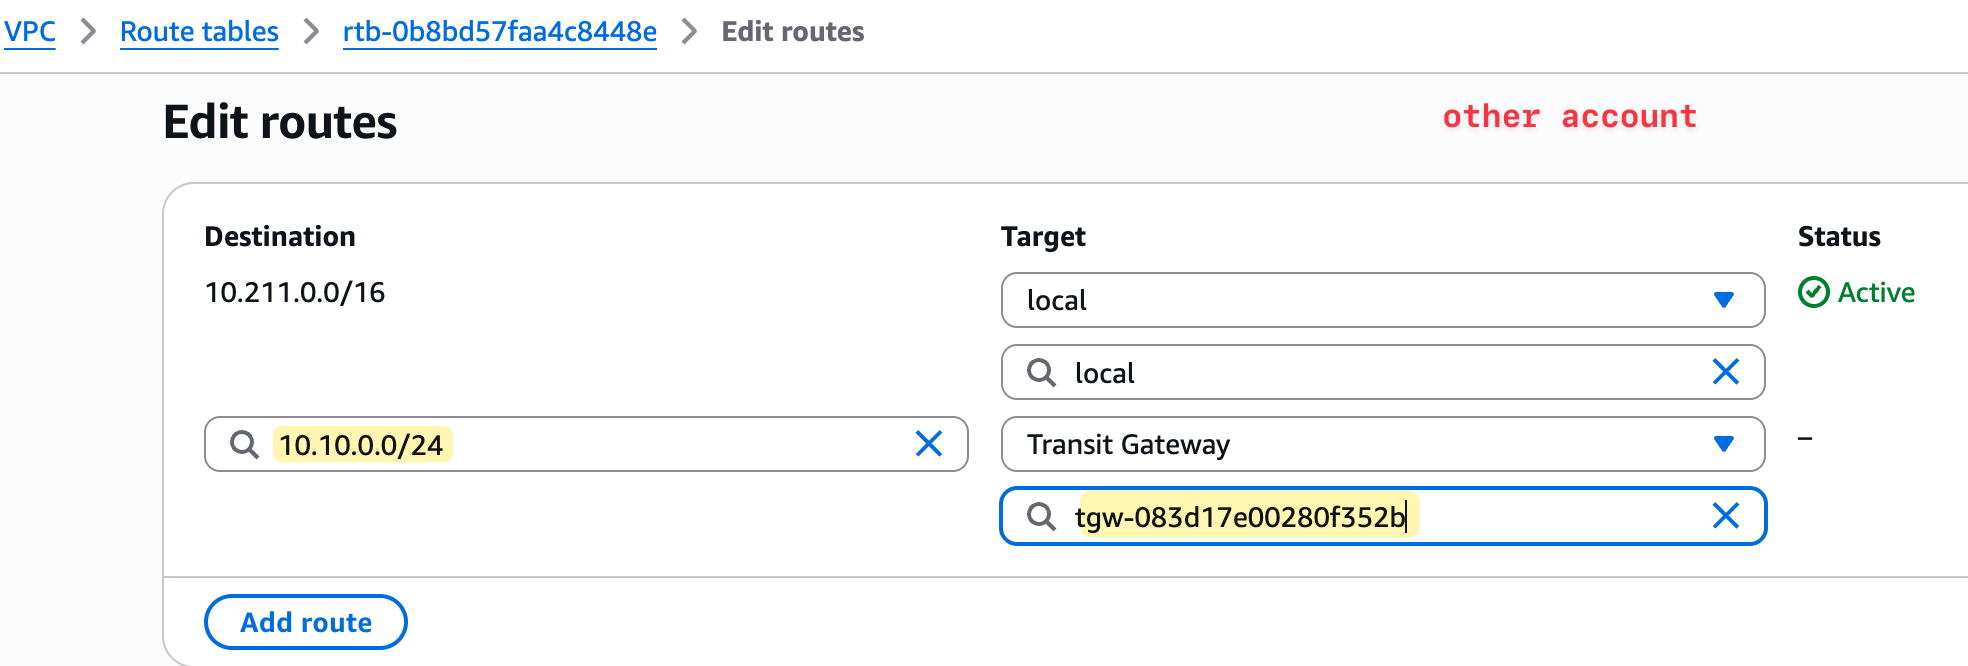
Their only remaining task is to update their own VPC's route table to point to the Transit Gateway for any traffic destined for the other networks.
Testing and Verification
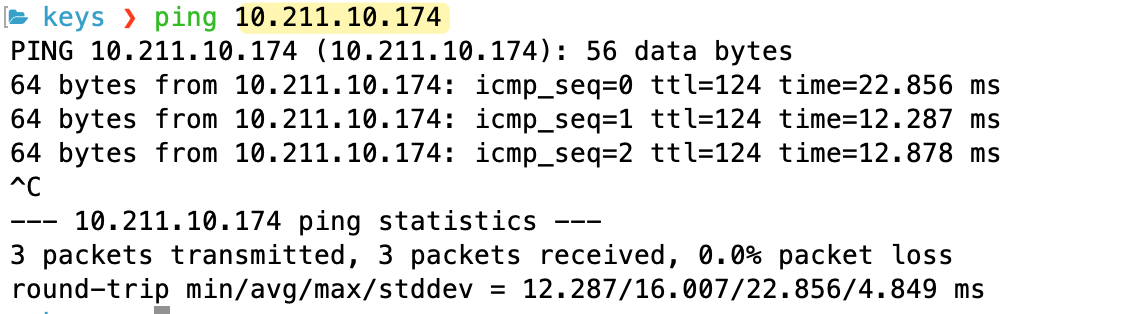
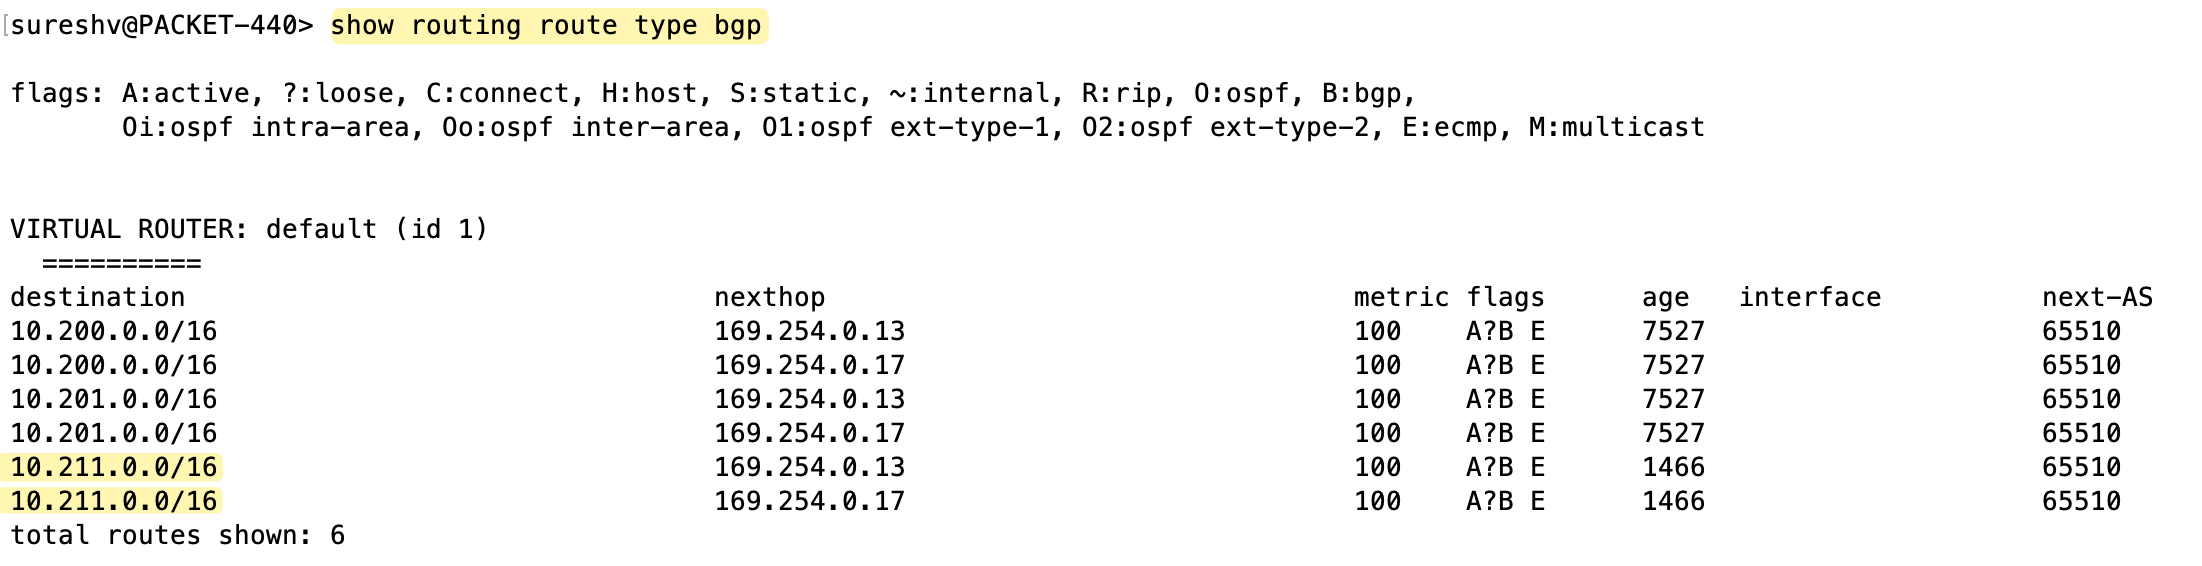
Now that the routing is complete on the AWS side, if I look at my on-premise firewall, I should see this new VPC CIDR (10.211.0.0/16) show up in the routing table, learnt via BGP from the Transit Gateway.
And as expected, if I try to ping any resources in that new VPC from my on-premise network, the connection will just work.