In today's blog post, we're diving into a practical guide on setting up WireGuard VPN on the MikroTik router. I'll be using the MikroTik hAP AX2 router for this example. Those of you who've followed my journey with this router might remember my review and initial setup experiences. If you haven't read those yet or need a quick refresher, feel free to check out my previous posts linked below.
Diagram and Overview
Let's break down the setup of the WireGuard VPN on the MikroTik router with a simple diagram and overview. Here’s a quick bullet-point list of the steps we're going to cover.

- Kick things off by creating a new WireGuard interface on the MikroTik router and assign an IP address to it.
- Next, we’ll need to pick and assign a port for the WireGuard to listen on.
- After that, we will add a peer, which involves entering the peer's public certificate.
- Switching over to the client side, which in our case is an iPhone, we'll copy the MikroTik's public certificate and add it to the client.
- Next, set the MikroTik’s public IP address and the port number we set earlier.
- Finally, assign an IP address to the client device (from the same subnet as the wireguard interface), and that's pretty much it.
MikroTik Configuration
Let's jump into configuring the MikroTik for our WireGuard VPN. Let's start by creating a WireGuard interface on your MikroTik router. I created one called 'wireguard_int'. For this setup, I've chosen the IP range 192.168.99.0/24. When you create this interface, the router will automatically generate a private and public key pair. It's important to copy the public key here because we'll need this to set up the client.
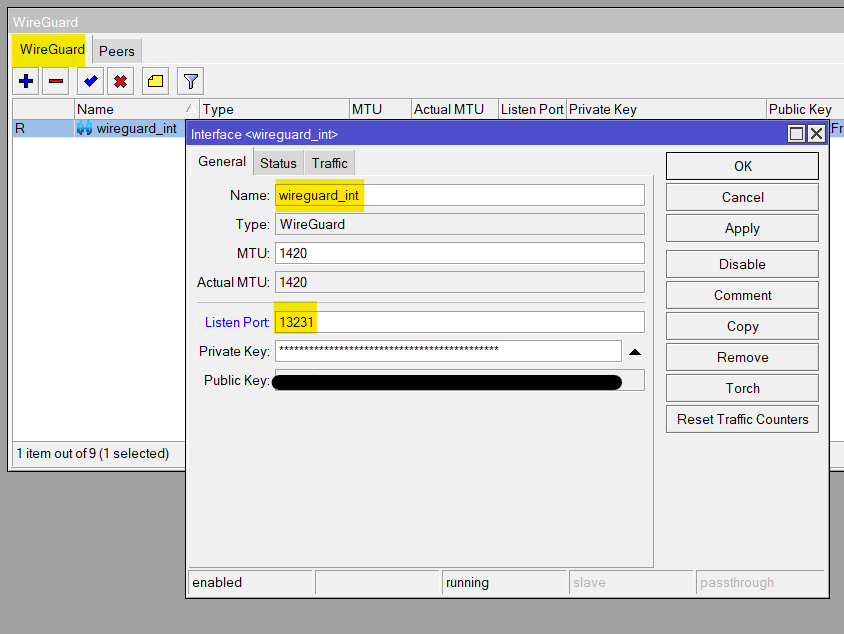
Next up, it’s time to add a new peer. Within the peer settings, pick the interface you've just created. Then, you will paste the public key from your client into this configuration — we'll get this from our iPhone shortly. I'm leaving the Port at its default value of 13231.
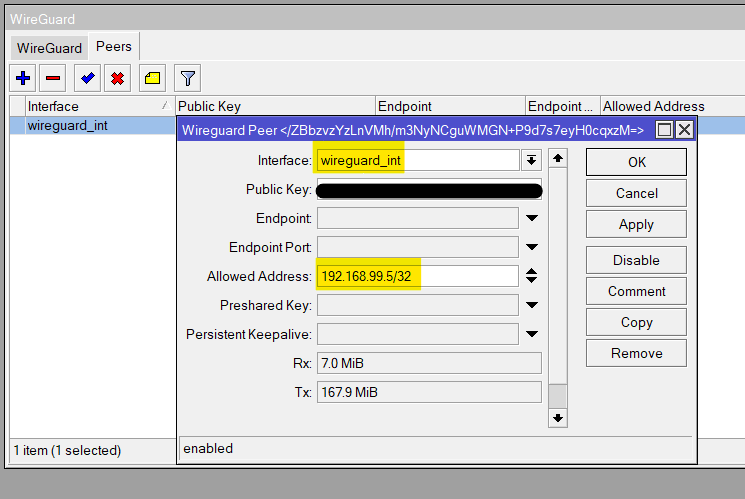
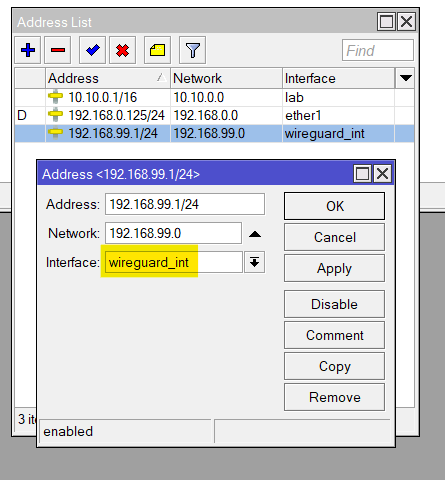
The 'Allowed Address' can be a bit confusing, but here's what it does. When we set up the client, we need to give it an IP address that’s in the same subnet as our WireGuard interface. Since our WireGuard interface is at 192.168.99.1/24, I'm assigning 192.168.99.5 to the client. By adding this IP under 'Allowed Address', we're basically saying that only this specific client (our iPhone in this case) is permitted to connect to this peer configuration.
Client Side Configuration (iPhone)
For the client (iPhone) setup, here’s what you need to do.
- Grab your iPhone and download the WireGuard app from the App Store. Open it up and tap on 'Add a new tunnel'. Then select 'Create from scratch'.
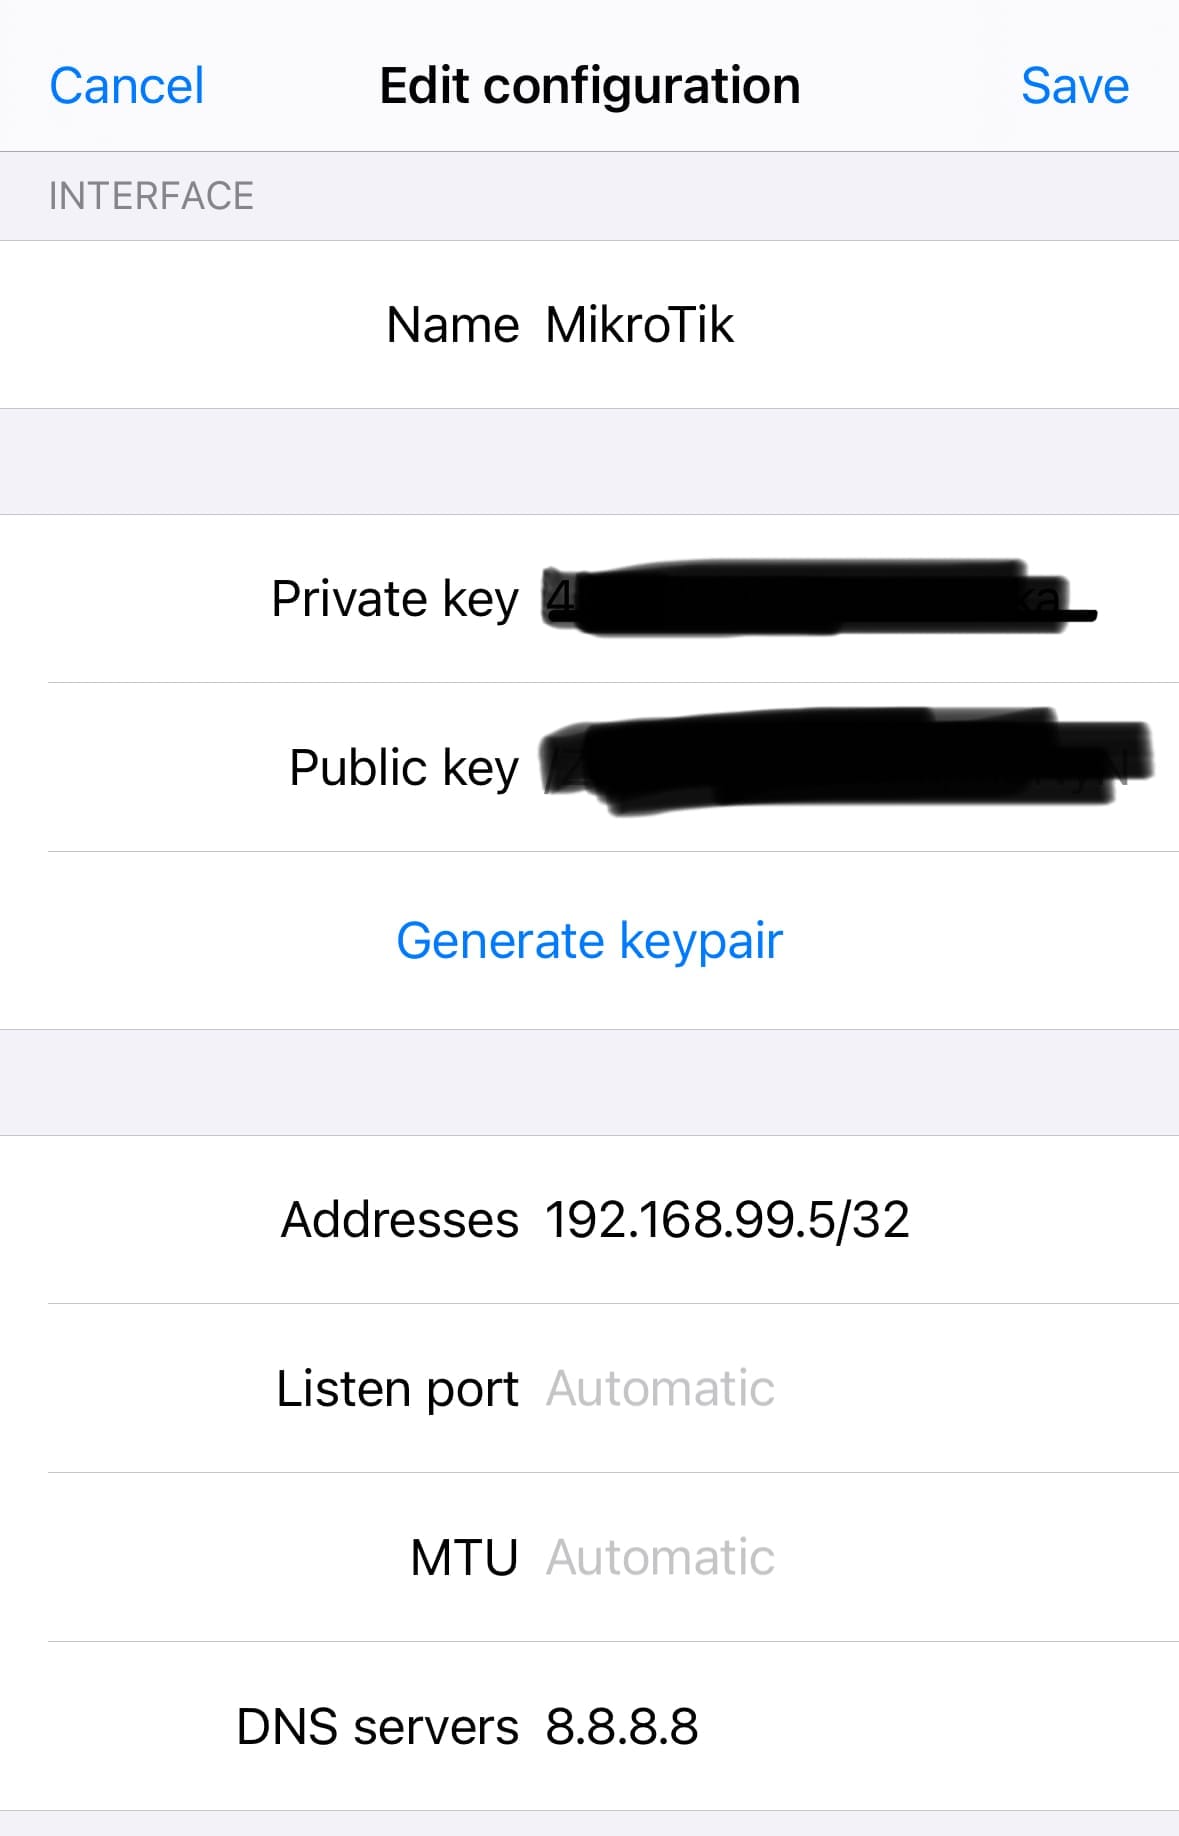
- In the Interface section of the app, hit 'Generate keypair'. This will create your keys. Make sure to copy the public key and paste it back into the WireGuard peer settings on your MikroTik router (we went through this in the previous step).
- For the 'Addresses' field in the app, enter 192.168.99.5/32 — this is the IP we set aside for this iPhone in the 'Allowed Address' on the MikroTik.
- For DNS servers, simply use 8.8.8.8 or choose any other DNS service you prefer.
- Leave all other settings as they are — defaults will do just fine for now.
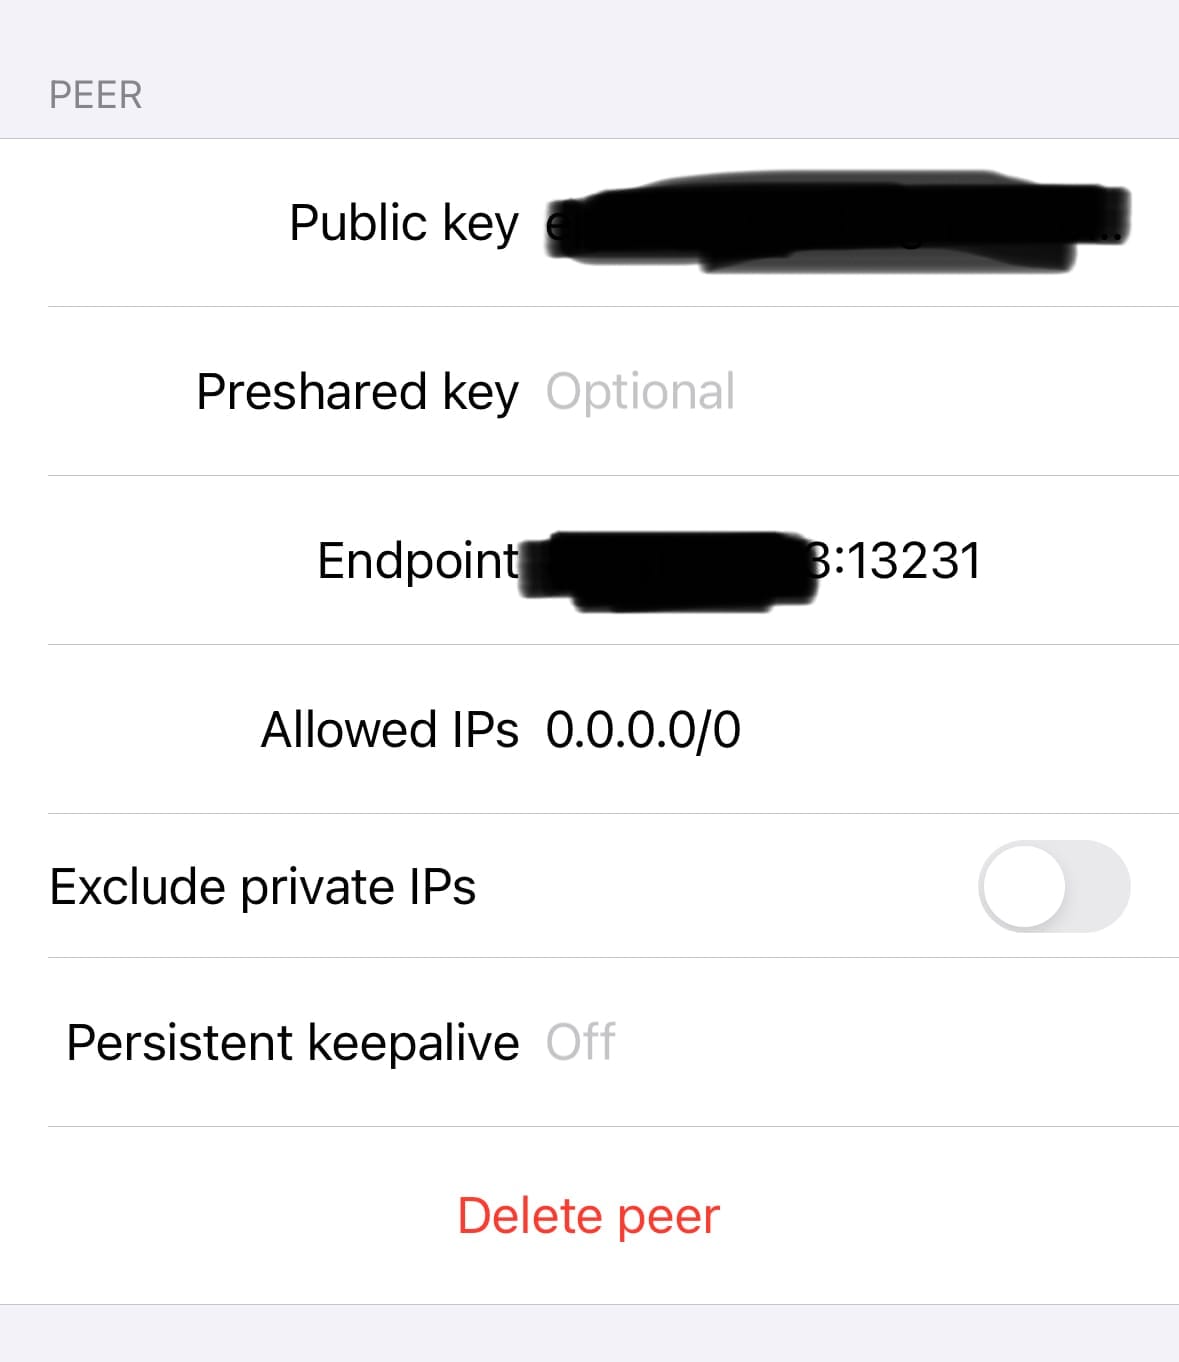
- Moving on to the Peer section, you'll need to copy the public key from your MikroTik router and add it here in the app.
- For the 'Endpoint' field, enter the public IP address of your MikroTik router followed by the port number you've chosen, like this -
x.x.x.x:13231. - In 'Allowed IPs', if you put
0.0.0.0/0, your phone will send all its internet traffic through the VPN. If you only want to tunnel traffic from your local network, then you’d specify your local subnet here.
And there you have it! If you've followed the steps correctly, you should now be able to connect your iPhone to the VPN and start accessing your internal applications securely. It's a straightforward way to keep your mobile connection secure, especially when you're on the go.
Give it a try and enjoy the peace of mind that comes with a secure, private connection back to your home network. If you hit any snags or have any questions, drop them in the comments below and I'll get back to you.