
Netmiko a popular Python library used in Network Automation, providing a simple and easy-to-use interface for interacting with Networking Devices.
In this blog post, we will take an in-depth look at Netmiko and explore how it can be used to simplify your Network Automation tasks. We will cover the basic concepts of Netmiko, including how it works and what it can do. We will also go through some examples of how Netmiko can be used to automate tasks in real-world scenarios.
Bit of a background
I've been using Ansible for the last few years and it was reasonably easy to learn and implement. Anyone can look at an Ansible Playbook and understand exactly what the playbook does. Python on the other hand can be overwhelming if you are not familiar with it.
As a Network Engineer, I started my Python journey with an amazing book called 'Automate the Boring Stuff with Python' which I highly recommend for absolute beginners. The book teaches everything you need to know as an absolute beginner.
This blog post assumes that you are somewhat familiar with Python such as import module, list, dictionary and flow control.
What is Netmiko?
Netmiko is a Python library developed by Kirk Byers that makes it easier to work and interact with network devices. Netmiko is based on Paramiko which is the Python implementation of the SSH protocol. You can learn more about Netmiko here on the Github page.
 ktbyers
Installing Netmiko
Netmiko is not part of the standard Python library so, you will have to install it using pip as shown below. The process is similar for other operating systems such as macOS or Linux.
C:\Users\vsurr\Documents\Projects\Python-Udemy>pip install netmiko
Collecting netmiko
  Using cached netmiko-4.0.0-py3-none-any.whl (207 kB)
Requirement already satisfied: setuptools>=38.4.0 in

*** TRUNCATED ***

  Using cached pycparser-2.21-py2.py3-none-any.whl (118 kB)
Installing collected packages: tenacity, six, future, textfsm, pycparser, cffi, pynacl, cryptography, bcrypt, paramiko, scp, ntc-templates, pyserial, netmiko
Successfully installed bcrypt-3.2.0 cffi-1.15.0 cryptography-36.0.2 future-0.18.2 netmiko-4.0.0 ntc-templates-3.0.0 paramiko-2.10.3 pycparser-2.21 pynacl-1.5.0 pyserial-3.5 scp-0.14.4 six-1.16.0 tenacity-8.0.1 textfsm-1.1.2
WARNING: You are using pip version 20.2.3; however, version 22.0.4 is available.
You should consider upgrading via the 'c:\users\vsurr\appdata\local\programs\python\python39\python.exe -m pip install --upgrade pip' command.
Connecting to a single device
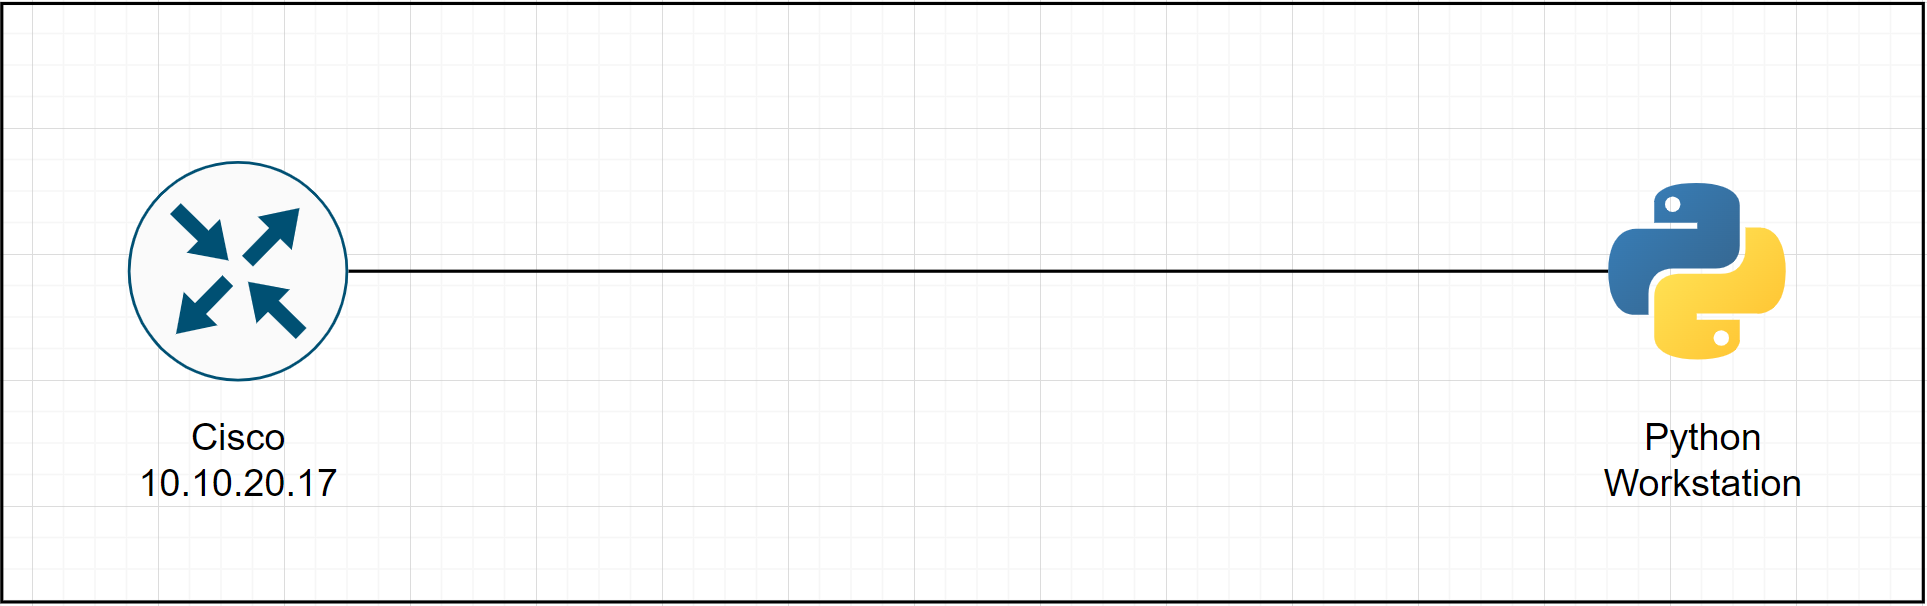
Now that we installed the Netmiko library, let's try and connect to a Cisco router using a simple Python script.
from netmiko import ConnectHandler

connection = ConnectHandler(host='10.10.20.17', port='22', username='cisco', password='cisco123', device_type='cisco_ios')

output = connection.send_command('show ip interface brief')
print(output)

print('Closing Connection')
connection.disconnect()- The first step is to import
ConnectHandlerclass from thenetmikolibrary. - The next step is to create the
connectionobject by calling theConnectHandlerclass constructor. Please note that the nameconnectionis just an arbitrary name and you can use whatever you prefer. - I've defined the device parameters such as IP, credentials and device-type directly into the
connectionobject (more on this later) - Use
send_command()method to send commands to the router. - Ensure to disconnect the SSH session by using the
disconnect()method
Let's run the script and see what happens? We should be able to see the show ip interface brief output on the terminal.
C:\Users\vsurr\Documents\Projects\Python-Udemy>python netmiko_1.py
Interface                  IP-Address      OK? Method Status                Protocol
GigabitEthernet0/0         10.10.20.17     YES manual up                    up
GigabitEthernet0/1         unassigned      YES unset  administratively down down
GigabitEthernet0/2         unassigned      YES unset  administratively down down
GigabitEthernet0/3         unassigned      YES unset  administratively down down
Closing Connection
Behind the scenes, Netmiko uses SSH to log in to the router and run the command specified and show us the output on the terminal.
Connect using a Python Dictionary
Ideally, we want to keep all the information about a device in a variable like a Python dictionary instead of defining directly in the connection object. One of the benefits of that is we can then use the variable elsewhere in our script. Like a list, a dictionary is a mutable collection of key-value pairs. Indexes for dictionaries are called keys, and a value is assigned to them. Dictionaries are written with curly brackets.
For example, in a dictionary"ip_address": "10.10.1.10", ip_address is the key and 10.10.1.10 is the value.
In this second example, we will define the device parameters as a Python dictionary called cisco-01 and pass it to ConnectHandler (In the previous example, we defined the parameters directly into ConnectHandler)
We can unpack the dictionary using **kwargs arguments unpacking. cisco_01 is called keyword argument of type dictionary and ** will unpack the dictionary.
from netmiko import ConnectHandler

cisco_01 = {
    "device_type": "cisco_ios",
    "host": "10.10.20.17",
    "username": "cisco",
    "password": "cisco123"
}

connection = ConnectHandler(**cisco_01) # unpacking the dictionary

output = connection.send_command('show interface desc')
print(output)

print('Closing Connection')
connection.disconnect()
Interface Status Protocol Description
Gi0/0 up up MANAGEMENT
Gi0/1 admin down down
Gi0/2 admin down down
Gi0/3 admin down down
Closing ConnectionAs you can see above, the result is the same but it looks more organised with a dictionary.
Enable / Privilege EXEC mode
Instead of show interface descriptioncommand, if we execute, show run command, the script will fail. The reason is that by default Netmiko logs in to the user EXEC shell which doesn't have permissions to run the show run command. We can verify which prompt is available by using the find_prompt() method (shown below)
We can instruct Netmiko to login into Privilege EXEC mode by using the enable() method. Of course, we also need to provide the enable password using the secret parameter as shown below.
from netmiko import ConnectHandler

cisco_01 = {
    "device_type": "cisco_ios",
    "host": "10.10.20.17",
    "username": "cisco",
    "password": "cisco123",
    "secret": "cisco123" # Enable password
}

connection = ConnectHandler(**cisco_01)
connection.enable() # Enable method

which_prompt = connection.find_prompt() # Find prompt method
print(which_prompt) # Print the prompt

output = connection.send_command('show run')
print(output)

print('Closing Connection')
connection.disconnect() Suresh Vina
Global Configuration mode
So far, we've seen how to run show commands on the Cisco router. If we want to run configuration commands to the router then we will need to use the config_mode method.
from netmiko import ConnectHandler

cisco_01 = {
    "device_type": "cisco_ios",
    "host": "10.10.20.17",
    "username": "cisco",
    "password": "cisco123",
    "secret": "cisco123" # Enable password
}

connection = ConnectHandler(**cisco_01)

connection.enable() # Enable method
connection.config_mode() # Global config mode

connection.send_command('access-list 1 permit any')

print('Closing Connection')
connection.disconnect()
The above script will create the defined ACL (access-list 1 permit any) on the router. Please note that if you want to run any show commands after entering the Global config mode, you must use exit_config_mode() method to return to the privilege EXEC mode as shown below.
from netmiko import ConnectHandler

cisco_01 = {
    "device_type": "cisco_ios",
    "host": "10.10.20.17",
    "username": "cisco",
    "password": "cisco123",
    "secret": "cisco123" # Enable password
}

connection = ConnectHandler(**cisco_01)

connection.enable() # Enable method
connection.config_mode() # Global config mode

connection.send_command('access-list 1 permit any')

connection.exit_config_mode() # Exit global config mode

show_output = connection.send_command('show interface desc')
print(show_output)

print('Closing Connection')
connection.disconnect()if statements with enable / global config mode
If you use TACACS+ for device administration, there is a good chance you will log in directly into the privilege EXEC mode. In a situation like this, we don't necessarily need to use the enable() method which is already available.
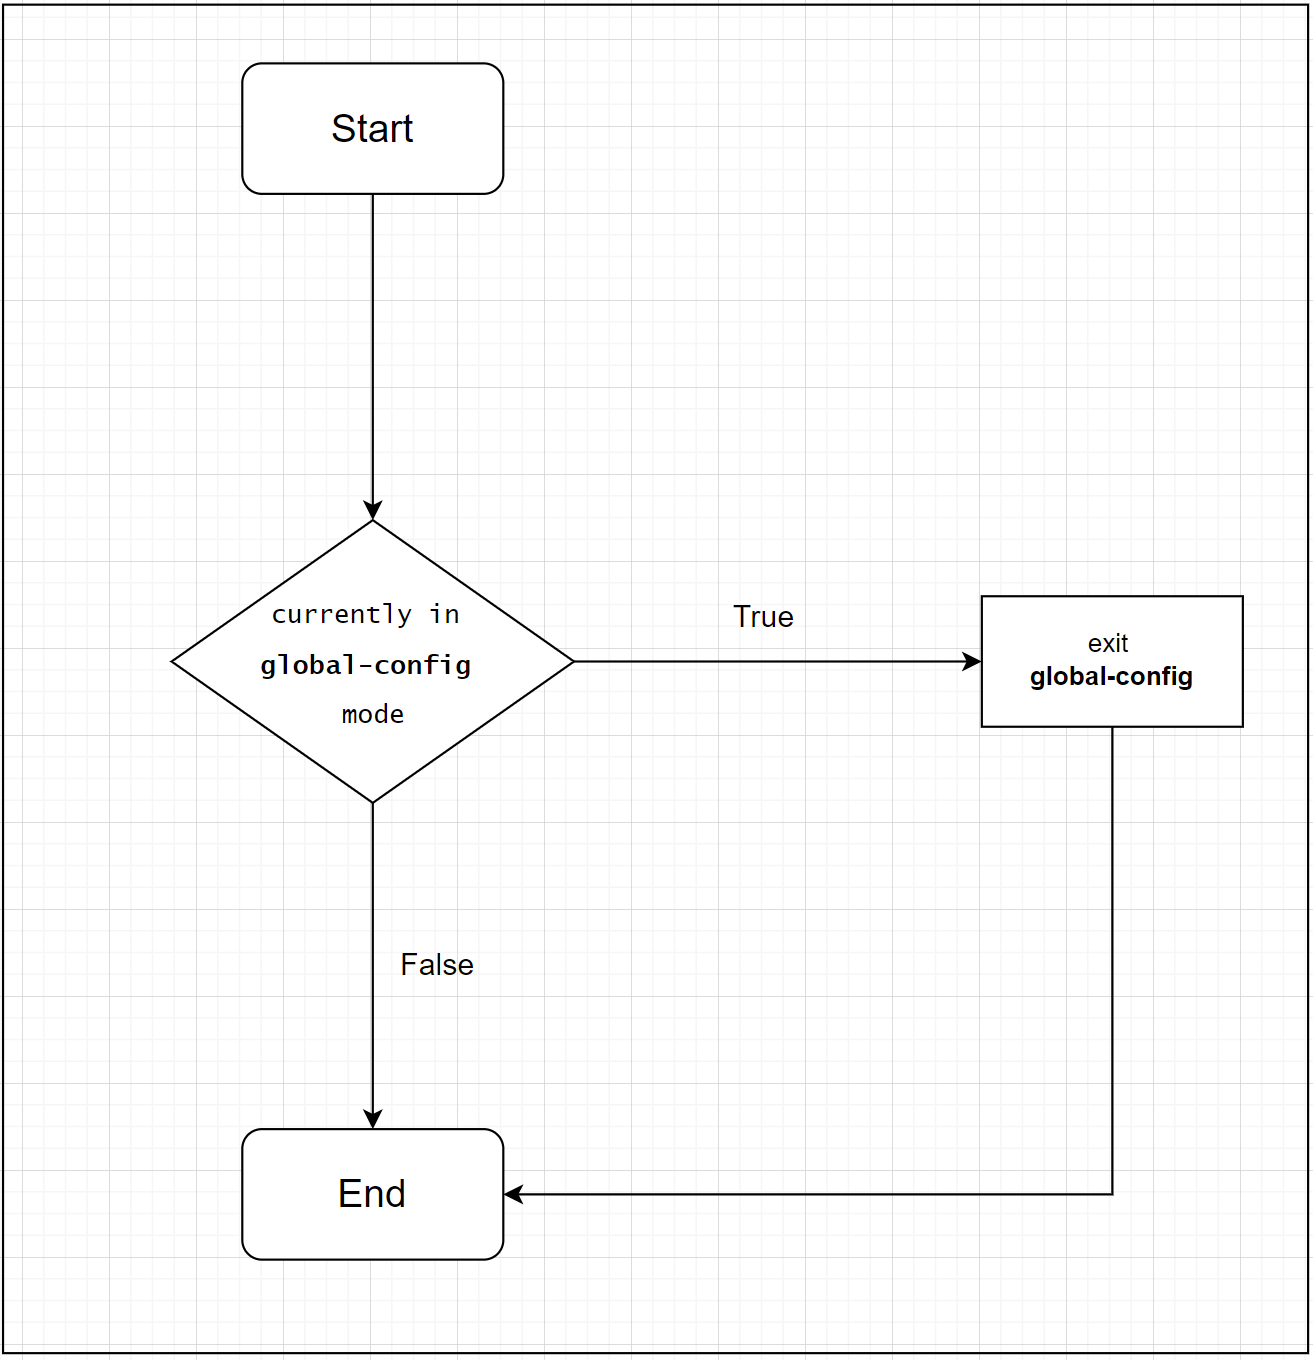
In a similar way, check_config_mode() returns either True or False Boolean value that can also be used with if statements. In the example below, I'm using two if statements to determine the current prompt and make decisions based on that.
from netmiko import ConnectHandler

cisco_01 = {
    "device_type": "cisco_ios",
    "host": "10.10.20.17",
    "username": "cisco",
    "password": "cisco123",
    "secret": "cisco123" # Enable password
}

connection = ConnectHandler(**cisco_01)
which_prompt = connection.find_prompt()
print(which_prompt)

if '>' in which_prompt:
    connection.enable() # Go to Priv EXEC mode only 'if' '>' is present in the output

connection.config_mode() # Global config mode

connection.send_command('access-list 1 permit any')

if connection.check_config_mode:
    connection.exit_config_mode() # Exit global config mode 'if' the statement reurns 'True' value

show_output = connection.send_command('show interface desc')
print(show_output)

print('Closing Connection')
connection.disconnect()
If the current prompt is user EXEC mode then the router will display '>' next to the hostname (cisco-01>) so, the first if statement evaluates to True which in turn will run the if clause - connection.enable()

The second if statement is used to exit the global configuration mode only if the check_config_mode() returns a True.
Sending multiple show commands
In this final example, we will learn how to send multiple 'show' commands using Netmiko. The process is very straightforward, we can use for loop to achieve this.
for loop in Python is used to iterate over a sequence such as a Python list. Loop continues until it reaches the last item on the list.
I created a Python List called show_commands and added three commands to it. for loop will then iterate over each item in the list as shown below.
from netmiko import ConnectHandler

cisco_01 = {
    "device_type": "cisco_ios",
    "host": "10.10.20.17",
    "username": "cisco",
    "password": "cisco123",
    "secret": "cisco123" # Enable password
}

connection = ConnectHandler(**cisco_01)
connection.enable() # Go to Priv EXEC mode

show_commands = ['show ip route', 'show interface desc', 'show clock'] # List of commands to send

for command in show_commands: # for loop
    print(f'\n *** Sending { command} *** \n')
    output = connection.send_command(command)
    print(output)

connection.disconnect()
Python/Python39/python.exe c:/Users/vsurr/Documents/Projects/python-learning/python-udemy/netmiko_muli_commands.py
*** Sending show ip route ***
Codes: L - local, C - connected, S - static, R - RIP, M - mobile, B - BGP
D - EIGRP, EX - EIGRP external, O - OSPF, IA - OSPF inter area
N1 - OSPF NSSA external type 1, N2 - OSPF NSSA external type 2
E1 - OSPF external type 1, E2 - OSPF external type 2
i - IS-IS, su - IS-IS summary, L1 - IS-IS level-1, L2 - IS-IS level-2
ia - IS-IS inter area, * - candidate default, U - per-user static route
o - ODR, P - periodic downloaded static route, H - NHRP, l - LISP
a - application route
+ - replicated route, % - next hop override
Gateway of last resort is not set
10.0.0.0/8 is variably subnetted, 2 subnets, 2 masks
C 10.10.0.0/16 is directly connected, GigabitEthernet0/0
L 10.10.20.17/32 is directly connected, GigabitEthernet0/0
*** Sending show interface desc ***
Interface Status Protocol Description
Gi0/0 up up MANAGEMENT
Gi0/1 admin down down
Gi0/2 admin down down
Gi0/3 admin down down
*** Sending show clock ***
*09:48:45.139 UTC Wed Apr 13 2022Securing passwords with getpass
Passwords or secrets should never be saved as plain text files. Every automation tools provide a way to encrypt or hide the passwords, for example, we can use Ansible Vault with Ansible to encrypt sensitive information.
getpass library is a go-to option for Python, getpass prompts the user for a value, password in our case, without echoing what the user types to the terminal. getpass then reads input from the user and saves it as a string. In this example, the input is saved into a variable called passwd. The variable is then used wherever a password is required.
from netmiko import ConnectHandler
import getpass

passwd = getpass.getpass('Please enter the password: ') # Reads the output from the user and save it as a string

cisco_01 = {
    "device_type": "cisco_ios",
    "host": "10.10.20.17",
    "username": "cisco",
    "password": passwd, # Log in password from getpass
    "secret": passwd # Enable password from getpass
}

connection = ConnectHandler(**cisco_01)
connection.enable() # Go to Priv EXEC mode

output = connection.send_command('show interface desc')
print(output)

connection.disconnect()
Python/Python39/python.exe c:/Users/vsurr/Documents/Projects/python-learning/python-udemy/netmiko_muli_commands.py
Please enter the password:
Interface Status Protocol Description
Gi0/0 up up MANAGEMENT
Gi0/1 admin down down
Gi0/2 admin down down
Gi0/3 admin down downWoo, we've just learnt how to use Netmiko for Network Automation and how it is very flexible to work with. Please let me know in the comments if you have any questions or feedback.