A Dev Container is essentially a development environment that's containerized, usually using Docker. It helps to ensure consistency across different development setups, making it easier for multiple developers to work on the same project without running into "it works on my machine" issues. This container includes all the necessary tools, extensions, and settings for a project.
In this blog post, let's dive into what DevContainers are and how you can use them with your Python development. If you want to see the video version of this blog, please check out the video below.
What Problem Does it Solve?
The primary issue Dev Containers address is the inconsistency across development environments in team projects. Imagine this, one developer writes Python code that runs perfectly on their machine, but when another team member tries it, they get errors. This is often due to differences in operating systems, installed libraries, or software versions.
Dev Containers fix this by creating a standardized, containerized environment. This uniformity ensures that the Python code works consistently for everyone, regardless of their individual computer setup. It also simplifies the onboarding process for new team members, as they can jump straight into coding without the hassle of configuring their development environment to match the team's specifications.
Recently, I faced a challenge while working on Network Automation. I developed a simple script for connecting to several Cisco devices using Netmiko. It then used ntc_templates (with TextFSM) to parse the output and then perform some actions based on the output. On my laptop, it worked like a charm - a real 'yaay' moment. But when I shared the script with a colleague, it failed immediately. We quickly realized the root of the problem, we had different Python versions and libraries.
This experience led me to create a DevContainer for our team. With this approach, everyone works in an identical development environment, ensuring scripts run consistently across different machines.
What About Python venv?
A virtual environment in Python (venv) is a great tool for managing package dependencies for individual projects. However, it's primarily focused on isolating Python packages and their versions. Docker, on the other hand, goes a step further. It not only isolates dependencies but also the entire runtime environment. This means with Docker, you get a consistent and more comprehensive environment that includes the specific versions of system libraries, system tools, and other settings. This is especially useful when you need to ensure that your application runs the same way in different environments, such as development, testing, and production.
Dev Containers with Visual Studio Code
The Visual Studio Code Dev Containers extension lets you use a container as a full-featured development environment. It allows you to open any folder inside a container and take advantage of Visual Studio Code's full feature set. A devcontainer.json file in your project tells VS Code how to access (or create) a development container with a well-defined tool and runtime stack. This container can be used to run an application or to separate tools, libraries, or runtimes needed for working with a codebase.
For our example, the goal is to create a container that comes with Python already installed. Additionally, we want it to automatically install the required pip packages when the container starts up. I'm going to use a simple Python script to demonstrate this and hopefully, you should be able to follow along.
Dev Container Extension
In Visual Studio Code, setting up DevContainers starts with the installation of the Dev Container extension. It's a simple process. First, open your VS Code editor and go to the Extensions view by clicking on the square icon on the left sidebar. In the search bar, type 'Dev Containers'. This extension by Microsoft should pop up in the search results. Click 'Install' to add it to your VS Code.

Netmiko Example
For this example, I've created a directory with two files in it: cisco.py and requirements.txt The Python script works well locally on my computer but our goal is to containerize this. Before we proceed, let's take a look at the two files.
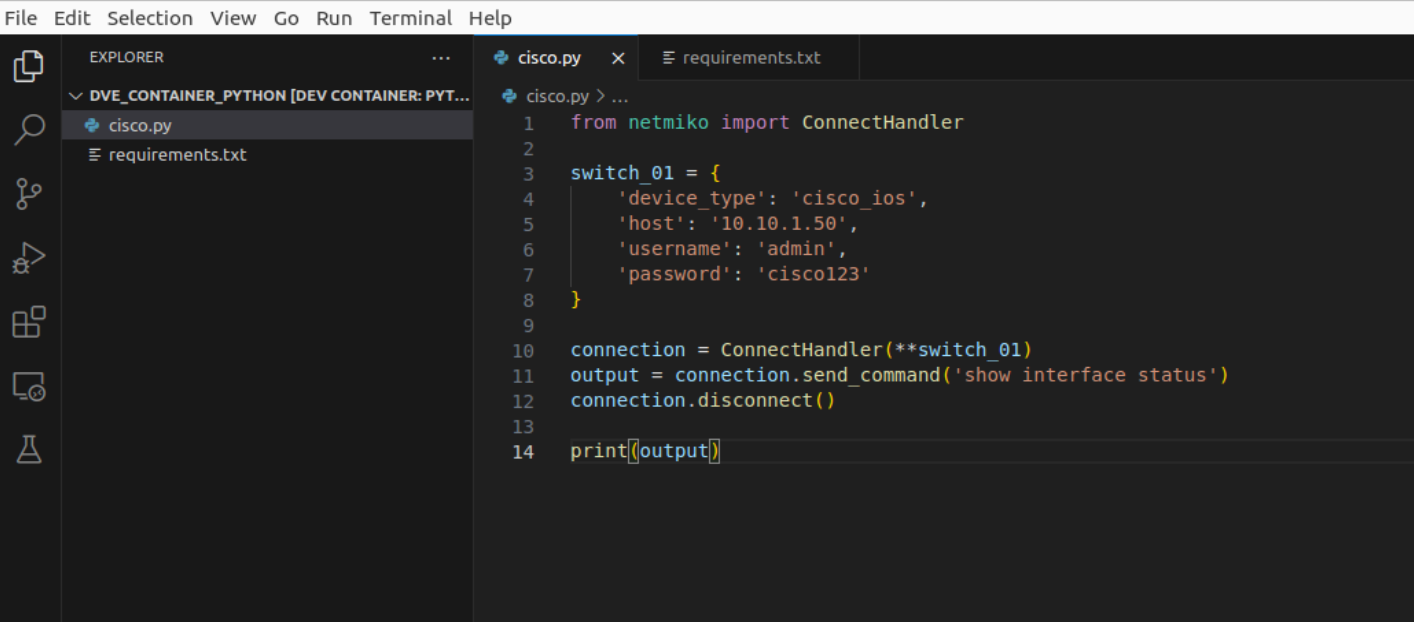
from netmiko import ConnectHandler
switch_01 = {
'device_type': 'cisco_ios',
'host': '10.10.1.50',
'username': 'admin',
'password': 'cisco123'
}
connection = ConnectHandler(**switch_01)
output = connection.send_command('show interface status')
connection.disconnect()
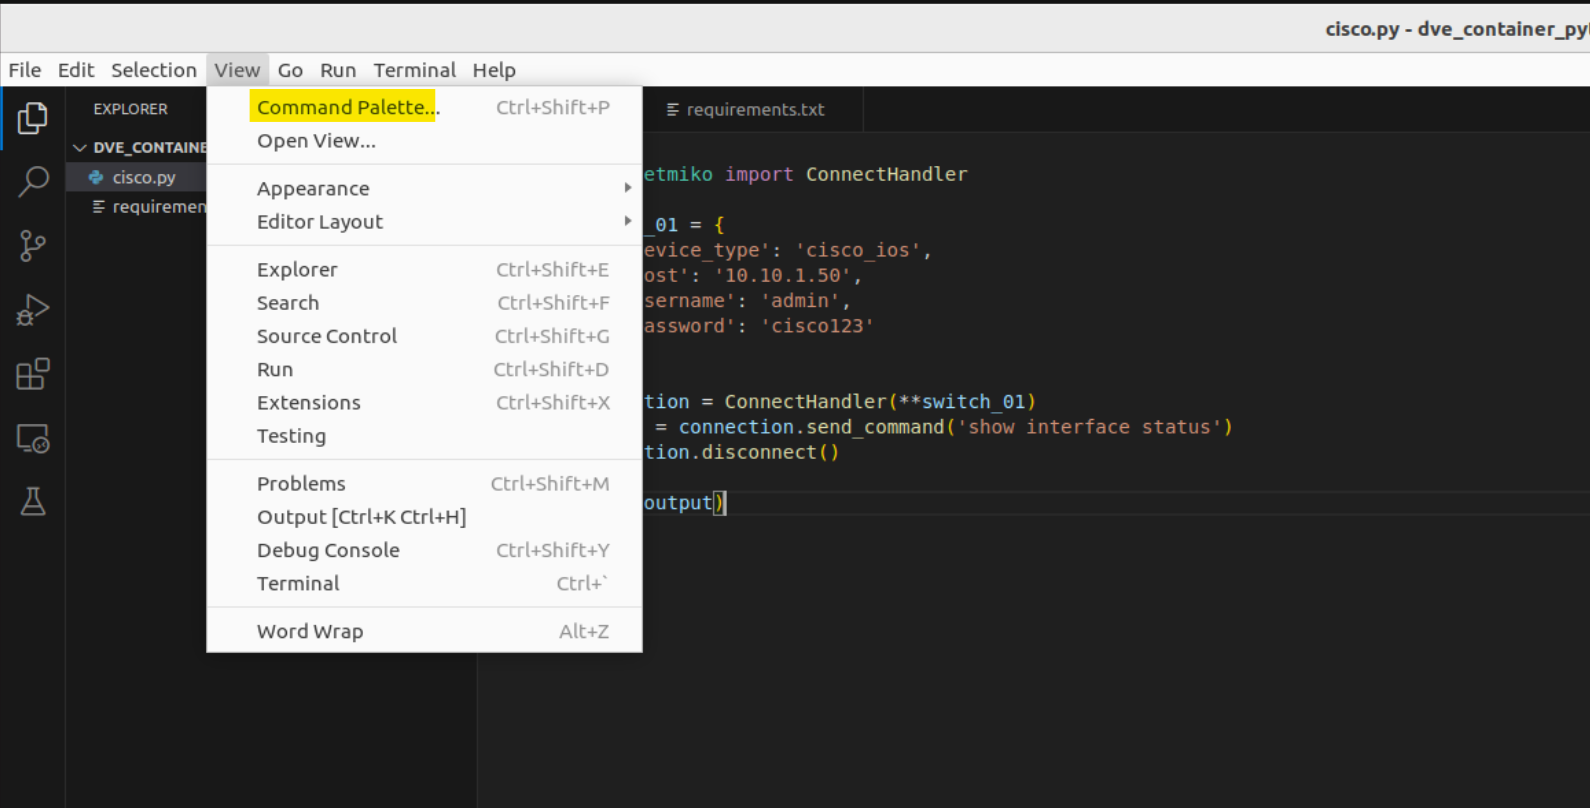
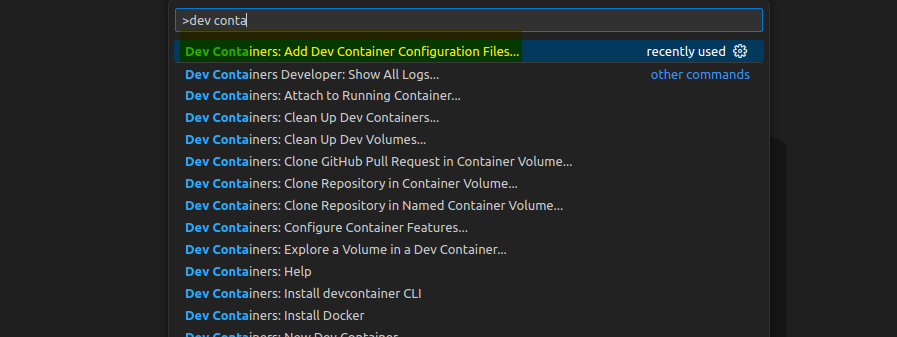
print(output)netmiko==4.3.0The next step is to add the dev container configuration files to this directory. Once the extension is installed, you can begin creating your Python dev container. You do this by opening your project folder in VS Code, then View > Command Palette. Type in 'Dev Containers: Add Dev Container Configuration Files...' and select it.
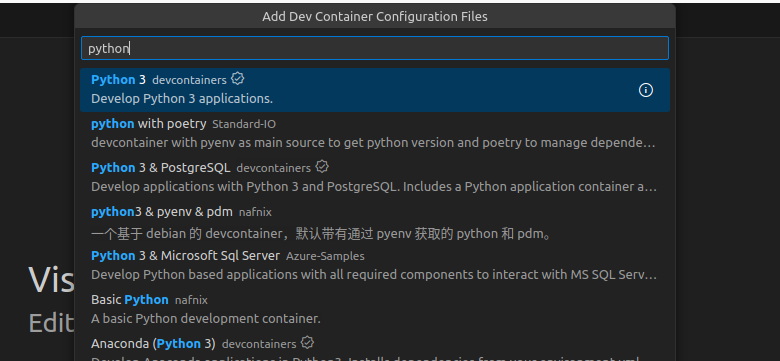
A list of predefined container configurations will appear. Choose 'Python 3' to get a container with Python pre-installed. This action will create a .devcontainer folder in your project with a devcontainer.json file. The file defines the container environment, including the Python version and any additional tools or extensions you need. The devcontainer.json file allows you to specify further configurations like port forwarding and setting environment variables.
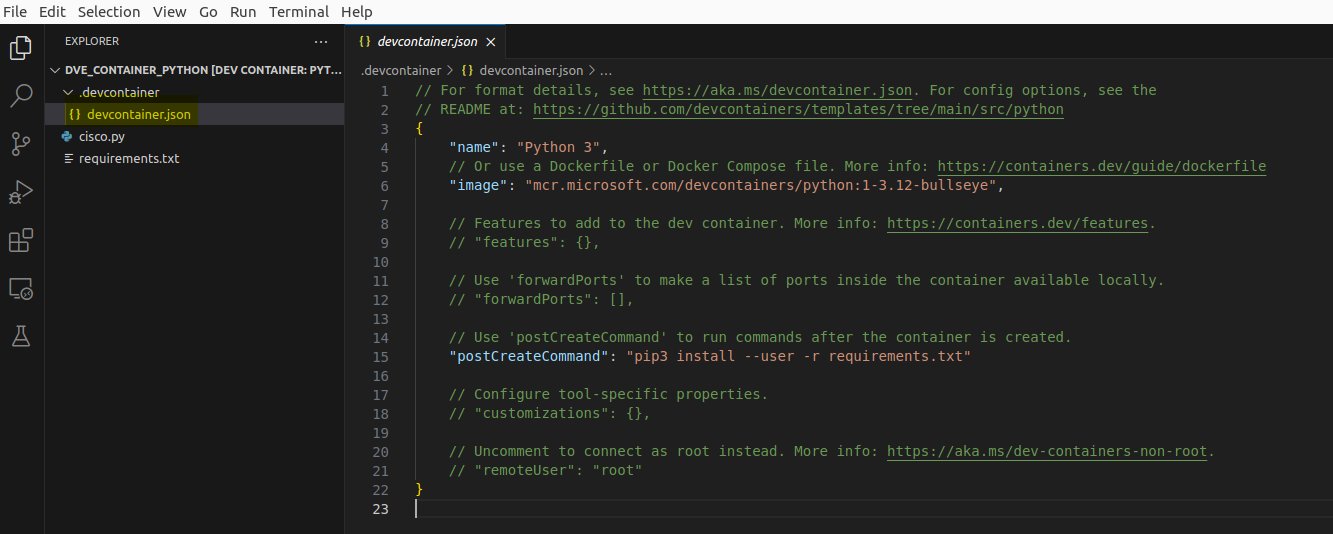
Let’s look at the devcontainer.json file. It specifies the base image for the container, in this case, a Python 3 environment using the image mcr.microsoft.com/devcontainers/python:1-3.12-bullseye. This image is a pre-configured environment that includes Python and is ready to use.
// For format details, see https://aka.ms/devcontainer.json. For config options, see the
// README at: https://github.com/devcontainers/templates/tree/main/src/python
{
	"name": "Python 3",
	// Or use a Dockerfile or Docker Compose file. More info: https://containers.dev/guide/dockerfile
	"image": "mcr.microsoft.com/devcontainers/python:1-3.12-bullseye",

	// Features to add to the dev container. More info: https://containers.dev/features.
	// "features": {},

	// Use 'forwardPorts' to make a list of ports inside the container available locally.
	// "forwardPorts": [],

	// Use 'postCreateCommand' to run commands after the container is created.
	"postCreateCommand": "pip3 install --user -r requirements.txt"

	// Configure tool-specific properties.
	// "customizations": {},

	// Uncomment to connect as root instead. More info: https://aka.ms/dev-containers-non-root.
	// "remoteUser": "root"
}
One of the key part of our devcontainer.json is the postCreateCommand. This command runs automatically after the container is set up. In our case, it's pip3 install --user -r requirements.txt. This command tells the container to install the packages listed in requirements.txt once the container is ready. It ensures that all necessary Python packages, including Netmiko, are installed in the container environment.
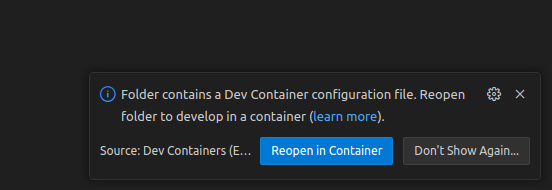
Now let's get our container up and running. In Visual Studio Code, with your project open, simply click on 'Reopen in Container'. This action prompts VS Code to pull the specified image from the devcontainer.json file and set up the container environment for you. It's a seamless process that configures everything in the background.
Once you're inside the container, you'll find that Python is pre-installed, and all the required packages, as listed in your requirements.txt, are already installed. This setup is completely isolated from your actual terminal or local environment, ensuring a consistent and controlled development space.
To verify everything is in order, you can run a Python version check and also verify the Netmiko version. These checks confirm that the container is properly configured with the tools you need. Remember, what you're seeing and working with inside this container is separate from your machine's local environment. It's like having a dedicated VM, without any interference from outside settings or installations.
vscode ➜ /workspaces/dve_container_python $ python --version
Python 3.12.1
vscode ➜ /workspaces/dve_container_python $ pip list | grep netmiko
netmiko       4.3.0
My Nemiko script is also working as intended 🙂
vscode ➜ /workspaces/dve_container_python $ python cisco.py

Port      Name               Status       Vlan       Duplex  Speed Type
Gi0/0                        connected    2          a-full   auto RJ45
Gi0/1                        connected    1          a-full   auto RJ45
Gi0/2                        connected    1          a-full   auto RJ45
Gi0/3                        notconnect   1          a-full   auto RJ45
Gi1/0                        notconnect   1          a-full   auto RJ45
Gi1/1                        notconnect   1          a-full   auto RJ45
Gi1/2                        notconnect   1          a-full   auto RJ45
Gi1/3                        notconnect   1          a-full   auto RJ45
Closing Thoughts
In conclusion, using DevContainers, particularly with Visual Studio Code, offers a consistent development environment for Python projects, like our Netmiko example. This approach not only simplifies the setup process but also ensures that every team member works with the same tools and configurations, avoiding the common "it works on my machine" problem.