Hi all, in this quick blog post, let's look at how to run Palo Alto firewalls in Containerlab. If you've been following me for a while, you might know that I've started using Containerlab more often in my projects. If you're new to Containerlab or need a quick recap, check out my other introductory post below. Now, let's dive in.
 Suresh Vina
boxen or vrnetlab
Palo Alto doesn't provide a containerized VM image (not CN-Series), it only has a VM-based image. You can create a container from this VM image using two methods. The official documentation recommends using 'boxen' to generate a container image from the VM. However, I chose to use the vrnetlab project instead.
Creating a containerized image using vrnetlab
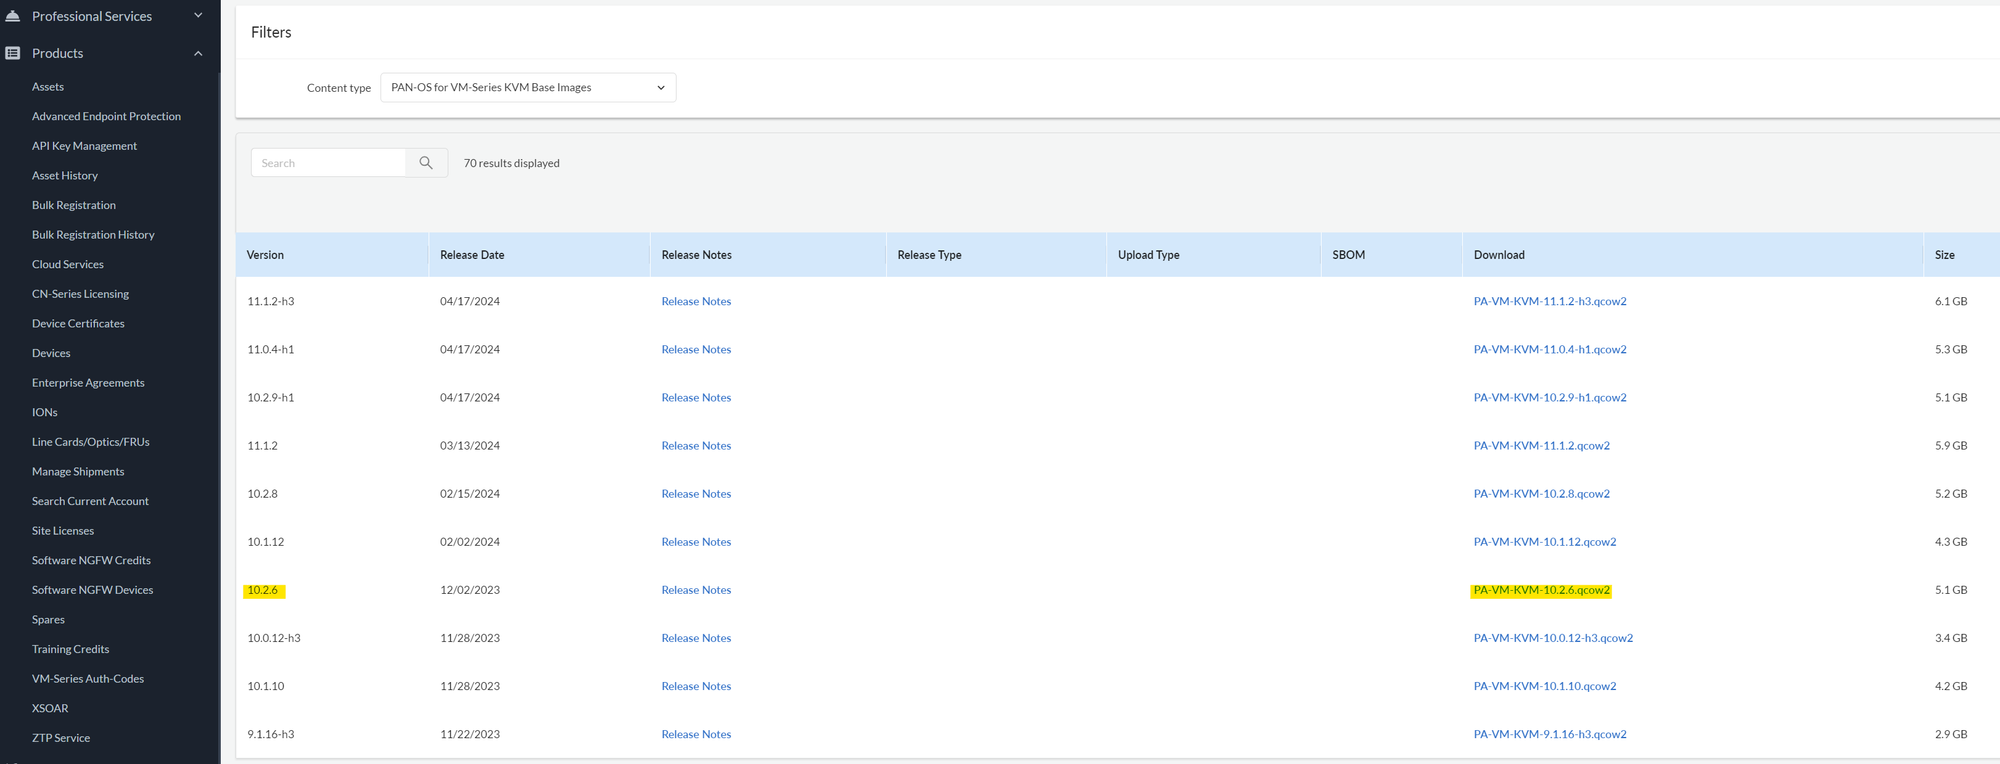
First things first, download the VM image (qcow2) from the Palo Alto support portal. You might need a valid support contract to access this image. For this example, I'm using panos-10.2.6, but other versions should work too.
Once downloaded, clone the vrnetlab repository, move the downloaded image into vrnetlab/pan, and run the make command.
Please note that the default setup uses two CPU cores, which can make the GUI laggy and less responsive. I edited the launch.py file inside vrnetlab/pan/docker to allocate 4 CPU cores instead, as shown below. With this adjustment, it runs smoothly without noticeable lag.
self.qemu_args.extend(["-smp", "4,sockets=1,cores=4"]Once completed, if you run docker images, you should see the new Palo Alto image listed.

Creating the lab
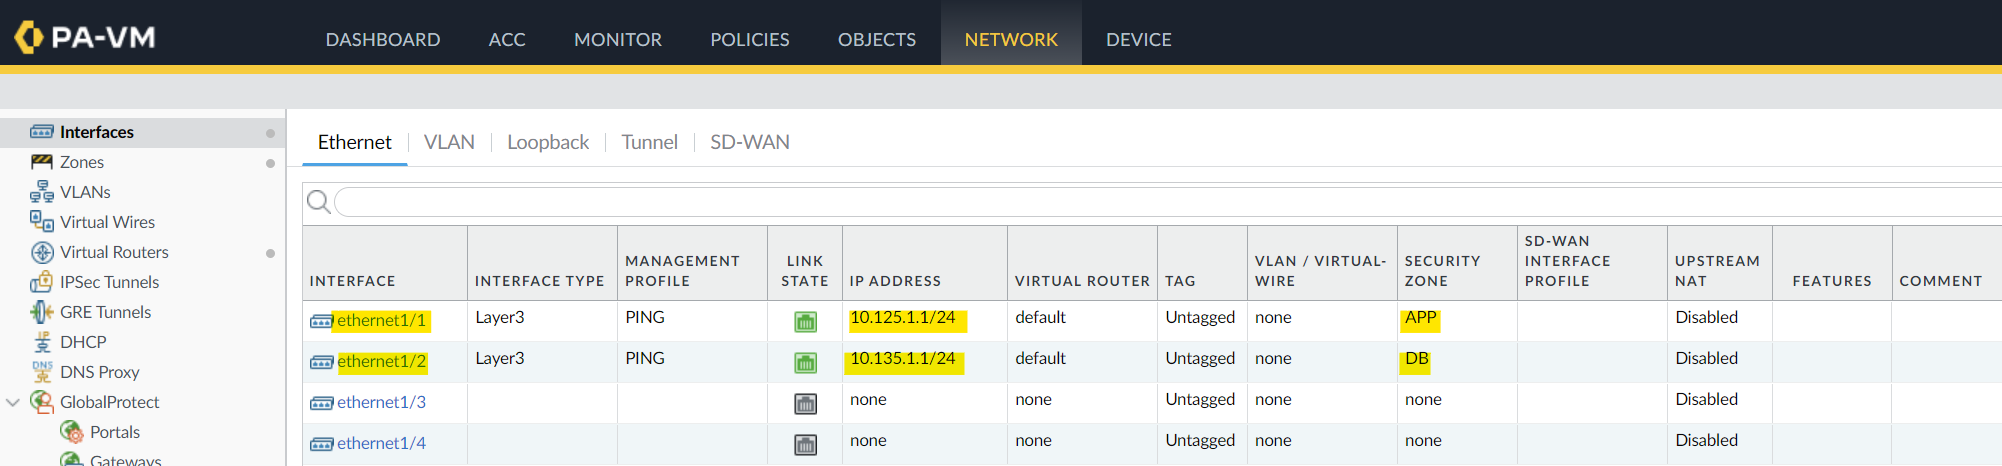
For this example, I'm setting up a simple topology with two interfaces. The first interface, Eth1, will be in the APP zone, while the second interface, Eth2, will be in the DB zone. Eth1 will use the 10.125.1.0/24 subnet, and Eth2 will use the 10.135.1.0/24 subnet.

Additionally, I'm deploying two Alpine Linux containers in each security zone and creating a security policy that allows traffic between the two zones.
Containerlab topology file
This containerlab file named 'main-labs' defines a topology that includes both Palo Alto and Alpine Linux nodes. The management network is set up with a subnet of 192.168.100.0/24. The topology consists of two main types of nodes, the paloalto_panos node using the image vrnetlab/vr-pan:10.2.6, and the linux node using the alpine:latest image.
name: main-labs
mgmt:
network: mgmt
ipv4-subnet: 192.168.100.0/24
topology:
kinds:
paloalto_panos:
image: vrnetlab/vr-pan:10.2.6
linux:
image: alpine:latest
nodes:
palo-01:
kind: paloalto_panos
mgmt-ipv4: 192.168.100.10
network-mode: mgmt
alpine-01:
kind: linux
network-mode: none
exec:
- ip addr add 10.125.1.10/24 dev eth0
- ip route add default via 10.125.1.1 dev eth0
alpine-02:
kind: linux
network-mode: none
exec:
- ip addr add 10.135.1.10/24 dev eth0
- ip route add default via 10.135.1.1 dev eth0
links:
- endpoints: ["palo-01:eth1", "alpine-01:eth0"]
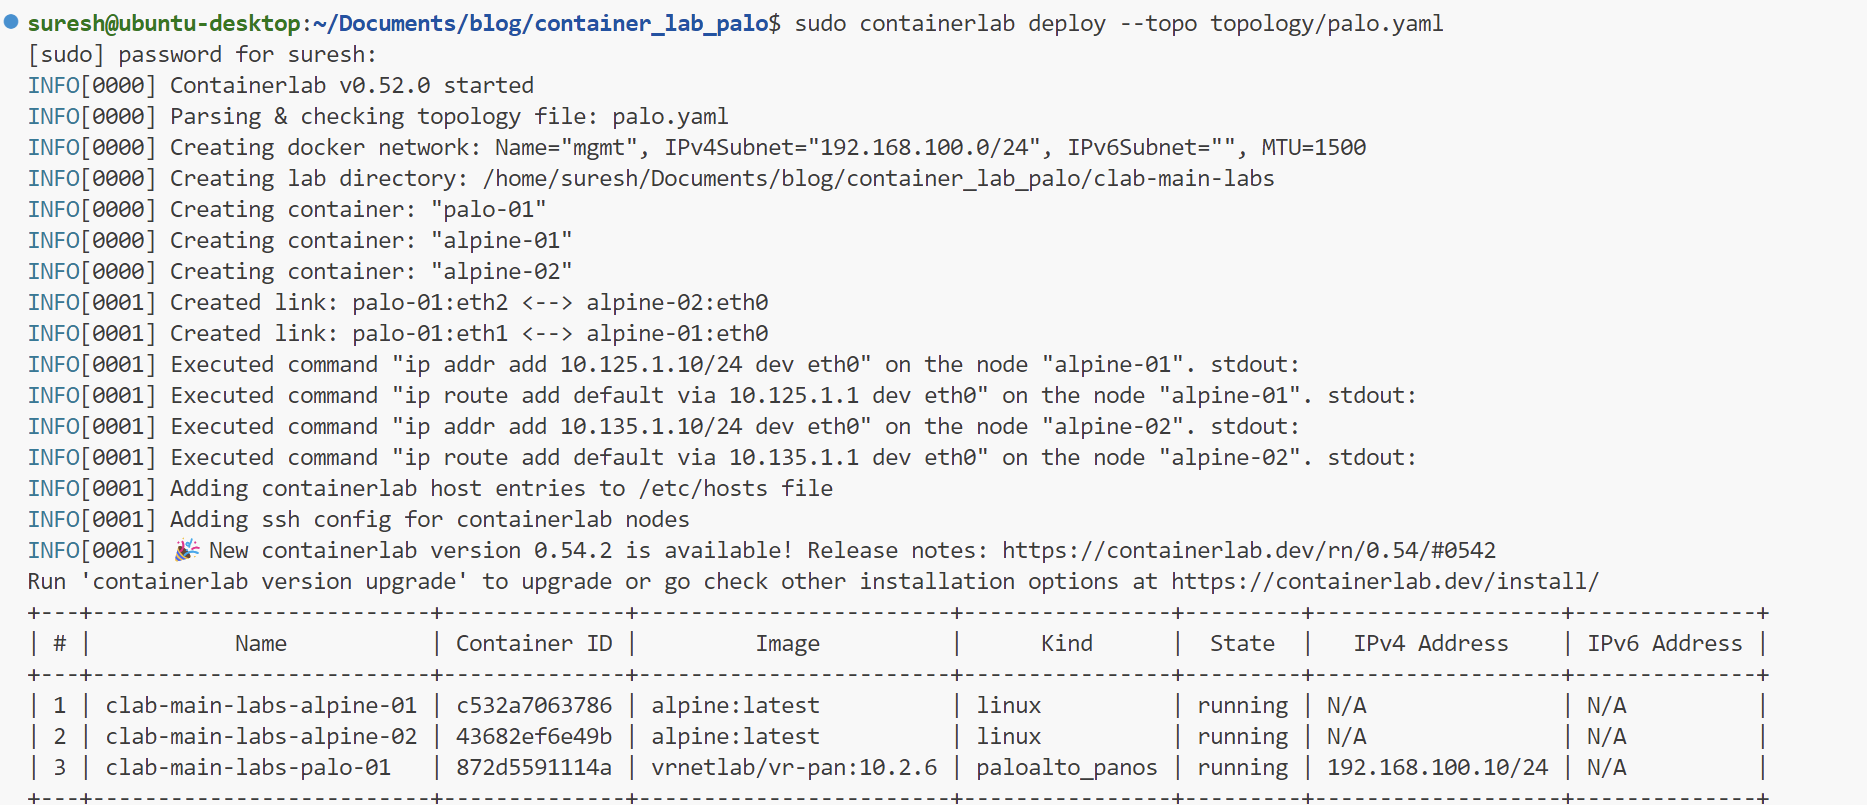
- endpoints: ["palo-01:eth2", "alpine-02:eth0"]The firewall node, palo-01, has a management IP address of 192.168.100.10 and uses the management network. Two Alpine Linux containers, alpine-01 and alpine-02, each have their network interfaces manually configured. alpine-01 is assigned the IP address 10.125.1.10/24 with a default route via 10.125.1.1. Similarly, alpine-02 has the IP address 10.135.1.10/24 with a default route via 10.135.1.1.
network-mode: none setting under each Alpine node means that we don't want to connect the Eth0 interfaces on these Linux nodes to the Docker network. Instead, we want to connect them directly to the firewall, routing all traffic through the firewall.As always just run the containerlab deploy command to deploy the nodes as shown below.
Palo Alto configurations
It takes around 8-10 minutes for the firewall to bootup completely. Once the firewall is ready, you can login to the webgui with admin/Admin@123 default credentials.
As we've discussed before, I'm going to assign the IP addresses to the interface, assign them to the security zones and create a security policy.

Testing the connectivity
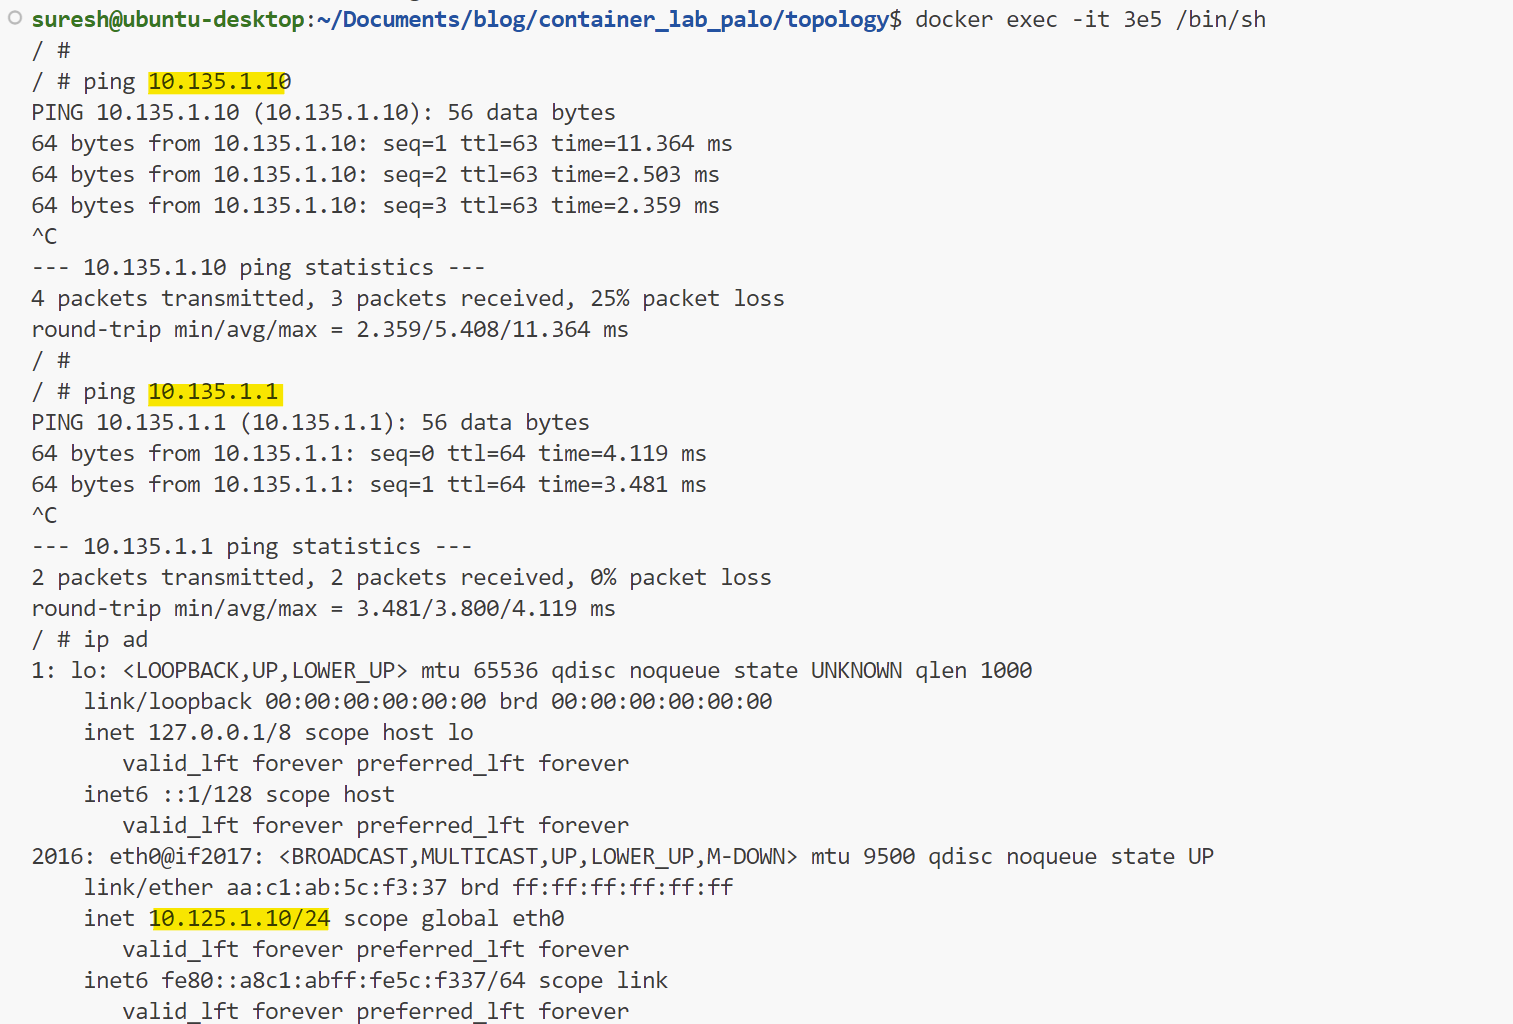
Once everything was deployed, I ran a ping from one Alpine node to the other. As you can see below, the traffic is successfully flowing through the firewall via the security policy I created. This confirms that the firewall is properly handling and routing the traffic between the two zones.
 Suresh Vina
One Thing to Remember and Closing Up
One thing I noticed is that if I stop the containers (using containerlab destroy, with or without the --cleanup flag) and then restart them, the firewall boots up with the default configuration, and all my changes are lost. So, remember to export the configurations before destroying the lab. If you know of a way to persist the configs, please let me know in the comments.
References
Containerlab - https://containerlab.dev/
Boxen - https://github.com/carlmontanari/boxen/
vrnetlab - https://github.com/hellt/vrnetlab