Having the ability to take packet captures directly on the Firewall is a lifesaver during any Network Troubleshooting. In this blog post, we will go through the steps required to take packet captures on the ASA.
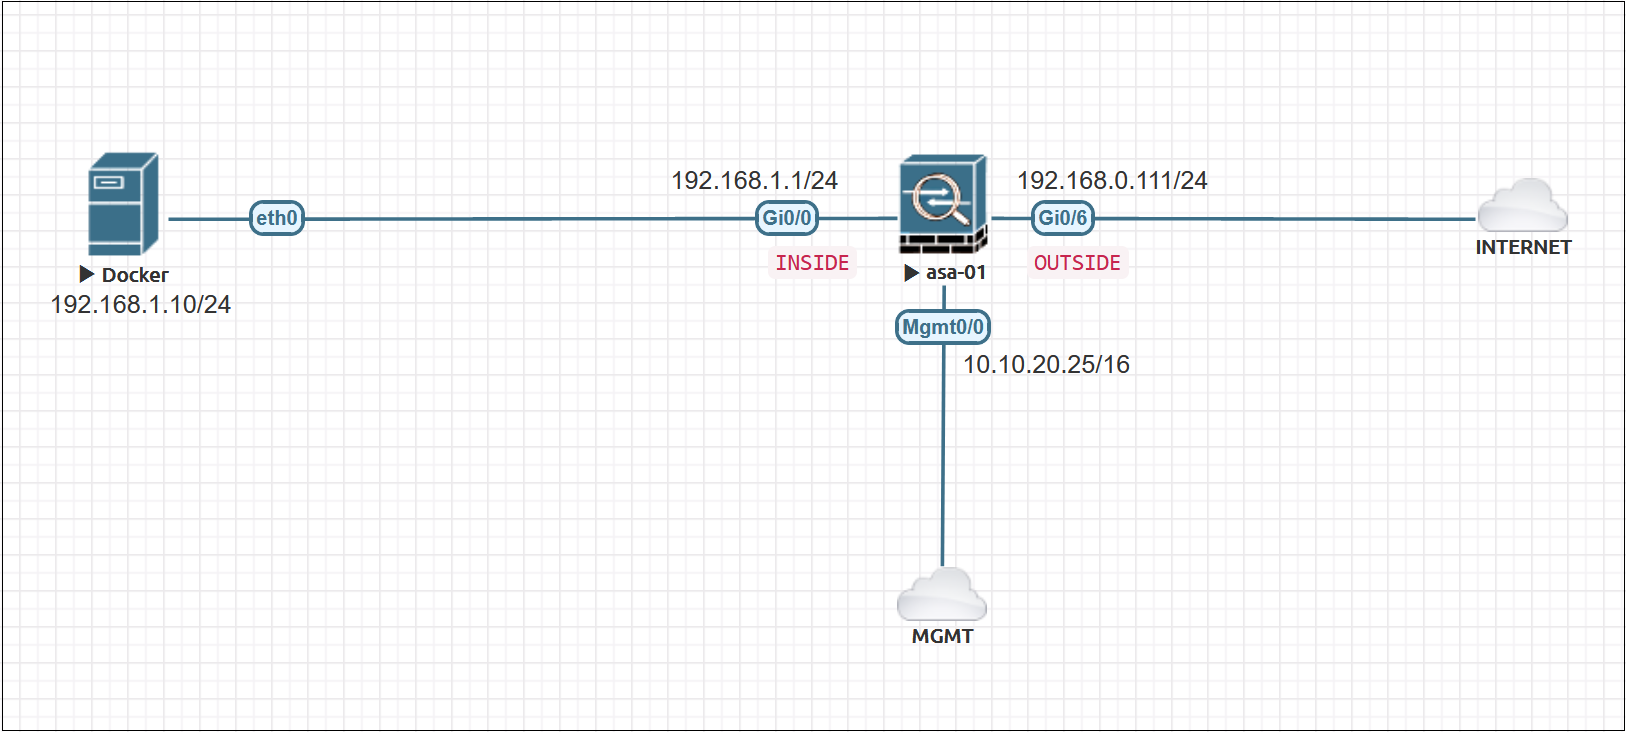
Diagram
The following examples are based on the shown diagram where the Server is behind the INSIDE interface of the ASA. The OUTSIDE interface is directly connected to the Internet.
ASA basic configurations
interface GigabitEthernet0/0
 nameif INSIDE
 security-level 100
 ip address 192.168.1.1 255.255.255.0

interface GigabitEthernet0/6
 nameif OUTSIDE
 security-level 0
 ip address 192.168.0.111 255.255.255.0

object network inside-subnet
 subnet 192.168.1.0 255.255.255.0
 nat (INSIDE,OUTSIDE) dynamic interface
Packet Capture via ASDM
Let's say we want to take the captures for the traffic between the server (192.168.1.10) and 8.8.8.8
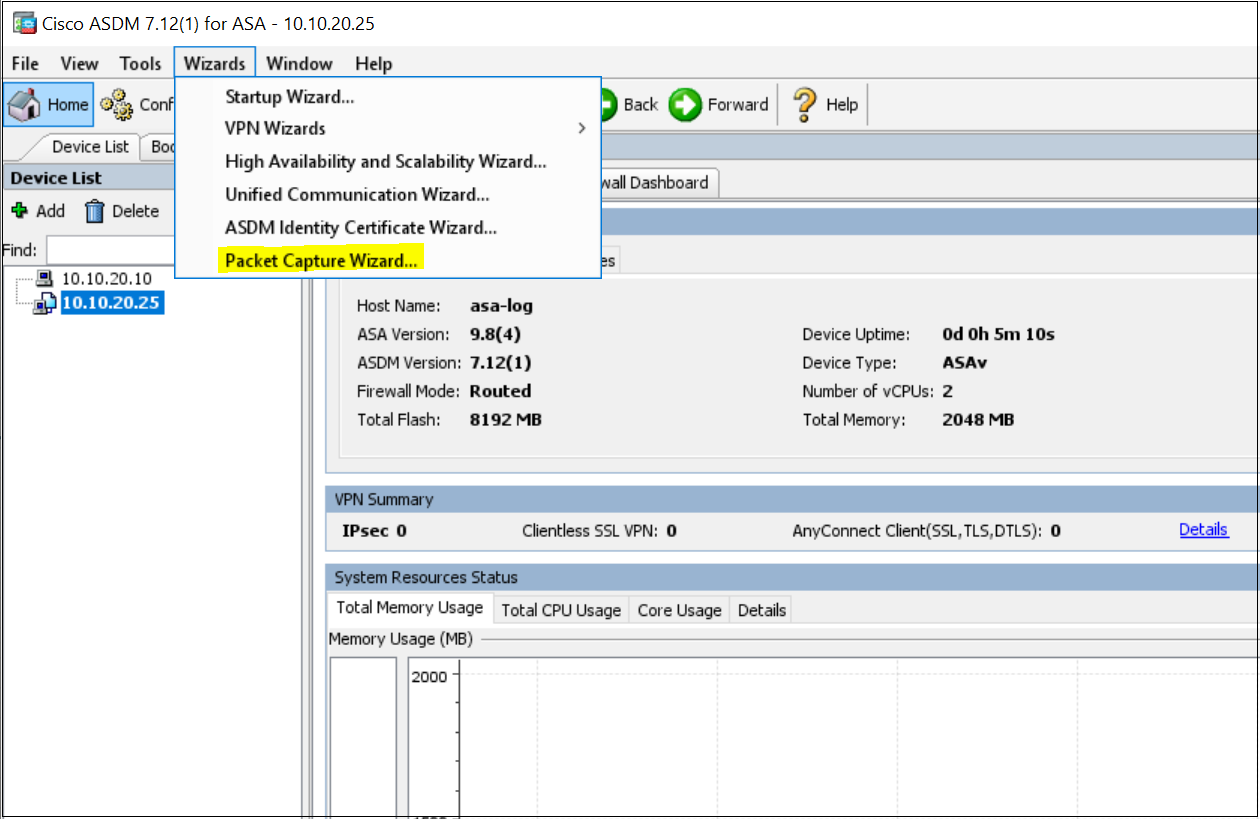
1. Navigate to Wizards > Packet Capture Wizard
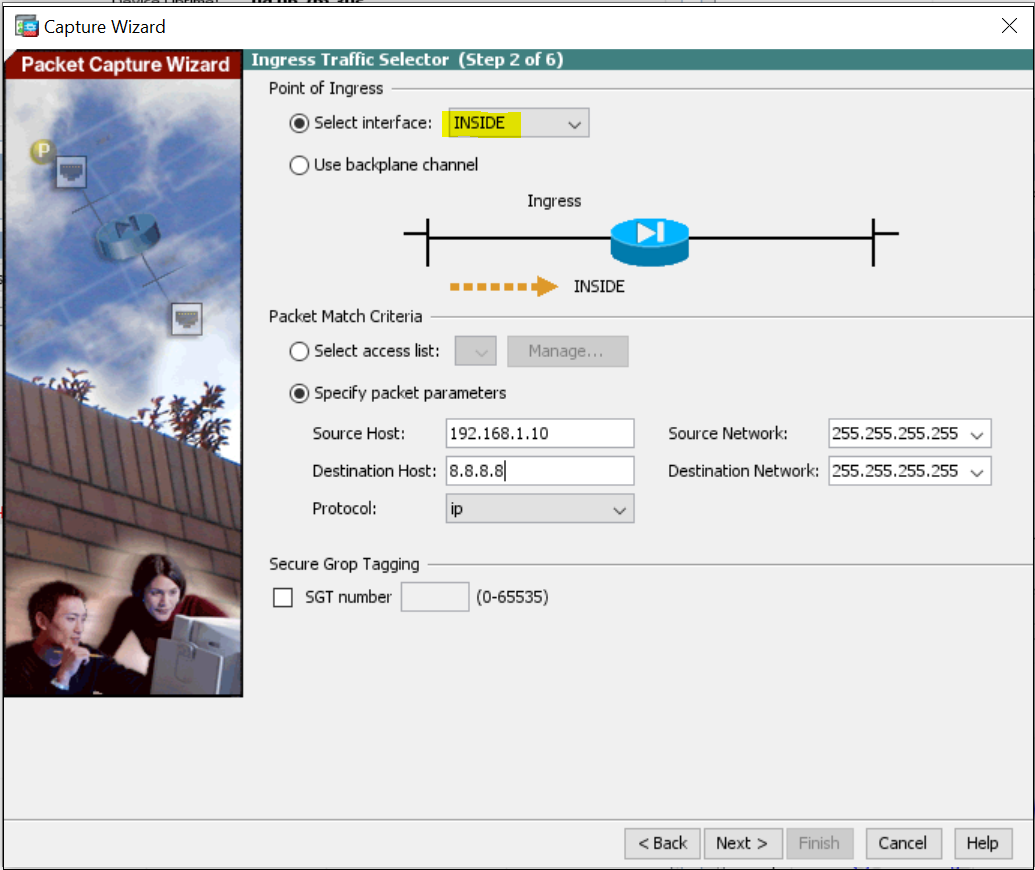
2. Choose the Ingress interface and specify the source /destination IP and Protocol.
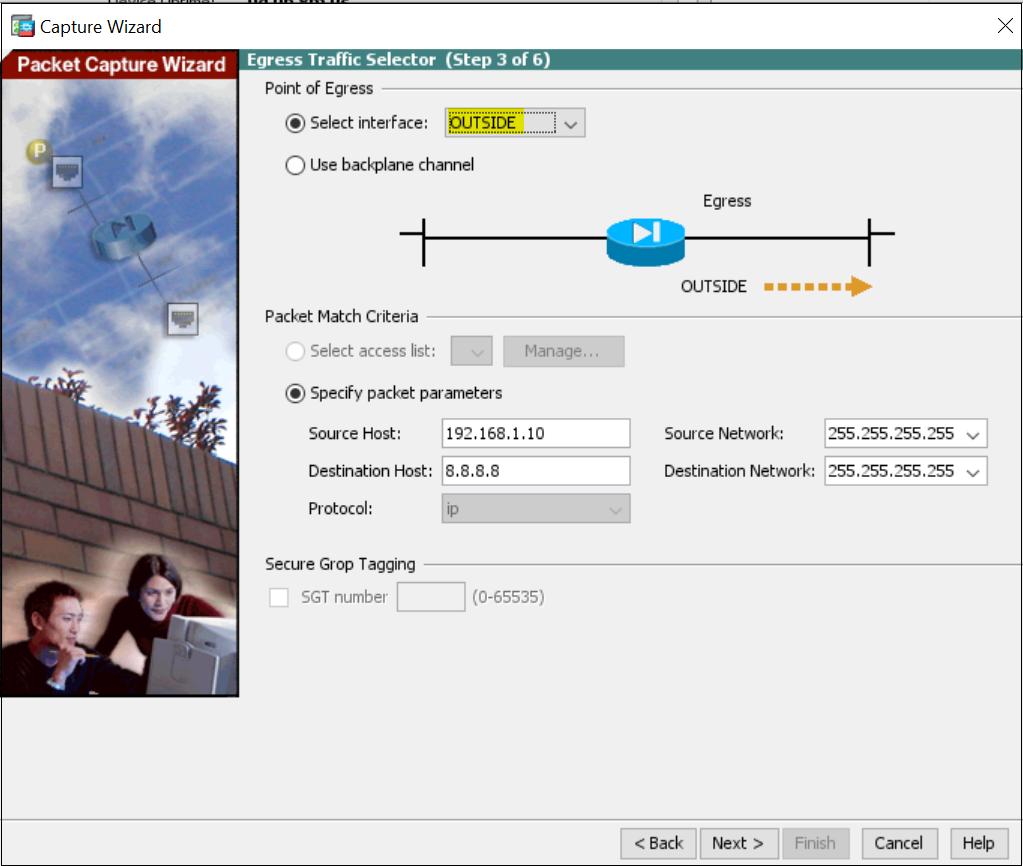
3. Choose the Egress interface
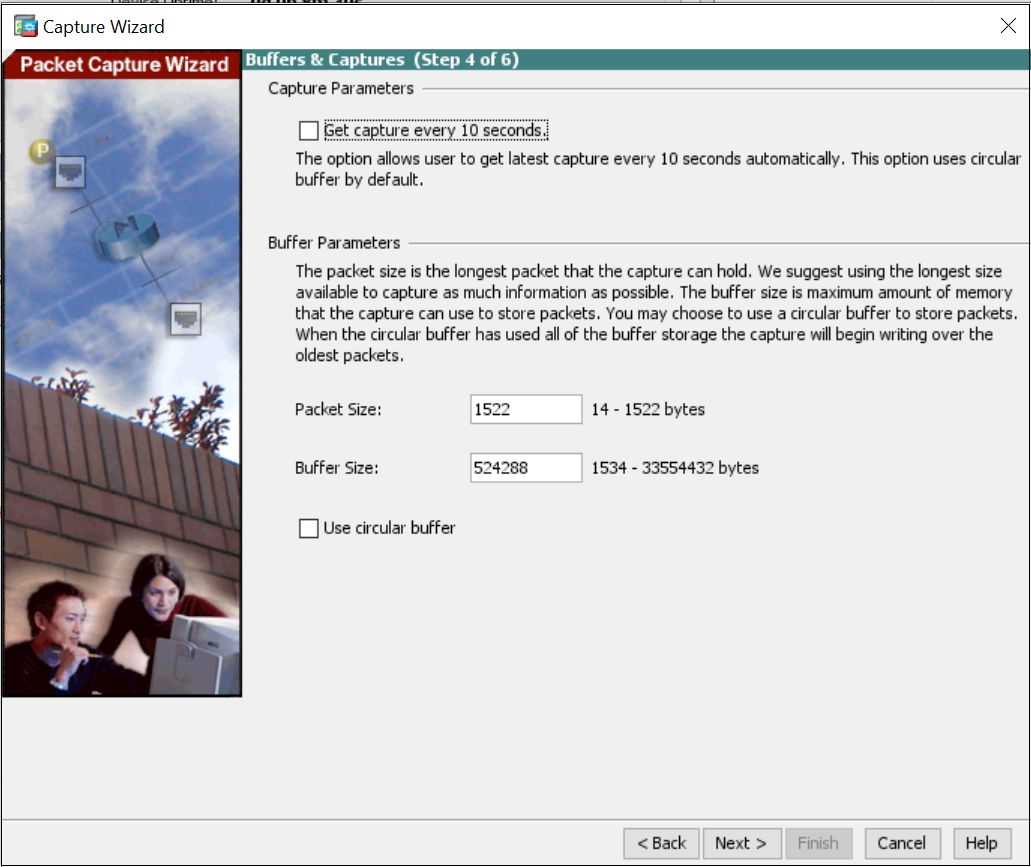
4. Buffer and Capture options, we can leave them at their defaults.
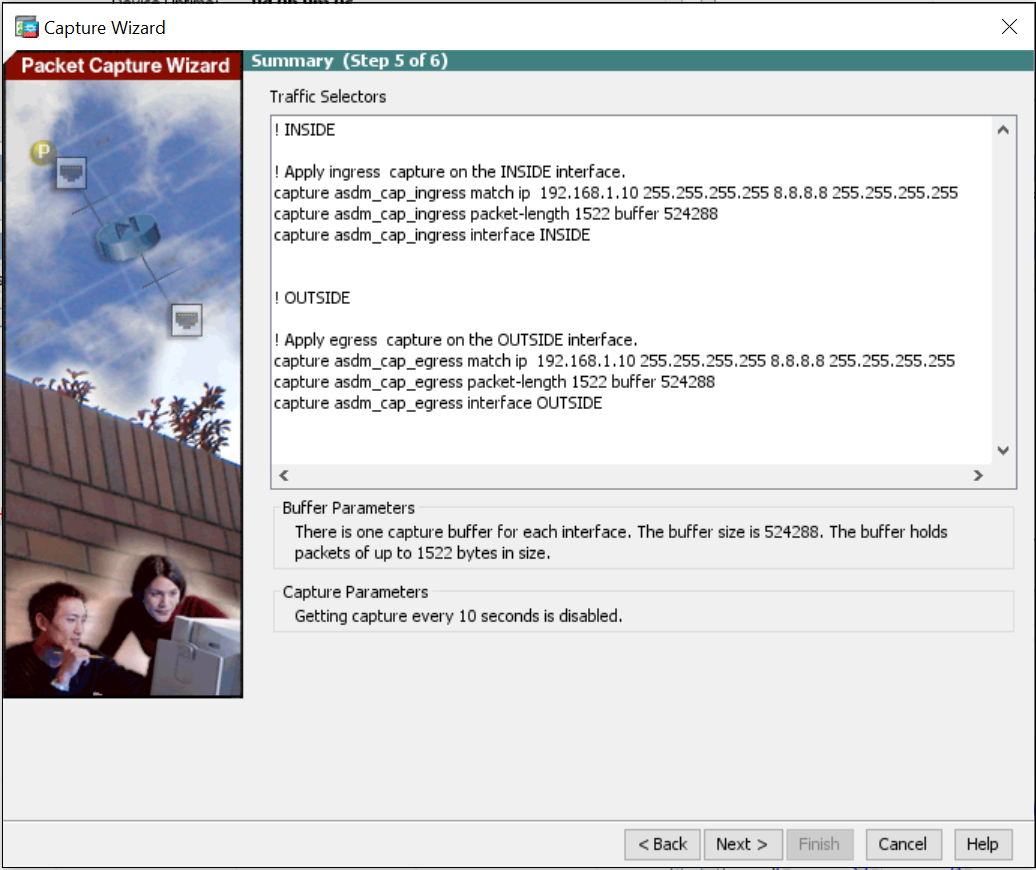
5. Based on the parameters used in the previous steps, ASDM will apply the shown commands to the ASA.
6. Select Start to start the captures
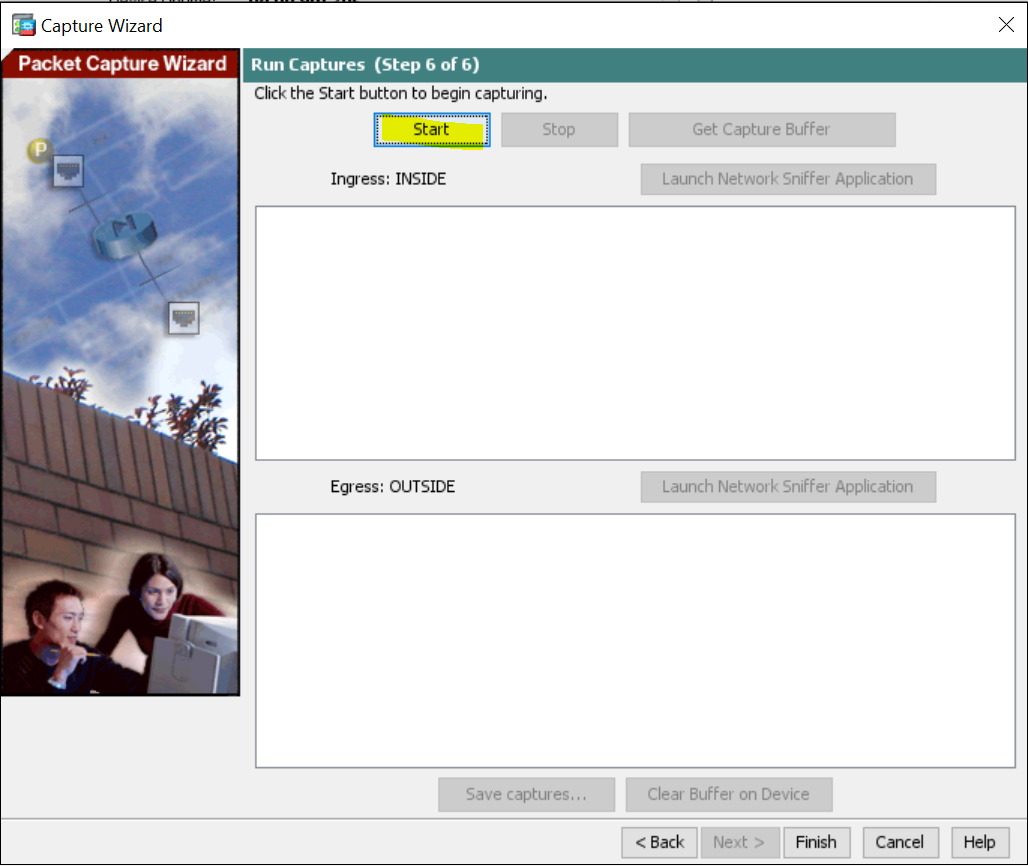
7. Once the required packets are captured, you can Stop the capture and save the file to your local computer. You can also view the captures on the ASDM by selecting Get Capture Buffer
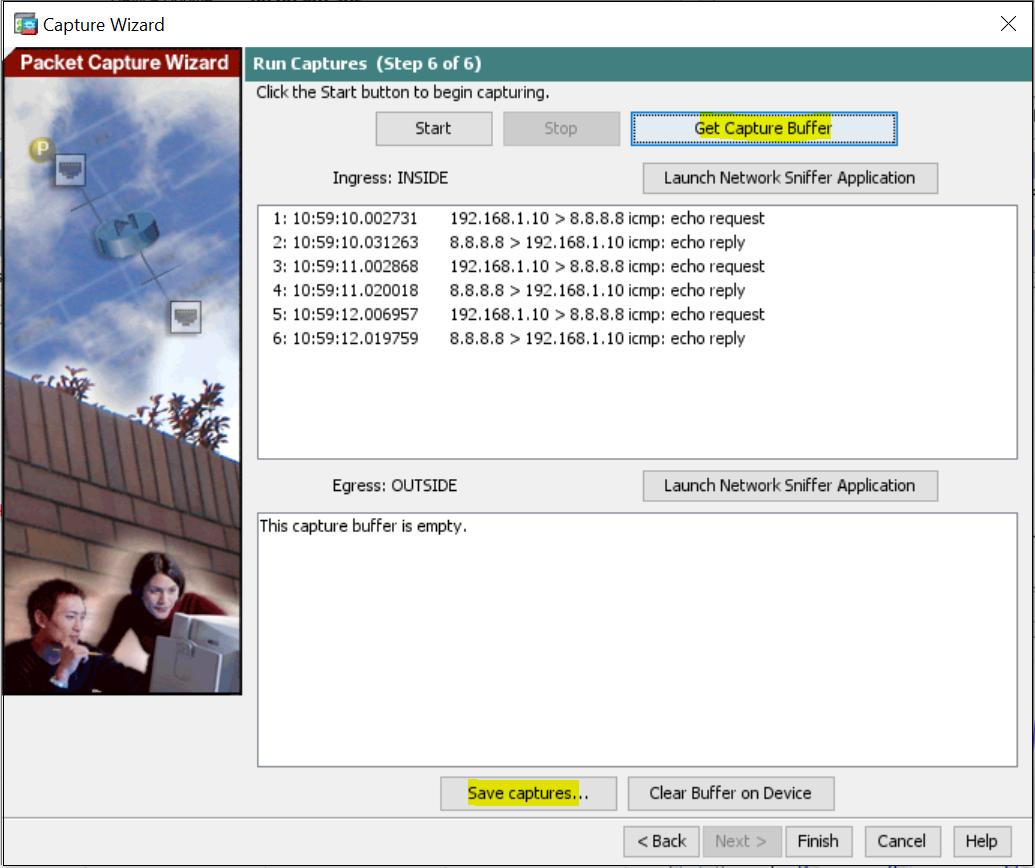
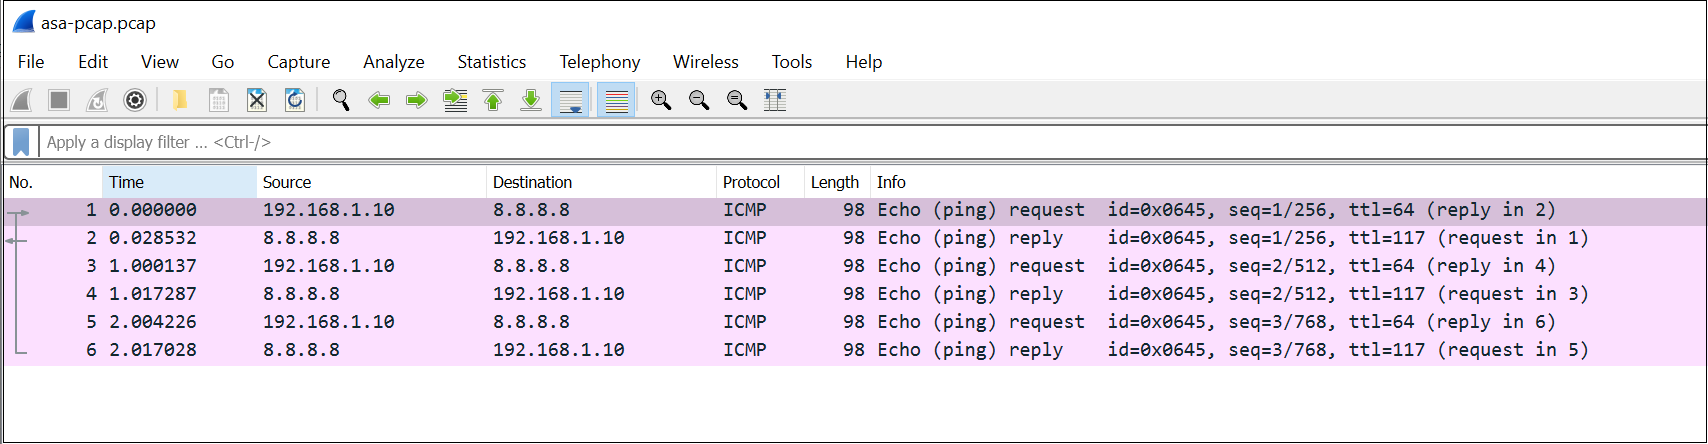
8. The capture file can then be analysed using tools such as Wireshark.
Packet Capture via the CLI
You can start the packet capture process by using the capture command. In this example, the capture name CAPTURE_TEST is defined.
capture CAPTURE_TEST interface INSIDE match ip 192.168.1.10 255.255.255.255 8.8.8.8 255.255.255.255

asa-log# show capture CAPTURE_TEST

6 packets captured

   1: 11:03:36.789281       192.168.1.10 > 8.8.8.8 icmp: echo request
   2: 11:03:36.810520       8.8.8.8 > 192.168.1.10 icmp: echo reply
   3: 11:03:37.791417       192.168.1.10 > 8.8.8.8 icmp: echo request
   4: 11:03:37.803821       8.8.8.8 > 192.168.1.10 icmp: echo reply
   5: 11:03:38.794651       192.168.1.10 > 8.8.8.8 icmp: echo request
   6: 11:03:38.807972       8.8.8.8 > 192.168.1.10 icmp: echo reply
6 packets shown
You can download the capture files from the ASA by navigating to the following URL path.
https://<ASA-IP>/admin/capture/<capture_name>/pcap

https://10.10.20.25/admin/capture/CAPTURE_TEST/pcap/
Packet Capture for the Post-NAT traffic
How do we capture the post-NAT traffic? For example, when the traffic from the server leaves the ASA, its source IP is NATed to the OUTSIDE interface IP which is 192.168.0.111
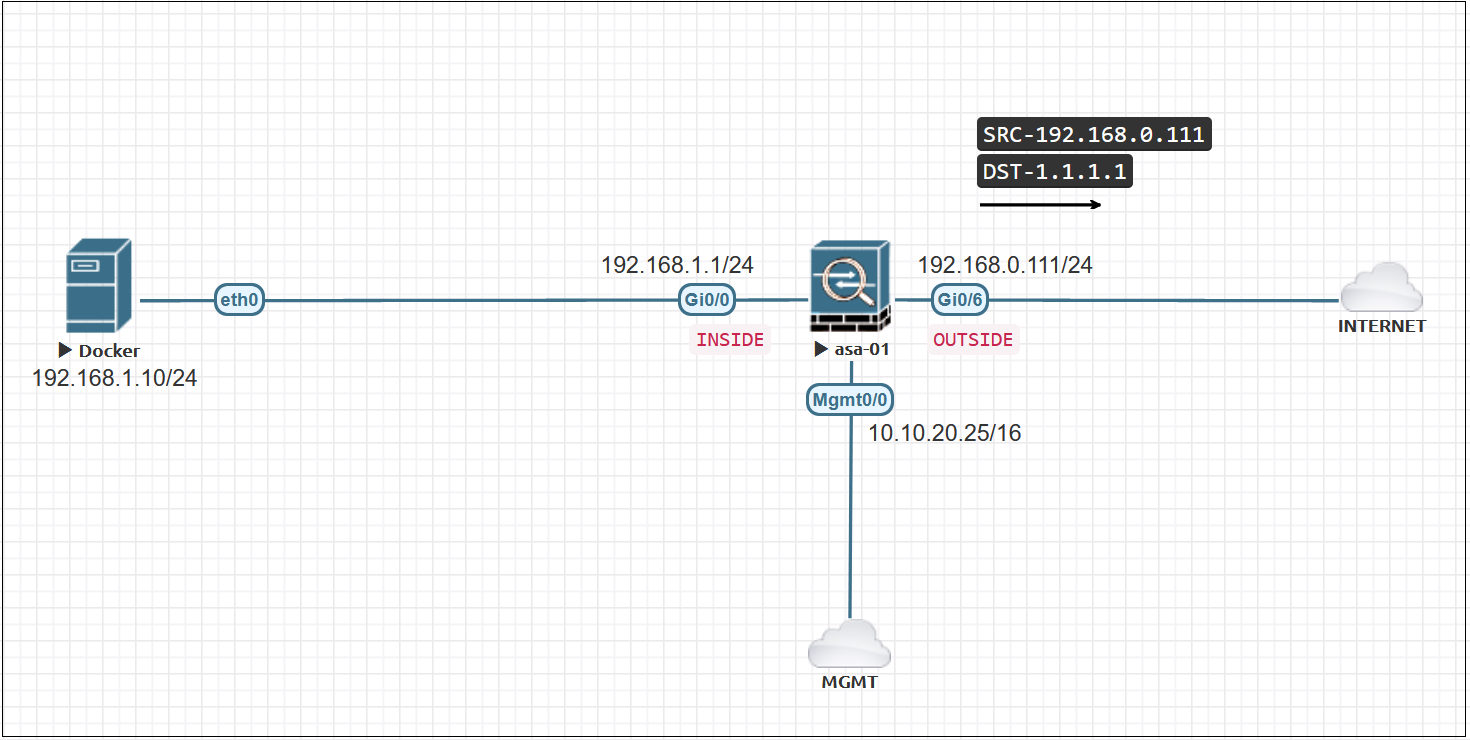
Well, we need to specify the Post-NAT IP (192.168.0.111) as the interesting traffic rather than the real IP (192.168.1.10) as shown below.
asa-log(config)# capture NAT interface OUTSIDE match ip host 192.168.0.111 host 1.1.1.1
asa-log(config)# exit
asa-log# show capture NAT

6 packets captured

   1: 18:19:28.947659       192.168.0.111 > 1.1.1.1 icmp: echo request
   2: 18:19:28.969401       1.1.1.1 > 192.168.0.111 icmp: echo reply
   3: 18:19:29.947247       192.168.0.111 > 1.1.1.1 icmp: echo request
   4: 18:19:29.963893       1.1.1.1 > 192.168.0.111 icmp: echo reply
   5: 18:19:30.949810       192.168.0.111 > 1.1.1.1 icmp: echo request
   6: 18:19:30.967998       1.1.1.1 > 192.168.0.111 icmp: echo reply
6 packets shown
Capture packets destined to/from the ASA
Let's say we want to capture the ICMP traffic originating from the ASA's OUTSIDE interface. The following command will capture will the traffic on the OUTSIDE interface including the one being generated from the ASA itself.
asa-log(config)# capture FROM_ASA interface OUTSIDE match ip host 192.168.0.111 any
asa-log(config)# exit

asa-log# ping 1.1.1.1
Type escape sequence to abort.
Sending 5, 100-byte ICMP Echos to 1.1.1.1, timeout is 2 seconds:
!!!!!
Success rate is 100 percent (5/5), round-trip min/avg/max = 20/24/30 ms

asa-log# show capture FROM_ASA

10 packets captured

   1: 11:09:53.162345       192.168.0.111 > 1.1.1.1 icmp: echo request
   2: 11:09:53.191503       1.1.1.1 > 192.168.0.111 icmp: echo reply
   3: 11:09:53.194173       192.168.0.111 > 1.1.1.1 icmp: echo request
   4: 11:09:53.217518       1.1.1.1 > 192.168.0.111 icmp: echo reply
   5: 11:09:53.217807       192.168.0.111 > 1.1.1.1 icmp: echo request
   6: 11:09:53.242663       1.1.1.1 > 192.168.0.111 icmp: echo reply
   7: 11:09:53.243029       192.168.0.111 > 1.1.1.1 icmp: echo request
   8: 11:09:53.264268       1.1.1.1 > 192.168.0.111 icmp: echo reply
   9: 11:09:53.264695       192.168.0.111 > 1.1.1.1 icmp: echo request
  10: 11:09:53.289871       1.1.1.1 > 192.168.0.111 icmp: echo reply
Clear or Remove the captures
If you want to clear the capture buffer but want to continue taking the captures then use clear capture CAPTURE-NAME
If you, however, want to remove the capture completely, then use no capture CAPTURE-NAME command.

The less boring side of Networking
No spam, receive blog posts straight to your inbox. Unsubscribe anytime with just a single click.