

This post is part of an ongoing series on Ansible, and you can find all the other posts in the series here.
In the previous parts of this series, we built an OSPF network with Ansible, and then wrote a few checks to make sure it's healthy. One of those checks counted the OSPF neighbors on each router, by running show ip ospf neighbor and counting the lines that contain the word FULL. It works, but it's a bit broken. We're treating the output as plain text and searching through it, so we're relying on the router always formatting the output in exactly the same way.
The output of a show command is designed for humans to read, not for machines. What we really want is structured data, such as a list of neighbors, where each neighbor has its own neighbor ID, state, and interface that we can work with directly, just like the facts and variables we've been using throughout the series.
In this part, we'll look at how to parse command output into structured data using the cli_parse module and a library of ready-made templates called ntc-templates. We'll parse show ip ospf neighbor, compare the plain text with the parsed output, and then rewrite our neighbor check to use it. Finally, we'll see what else becomes possible once the data is structured.
We're continuing with the same OSPF lab and project from the previous parts, so if you haven't read them yet, I recommend starting there.
Installing the Parser
To turn the output of a show command into structured data, we need two things, a parsing engine and a template that tells the engine how to read the output.
- TextFSM - A Python library, originally created by Google, that parses plain text output using templates. A template describes what each line of the output looks like, and which values to pull out of it, such as the neighbor ID or the interface.
- ntc-templates - A large library of ready-made TextFSM templates, maintained by Network to Code. It covers hundreds of common show commands across many vendors, including
show ip ospf neighboron Cisco IOS. This means we don't have to write any templates ourselves.
Both of them are Python packages, so we install them in our virtual environment. Since I'm using uv for this project, I added them like this.
uv add textfsm ntc-templates
If you're using pip, the equivalent command is the following.
pip install textfsm ntc-templates
On the Ansible side, we'll use a module called cli_parse, which comes from the ansible.utils collection. It's included in the ansible package, so there's nothing extra to install. cli_parse runs a command on the device, passes the output to a parser, and gives us back the structured data. It supports a few different parsers, but in this part, we'll be using TextFSM with ntc-templates.
Parsing show ip ospf neighbor
Let's start by parsing show ip ospf neighbor on a single router, r1, so we can see what we get back. Create a new playbook called parse_ospf.yml.
---
- name: Parse OSPF neighbors
  hosts: r1
  gather_facts: false

  tasks:
    - name: Run and parse show ip ospf neighbor
      ansible.utils.cli_parse:
        command: show ip ospf neighbor
        parser:
          name: ansible.netcommon.ntc_templates
      register: ospf_parsed

    - name: Display the parsed output
      ansible.builtin.debug:
        var: ospf_parsed.parsed
The cli_parse task has two options.
- command - The command to run on the device. Notice that we're not using
ios_commandhere.cli_parseruns the command for us. - parser - Which parser to use.
ansible.netcommon.ntc_templatestellscli_parseto use TextFSM with the templates from ntc-templates.
You might be wondering how the parser knows which template to use, since there are templates for lots of different vendors. It works this out from ansible_network_os. Our routers have it set to cisco.ios.ios, which cli_parse maps to the Cisco IOS templates, and then it picks the template for show ip ospf neighbor.
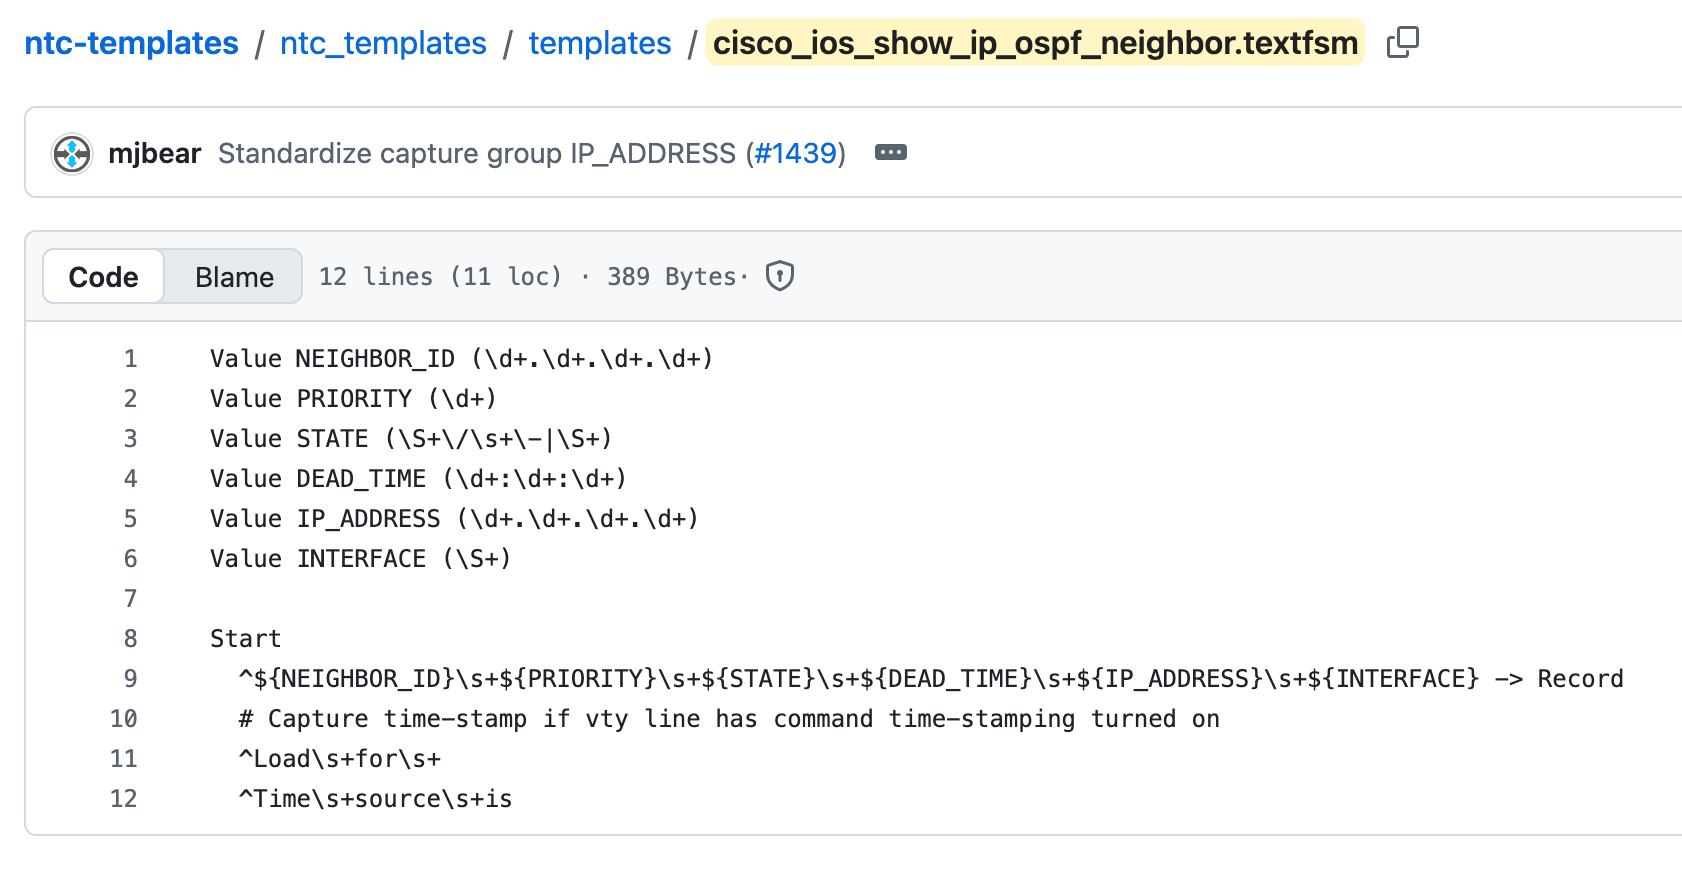
We save the result in ospf_parsed, and the structured data ends up under ospf_parsed.parsed, which is what the second task prints.
Before we run it, here's what the plain output of show ip ospf neighbor looks like on r1, as a reminder.
r1#show ip ospf neighbor

Neighbor ID     Pri   State           Dead Time   Address         Interface
3.3.3.3           0   FULL/  -        00:00:32    10.100.13.2     Ethernet0/3
4.4.4.4           0   FULL/  -        00:00:33    10.100.14.2     Ethernet0/2
2.2.2.2           0   FULL/  -        00:00:37    10.100.12.2     Ethernet0/1
5.5.5.5           0   FULL/  -        00:00:36    10.100.15.2     Ethernet1/0
Now, let's run the playbook.
ansible-playbook parse_ospf.yml
PLAY [Parse OSPF neighbors] **********************

TASK [Run and parse show ip ospf neighbor] *******
ok: [r1]

TASK [Display the parsed output] *****************
ok: [r1] => {
  "ospf_parsed.parsed": [
    {
      "dead_time": "00:00:35",
      "interface": "Ethernet0/3",
      "ip_address": "10.100.13.2",
      "neighbor_id": "3.3.3.3",
      "priority": "0",
      "state": "FULL/  -"
    },
    {
      "dead_time": "00:00:34",
      "interface": "Ethernet0/2",
      "ip_address": "10.100.14.2",
      "neighbor_id": "4.4.4.4",
      "priority": "0",
      "state": "FULL/  -"
    },
    {
      "dead_time": "00:00:39",
      "interface": "Ethernet0/1",
      "ip_address": "10.100.12.2",
      "neighbor_id": "2.2.2.2",
      "priority": "0",
      "state": "FULL/  -"
    },
    {
      "dead_time": "00:00:33",
      "interface": "Ethernet1/0",
      "ip_address": "10.100.15.2",
      "neighbor_id": "5.5.5.5",
      "priority": "0",
      "state": "FULL/  -"
    }
  ]
}

PLAY RECAP ***************************************
r1 : ok=2 changed=0 unreachable=0 failed=0 skipped=0 rescued=0 ignored=0
The plain text has turned into a list of dictionaries, with one dictionary for each neighbor. Each column in the original output has become a key, so instead of a line of text, each neighbor now has a neighbor_id, priority, state, dead_time, ip_address, and interface. The header line is gone too, since it isn't a neighbor.
This is the same kind of data we've been working with throughout the series, such as the interface facts or the variables in host_vars. So everything we've learned about filters works here too. For example, map(attribute='neighbor_id') would give us a simple list of the neighbor IDs, and selectattr('interface', '==', 'Ethernet0/1') would give us just the neighbor on Ethernet0/1.
To test this out, let's create a small playbook called parse_ospf_filters.yml, which uses a couple of filters on the parsed output.
---
- name: Use filters on parsed output
  hosts: r1
  gather_facts: false

  tasks:
    - name: Run and parse show ip ospf neighbor
      ansible.utils.cli_parse:
        command: show ip ospf neighbor
        parser:
          name: ansible.netcommon.ntc_templates
      register: ospf_parsed

    - name: List the neighbor IDs
      ansible.builtin.debug:
        msg: "{{ ospf_parsed.parsed | map(attribute='neighbor_id') | list }}"

    - name: Show the neighbor on Ethernet0/1
      ansible.builtin.debug:
        msg: "{{ ospf_parsed.parsed | selectattr('interface', '==', 'Ethernet0/1') | list }}"
ansible-playbook parse_ospf_filters.yml
PLAY [Use filters on parsed output] **************

TASK [Run and parse show ip ospf neighbor] *******
ok: [r1]

TASK [List the neighbor IDs] *********************
ok: [r1] => {
  "msg": [
    "3.3.3.3",
    "4.4.4.4",
    "2.2.2.2",
    "5.5.5.5"
  ]
}

TASK [Show the neighbor on Ethernet0/1] **********
ok: [r1] => {
  "msg": [
    {
      "dead_time": "00:00:35",
      "interface": "Ethernet0/1",
      "ip_address": "10.100.12.2",
      "neighbor_id": "2.2.2.2",
      "priority": "0",
      "state": "FULL/  -"
    }
  ]
}

PLAY RECAP ***************************************
r1 : ok=3 changed=0 unreachable=0 failed=0 skipped=0 rescued=0 ignored=0
map gave us a simple list of the four neighbor IDs, and selectattr picked out just the neighbor on Ethernet0/1, which is r2. Doing the same thing with the plain text output would have been much harder.
Creating Your Own Template
ntc-templates covers a huge number of commands, but it doesn't have a template for everything. Sometimes, you'll need to parse a command that isn't covered, or the output on your platform might be slightly different from what the existing template expects. In that case, you can write your own TextFSM template and point cli_parse to it.
For simplicity, let's pretend there's no template for show ip ospf neighbor, and write our own. To keep it short, we'll only capture the three values we actually care about, the neighbor ID, the state, and the interface.
Writing TextFSM templates is a topic of its own, so I won't go into all the details here. We'll cover TextFSM properly in a later part. For now, the goal is just to show how you'd use your own template with Ansible.
First, create a directory called templates in the project, and add a file called ospf_neighbor.textfsm.
Value NEIGHBOR_ID (\d+\.\d+\.\d+\.\d+)
Value STATE (\S+)
Value INTERFACE (\S+)

Start
  ^${NEIGHBOR_ID}\s+\d+\s+${STATE}\s+.*\s+${INTERFACE}\s*$$ -> Record
At a high level, here's what it does.
- Value - Each
Valueline defines something we want to capture, along with a regular expression describing what it looks like. For example,NEIGHBOR_IDhas to look like an IP address. - Start - The lines under
Startare patterns that TextFSM tries to match against every line of the output. Our pattern looks for a line that starts with an IP address, followed by the priority, the state, a few other columns we don't need, and finally the interface at the end of the line. - -> Record - Every time a line matches, the captured values are saved as one entry.
The header line doesn't start with an IP address, so it doesn't match, and it's skipped. Next, create a new playbook called parse_ospf_custom.yml.
---
- name: Parse OSPF neighbors with a custom template
  hosts: r1
  gather_facts: false

  tasks:
    - name: Run and parse show ip ospf neighbor
      ansible.utils.cli_parse:
        command: show ip ospf neighbor
        parser:
          name: ansible.utils.textfsm
          template_path: templates/ospf_neighbor.textfsm
      register: ospf_parsed

    - name: Display the parsed output
      ansible.builtin.debug:
        var: ospf_parsed.parsed
There are two differences from the earlier playbook. The parser name is now ansible.utils.textfsm instead of ansible.netcommon.ntc_templates, and we use template_path to tell cli_parse where to find our template.
ansible-playbook parse_ospf_custom.yml
PLAY [Parse OSPF neighbors with a custom template]

TASK [Run and parse show ip ospf neighbor] *******
ok: [r1]

TASK [Display the parsed output] *****************
ok: [r1] => {
  "ospf_parsed.parsed": [
    {
      "INTERFACE": "Ethernet0/3",
      "NEIGHBOR_ID": "3.3.3.3",
      "STATE": "FULL/"
    },
    {
      "INTERFACE": "Ethernet0/2",
      "NEIGHBOR_ID": "4.4.4.4",
      "STATE": "FULL/"
    },
    {
      "INTERFACE": "Ethernet0/1",
      "NEIGHBOR_ID": "2.2.2.2",
      "STATE": "FULL/"
    },
    {
      "INTERFACE": "Ethernet1/0",
      "NEIGHBOR_ID": "5.5.5.5",
      "STATE": "FULL/"
    }
  ]
}

PLAY RECAP ***************************************
r1 : ok=2 changed=0 unreachable=0 failed=0 skipped=0 rescued=0 ignored=0
Our own template works, and we get one entry for each neighbor, with only the three values we asked for. There are two small differences compared with the ntc-templates version.
- The key names are in uppercase - They come straight from the
Valuenames in our template, soneighbor_idis nowNEIGHBOR_ID. ntc-templates converts them to lowercase for us. - The state is FULL/ - Our pattern for
STATEis\S+, which stops at the first space, so it doesn't capture the-at the end. The ntc-templates version has a more detailed pattern to handle this. For our checks, it doesn't matter, since we only need to know whether the state containsFULL.
This is also a good reason to use ntc-templates whenever a template already exists. Someone else has already dealt with these small details and tested the template against lots of real output.
If you're not familiar with the characters in the template, such as \d+ or \S+, they're part of a regular expression, or regex for short. A regular expression is a pattern that describes what a piece of text should look like. For example, \d means any digit, \S means any character that isn't a space, \s means space/tab, and + means one or more of the previous character. So \d+\.\d+\.\d+\.\d+ matches four groups of digits separated by dots, which is exactly what an IP address looks like. I've written a dedicated guide on using regex in Python, so feel free to check it out if you'd like to learn more.
Native JSON on Arista
Depending on the vendor you're working with, you may need to take a different approach to get structured output. Some platforms can return structured data directly, so there's no need for a parser at all. Arista is a good example of this.
For this section, I'm using an Arista switch called L1 from a separate lab, which is already running OSPF with two neighbors. Here's the normal output of show ip ospf neighbor.
L1#show ip ospf neighbor
Neighbor ID   Instance VRF      Pri State   Dead Time   Address    Interface
10.0.0.6      1        default  0   FULL    00:00:37    10.1.0.6   Ethernet2
10.0.0.5      1        default  0   FULL    00:00:36    10.1.0.2   Ethernet1
On Arista, you can add | json to the end of most show commands, and the switch returns the output as JSON instead.
L1#show ip ospf neighbor | json
{
  "vrfs": {
    "default": {
      "instList": {
        "1": {
          "ospfNeighborEntries": [
            {
              "routerId": "10.0.0.6",
              "interfaceAddress": "10.1.0.6",
              "interfaceName": "Ethernet2",
              "priority": 0,
              "adjacencyState": "full",
              "drState": null,
              "options": {...},
              "inactivity": 1793200516.403323,
              "details": {
                "areaId": "0.0.0.0",
                "designatedRouter": "0.0.0.0",
                "backupDesignatedRouter": "0.0.0.0",
                "numberOfStateChanges": 7,
                "bfdState": "adminDown",
                ...
              }
            },
            {
              "routerId": "10.0.0.5",
              "interfaceAddress": "10.1.0.2",
              "interfaceName": "Ethernet1",
              ...
            }
          ]
        }
      }
    }
  }
}
I've trimmed the output a bit, but there are a few things worth pointing out.
- It's already structured - The switch gives us the data in a format Ansible can use straight away, so there's no need for TextFSM or any templates.
- There's more information - The JSON output includes details that aren't shown in the plain output at all, such as the OSPF area of each neighbor, the number of state changes, and the BFD state. That's because it comes straight from the switch's own data, rather than from the text that's printed on the screen.
- It's nested quite deep - The neighbors are a few levels down, under the VRF and the OSPF instance. That's because Arista supports multiple VRFs and OSPF instances, so the output is organised by both.
- The key names are different - Arista uses its own names, such as
routerId,interfaceName, andadjacencyState, rather than theneighbor_id,interface, andstatewe got from ntc-templates. Every vendor structures its JSON differently, so you'll always need to look at the output first.
Using It with Ansible
First, let's add the Arista switch to the inventory, in a new group called arista.
---
all:
  children:
    routers:
      hosts:
        r1:
          ansible_host: 192.168.202.101
        ...
        r6:
          ansible_host: 192.168.202.106
    arista:
      hosts:
        eos1:
          ansible_host: 192.168.202.201
Next, create group_vars/arista.yml with the connection settings for the Arista switch.
---
ansible_network_os: arista.eos.eos
ansible_connection: ansible.netcommon.network_cli
ansible_user: admin
ansible_password: admin
Now, let's create a new playbook called parse_ospf_arista.yml.
---
- name: Get structured OSPF output from Arista
  hosts: arista
  gather_facts: false

  tasks:
    - name: Run show ip ospf neighbor as JSON
      arista.eos.eos_command:
        commands:
          - show ip ospf neighbor | json
      register: ospf_output

    - name: Display the OSPF neighbors
      ansible.builtin.debug:
        var: ospf_output.stdout[0]['vrfs']['default']['instList']['1']['ospfNeighborEntries']

    - name: List the neighbor IDs and interfaces
      vars:
        neighbors: "{{ ospf_output.stdout[0]['vrfs']['default']['instList']['1']['ospfNeighborEntries'] }}"
      ansible.builtin.debug:
        msg: "{{ neighbors | map(attribute='routerId') | list }} on {{ neighbors | map(attribute='interfaceName') | list }}"
This time, we're using eos_command rather than cli_parse. Since we added | json to the command, eos_command recognises the output as JSON, and turns it into structured data for us. So stdout[0] is already a dictionary, rather than a string of text.
To get to the list of neighbors, we follow the path through the nested data: vrfs, then default, then instList, then 1, and finally ospfNeighborEntries. Notice that the OSPF instance is written as ['1'] with quotes. That's because 1 is a key in a dictionary, not a position in a list.
In the last task, we use vars on the task to give that long path a shorter name, neighbors, and then use map to pull out the neighbor IDs and interfaces, just like we did with the parsed Cisco output.
ansible-playbook parse_ospf_arista.yml
PLAY [Get structured OSPF output from Arista] ****

TASK [Run show ip ospf neighbor as JSON] *********
ok: [eos1]

TASK [Display the OSPF neighbors] ****************
ok: [eos1] => {
  "ospf_output.stdout[0]['vrfs']['default']['instList']['1']['ospfNeighborEntries']": [
    {
      "adjacencyState": "full",
      "details": {
        "areaId": "0.0.0.0",
        ...
      },
      "interfaceAddress": "10.1.0.6",
      "interfaceName": "Ethernet2",
      "priority": 0,
      "routerId": "10.0.0.6",
      ...
    },
    {
      "adjacencyState": "full",
      ...
      "interfaceName": "Ethernet1",
      "routerId": "10.0.0.5",
      ...
    }
  ]
}

TASK [List the neighbor IDs and interfaces] ******
ok: [eos1] => {
  "msg": "['10.0.0.6', '10.0.0.5'] on ['Ethernet2', 'Ethernet1']"
}

PLAY RECAP ***************************************
eos1 : ok=3 changed=0 unreachable=0 failed=0 skipped=0 rescued=0 ignored=0
We get exactly the same kind of structured data as we did with the parsed Cisco output, and the same filters work on it. The only difference is that we didn't need a parser, since the switch did all the work for us.
Using Genie
You can also use other parsers with cli_parse. One popular option for Cisco devices is Genie, which is part of Cisco's pyATS framework, and comes with a huge library of parsers for Cisco platforms. To use it, install pyats and genie in your virtual environment.
uv add pyats genie
Then, create a new playbook called parse_ospf_genie.yml. The only change from the ntc-templates playbook is the parser name, ansible.netcommon.pyats.
---
- name: Parse OSPF neighbors with Genie
  hosts: r1
  gather_facts: false

  tasks:
    - name: Run and parse show ip ospf neighbor
      ansible.utils.cli_parse:
        command: show ip ospf neighbor
        parser:
          name: ansible.netcommon.pyats
      register: ospf_parsed

    - name: Display the parsed output
      ansible.builtin.debug:
        var: ospf_parsed.parsed
If you're on macOS, you may see an error saying A worker was found in a dead state when you run this playbook. This is a known issue with macOS and some Python libraries, including pyATS, and you can fix it by setting the following environment variable before running the playbook.
export OBJC_DISABLE_INITIALIZE_FORK_SAFETY=YES
The first run may also take a while, since Genie loads its parser library the first time it's used.
ansible-playbook parse_ospf_genie.yml
PLAY [Parse OSPF neighbors with Genie] ***********

TASK [Run and parse show ip ospf neighbor] *******
ok: [r1]

TASK [Display the parsed output] *****************
ok: [r1] => {
  "ospf_parsed.parsed": {
    "interfaces": {
      "Ethernet0/1": {
        "neighbors": {
          "2.2.2.2": {
            "address": "10.100.12.2",
            "dead_time": "00:00:31",
            "priority": 0,
            "state": "FULL/  -"
          }
        }
      },
      "Ethernet0/2": {
        "neighbors": {
          "4.4.4.4": {...}
        }
      },
      "Ethernet0/3": {
        "neighbors": {
          "3.3.3.3": {...}
        }
      },
      "Ethernet1/0": {
        "neighbors": {
          "5.5.5.5": {...}
        }
      }
    }
  }
}

PLAY RECAP ***************************************
r1 : ok=2 changed=0 unreachable=0 failed=0 skipped=0 rescued=0 ignored=0
We get the same information, but it's structured quite differently from ntc-templates. Instead of a flat list with one dictionary per neighbor, Genie organises the data by interface, and then by neighbor ID. The interface names and neighbor IDs are used as keys, rather than values. Neither approach is better, they're just different, but it does affect how you write your filters. For example, to loop over the interfaces here, you'd use dict2items, just like we did with the interface facts earlier in the series.
This post is part of an ongoing series on Ansible, and you can find all the other posts in the series here.