
"Can you suggest some specs for a server for my network labs?" is probably the question I get asked the most. People reach out all the time asking for recommendations. The thing is, I never really know their exact situation or what they’re trying to do in their lab. So, I usually just share what I have and what worked best for me, and let them decide what fits their setup.
In this post, I’ll go over the cheapest way to build your own network lab without spending too much.
What We Will Cover?
- Buying a used mini PC
- Proxmox as the hypervisor (optional)
- Linux as a VM
- Containerlab/Netlab, EVE-NG, Cisco CML
- Proxmox Backup Server (optional)
- Simplest Option for Absolute Beginners
TL;DR
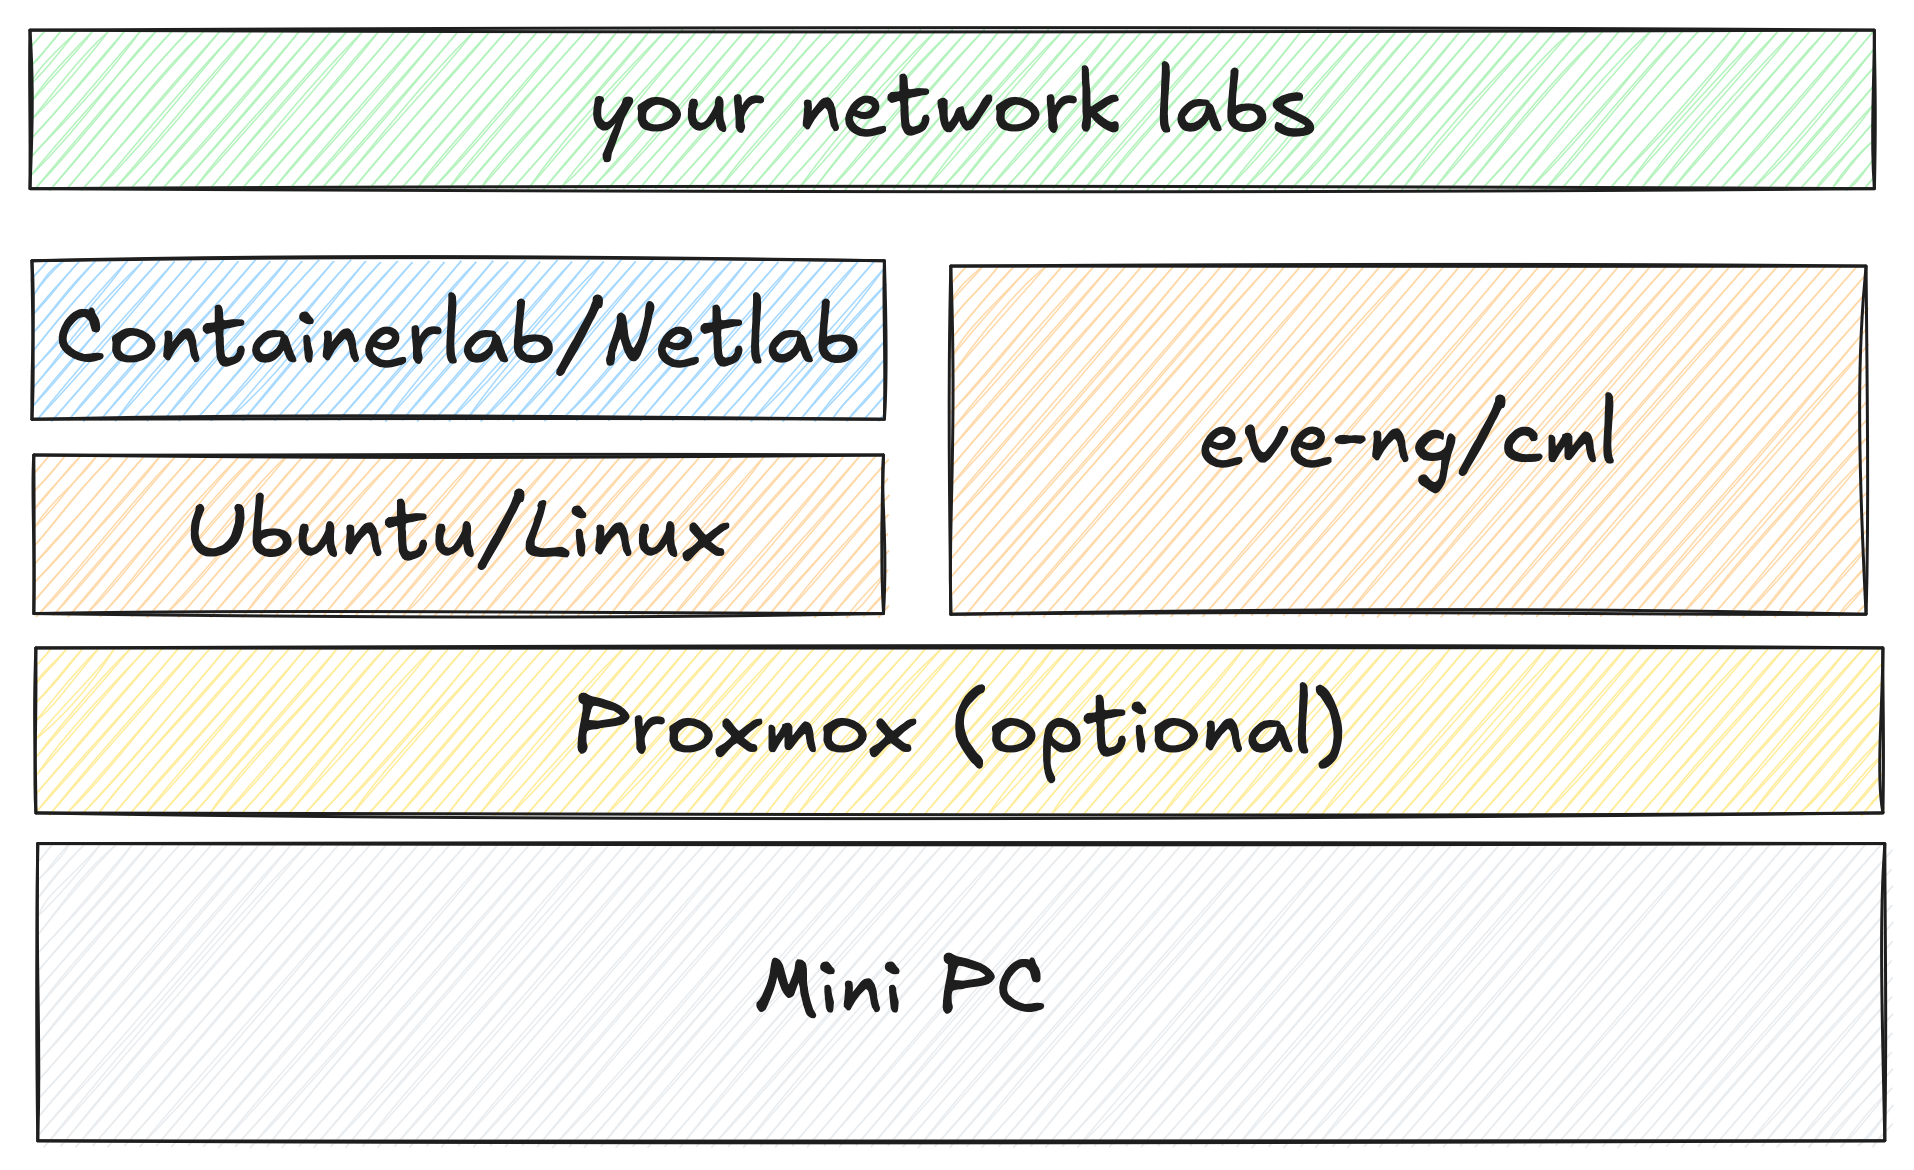
You don’t need expensive hardware to build a solid network lab. A used mini PC with decent specs is more than enough to run tools like Proxmox, Cisco CML, EVE-NG, or Containerlab. Start small with something like an Intel i5 8th Gen mini PC, 16 - 32GB of RAM, and an SSD. Use Proxmox for flexibility, backups, and snapshots, then run lightweight images like Arista cEOS, Cisco IOL, or Nokia SR Linux. If you want automation, add Netlab on top of Containerlab.
The focus here is on keeping costs low while still having a proper environment to learn routing, switching, and automation.
Who Is It For?
I want to focus on the budget option because while buying a decent server here in the UK isn’t a big deal for me, for readers in other parts of the world, it could mean spending a few months of their salary. I’m originally from Sri Lanka, and £1000 or even £500 back home is a huge amount.
If you’re planning to build a high-end homelab that can run things like Cisco ISE, firewalls such as Fortinet or Palo Alto, Cisco Nexus or SD-WAN setups, then this post isn’t for you. This one is mainly for those who want to learn traditional networking topics like OSPF, EIGRP, BGP, STP, MPLS, or EVPN, or anyone who wants to start with automation using Ansible or Python without spending a lot of money on expensive hardware. I’ll cover a more advanced homelab setup in another post.

Apart from the cost, one of the biggest challenges of running a network lab is obtaining the images. Some vendors make it easy, while others make it almost impossible (I’m looking at you, Cisco). Since most of us are already familiar with Cisco-like syntax, the best option is to use Arista. Anyone can create a free account on the Arista website and download the images without any trouble.
Here are some of the images you can run on a mini PC.
- Arista cEOS - Recommended, free to download.
- Cisco IOL - Well-known Cisco syntax, lightweight, but difficult to obtain the images.
- Juniper - Free to download, but you’ll struggle to run more than 2–4 nodes on a mini PC.
- Nokia SR Linux - Easy to download and use, but comes with a new syntax and a bit of a learning curve.
So, with that in mind, I recommend using Arista cEOS, but Nokia SR Linux or Cisco IOL are also good options. Keep in mind, though, according to Cisco’s terms and conditions, you’re not allowed to run IOL outside of CML, which is a bit of a bummer. But honestly, just do it anyway. What are they really going to do?

Please Buy a (used) Mini PC
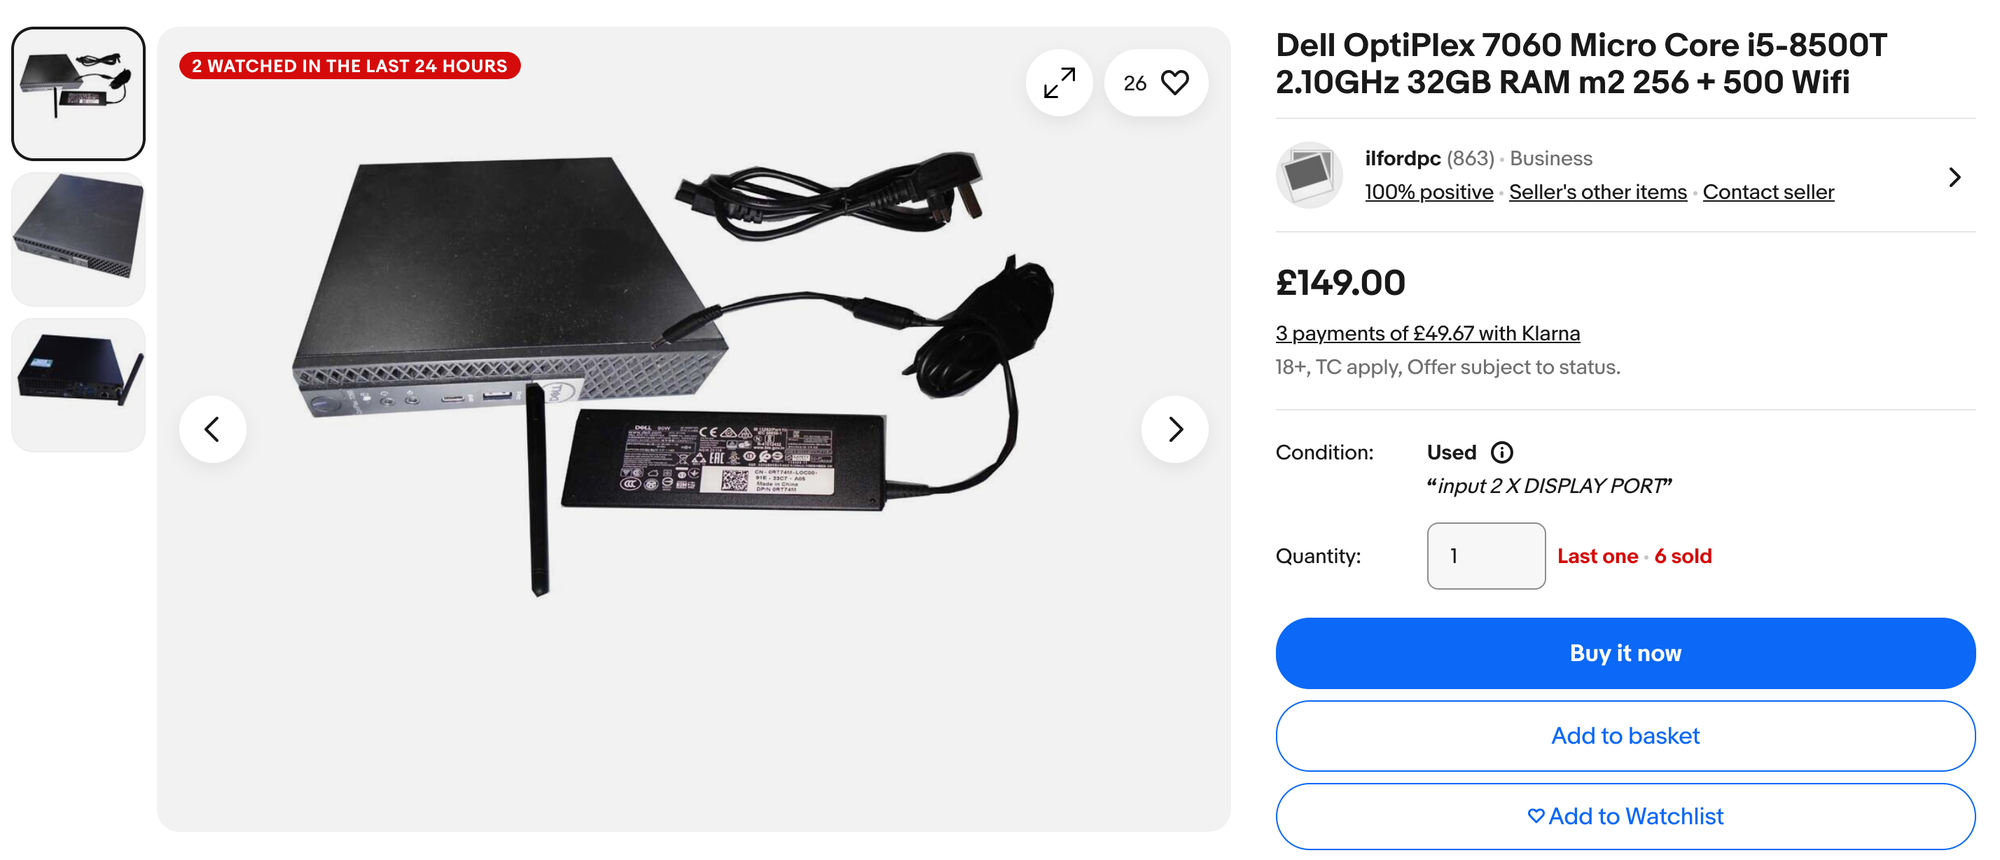
For the past year or so, I’ve been using a mini PC (a Dell OptiPlex 7060) that I bought for around £120 with 32GB of RAM. I added a 1TB SSD and have been using it ever since. It has an Intel i5-8500T CPU and came with a 256GB NVMe drive as well. It’s tiny, quiet, uses very little power, and you can place it anywhere in your home without it standing out.
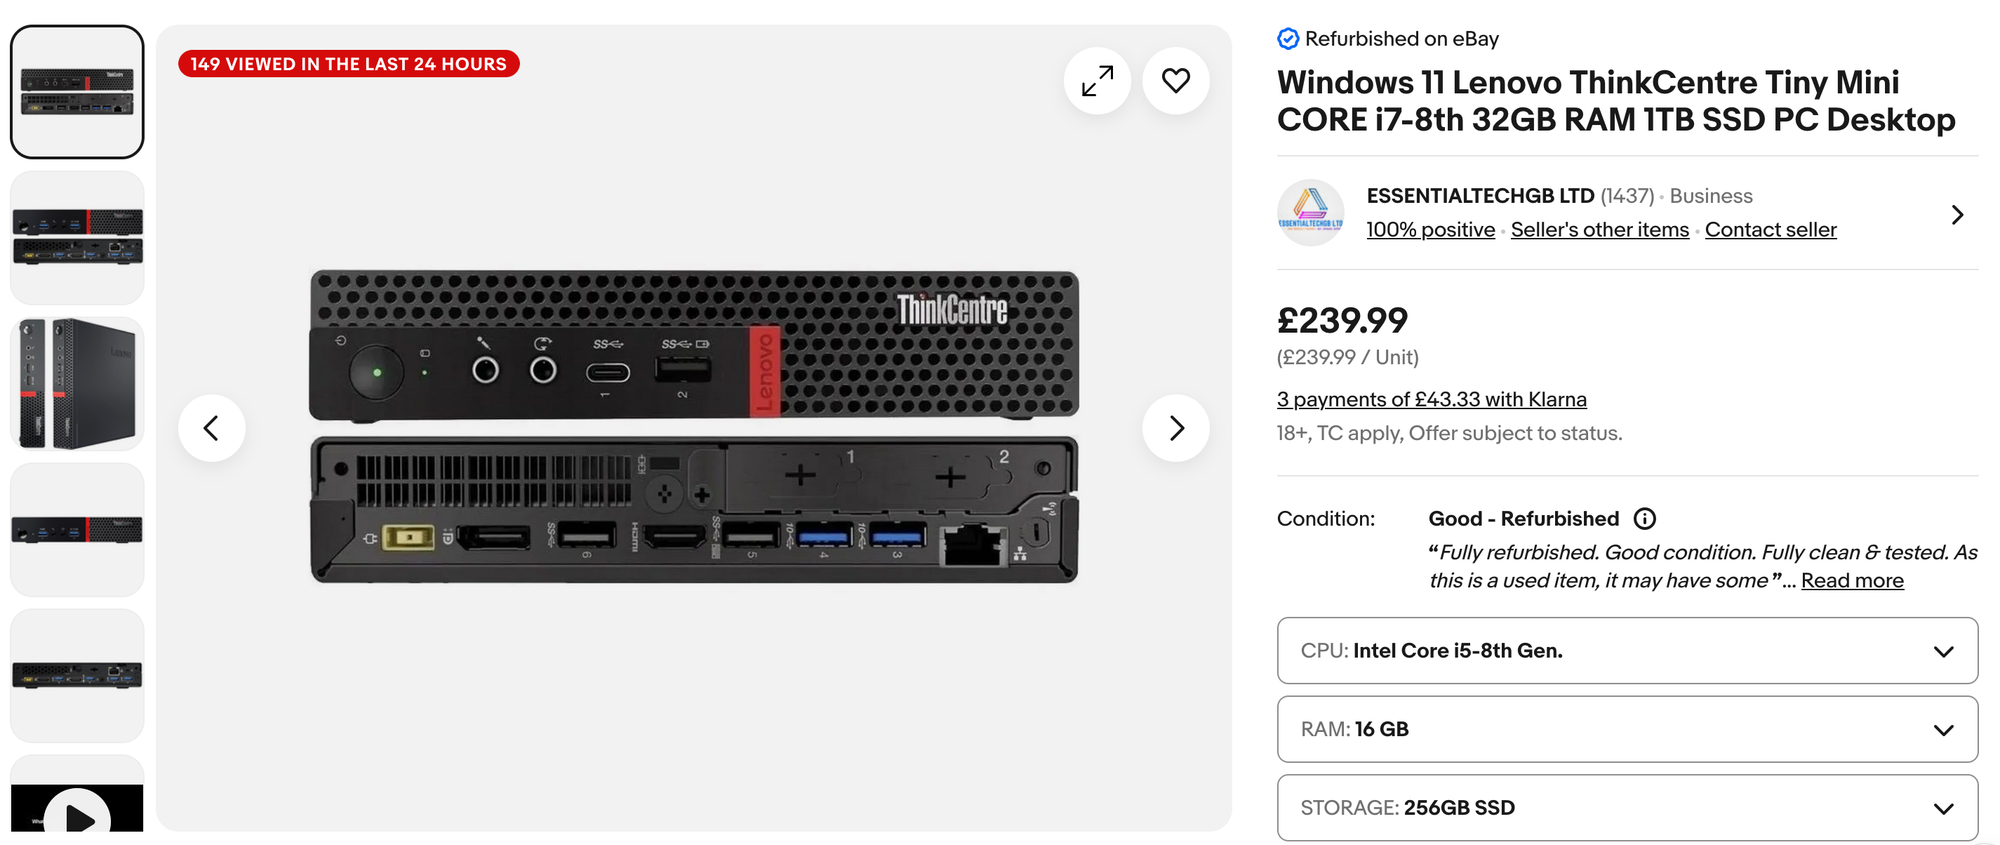
You don’t have to get the same model. I’d suggest looking for any mini PC with at least an Intel i5 8th Gen CPU. I haven’t used AMD systems myself, so I can’t comment on them. There are plenty of used mini PCs from Lenovo, Dell, and HP available on eBay or other second-hand marketplaces. If you have a bit more to spend, you can go for an i7 or a newer generation CPU, but it’s not really necessary for most network lab work.
If you’re buying from eBay, you can usually find these for around £200. Prices can vary depending on the seller, so it’s worth shopping around. For example, you might find a Lenovo mini PC with an i5 8th Gen CPU, 16GB of RAM, and a 256GB SSD in that price range.
Here is another Dell with more or less the same specs (the same model I have)
Again, as I said before, this isn’t for everyone. It’s for those who want to build a budget-friendly lab with minimal investment, low power consumption, and almost no noise.
Hypervisor or Not?
Once you have your mini PC, the next decision is whether or not to use a hypervisor like Proxmox or ESXi. I highly recommend using Proxmox as your hypervisor for a few reasons.
With Proxmox (or any other hypervisor), you can install Ubuntu, CML, or EVE-NG as virtual machines. You can even have all of them installed at the same time and simply choose which one to use when needed. One of the main benefits of using Proxmox for me is snapshots and backups. I experiment a lot and often break things, so when that happens, I just revert to a previous snapshot in Proxmox.
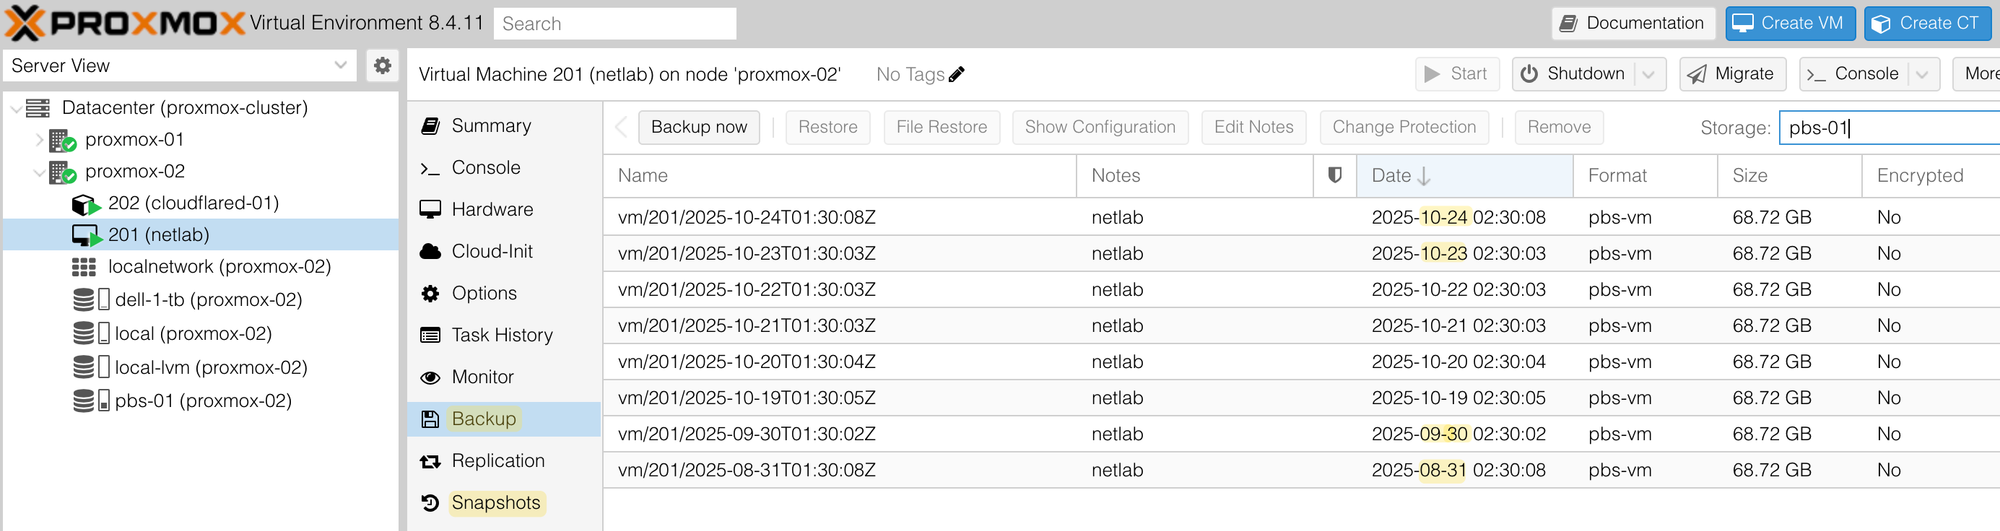
I also run Proxmox Backup Server (more on this later) on another mini PC, which automatically backs up all my VMs every day. If I ever mess something up badly, I can restore the VM to how it was before, and this has saved me many times.
If you install something like Linux, CML or EVE-NG directly on your mini PC instead of using a hypervisor, you’ll need to come up with your own backup and restore method. It’s a tradeoff. With Proxmox, you have a small learning curve and one more thing to manage, but the benefits are worth it. This is one of my favourite YouTube creators for Proxmox content, so feel free to check it out.
EVE-NG vs Cisco CML vs Containerlab
I know I haven’t mentioned GNS3, so don’t hate me for it. I just haven’t used it for a long time, so I can’t really say how good it is now. But if you think it’s a better option, feel free to let me know in the comments.
EVE-NG
EVE-NG, as most of you already know, is a great platform for creating network labs. It has a free community edition and a paid pro version. I’ve used it a lot in the past, but I haven’t touched it in the last year or so. Keep in mind that EVE-NG doesn’t come with any images, so you need to bring your own.
The free version is more than enough for most people. You can find plenty of guides and videos on EVE-NG since it’s one of the most popular network emulators out there. There are plenty of guides out there on how to install EVE-NG, so I’m going to skip that part.
Cisco CML
Cisco CML is another tool, and probably the only way to legally get Cisco images. It does have a free plan, but you can only run 5 nodes, which honestly feels like Cisco taking the piss out of us. Five nodes just aren’t enough for any proper lab. To run more, you’ll need to buy an annual subscription.
- The personal plan is $199 and lets you run up to 20 nodes.
- If you want 40 nodes, you need the personal plus plan, which costs $349 as of writing this post.
I don’t know, it just doesn’t sit well with me. It feels like they’re trying to squeeze every penny out of users. In my opinion, it should be free for everyone. For that reason, I don’t usually recommend it. On the positive side, if you’re willing to pay for it, CML does come preinstalled with a wide range of images like routers, switches, firewalls, and even Cisco ISE and Firepower (as far as I know). So you don’t have to go searching for images online.
There are plenty of guides on how to install CML, but I’ve covered parts of it in a couple of posts, so feel free to check them out below.


Containerlab (My Favourite)
Containerlab is an absolutely amazing tool, and I’ve been using it for years now. I really love it. There is a bit of a learning curve, but once you get the hang of it, it’s hard to go back. If you’ve never heard of it, think of Containerlab as a way to define your lab using a simple YAML file. That’s pretty much it. For example, if you want two routers and one switch connected together, you don’t need to manually create the links or add them in a GUI. You just define them in the YAML file and run the lab.
The best part is that you can share your topology file with anyone, and they can spin up the exact same lab on their system.
For example, here I have two routers and a switch defined in a topology file with links between them. Once you run the lab, Containerlab will spin up the devices, and within a few seconds, you’ll have access to them. It even assigns management IPs and hostnames automatically, so you can SSH into the devices right away.
---
name: simple_lab

mgmt:
  network: mgmt
  ipv4-subnet: 192.168.100.0/24

topology:
  nodes:
    iol-1:
      kind: cisco_iol
      image: vrnetlab/cisco_iol:17.12.01
      mgmt-ipv4: 192.168.100.31
    iol-2:
      kind: cisco_iol
      image: vrnetlab/cisco_iol:17.12.01
      mgmt-ipv4: 192.168.100.32
    iol-3:
      kind: cisco_iol
      image: vrnetlab/cisco_iol:l2-17.12.01
      type: l2
      mgmt-ipv4: 192.168.100.40

  links:
    - endpoints: ["iol-1:Ethernet0/1","iol-3:Ethernet0/1"]
    - endpoints: ["iol-2:Ethernet0/1","iol-3:Ethernet0/2"]
I’ve covered Containerlab extensively in several posts, but the following two should be enough to get you up and running.
Just like EVE-NG, Containerlab doesn’t come with any images, so you’ll need to obtain them yourself. For Arista, create a free account and download cEOS. I have a step-by-step guide on this linked above.
Netlab - Great Addition to Containerlab
Netlab takes it even further by preconfiguring the devices that Containerlab spins up. Please note that Containerlab and Netlab work together, so they’re not comparable. They actually complement each other. When you install Netlab, it automatically installs Containerlab as well and depends on it to run the images.
For example, if you want to quickly create a lab with four routers running OSPF and the links between them, that’s all you need to define. Netlab will automatically generate the Containerlab topology file, spin up the lab, and then push the OSPF configuration to each router.
provider: clab
defaults.device: eos
defaults.devices.eos.clab.image: ceos:4.34.2

module: [ ospf ]
nodes: [r1, r2, r3, r4]
links:
  - r1-r2
  - r2-r3
  - r3-r4
By the time the devices finish booting up, usually within a minute or two, everything is ready. When you SSH into them, the interfaces, IP addresses, and OSPF setup are already configured for you.
What To Choose?
If you want to use Containerlab or Netlab, you’ll first need to install Linux as a VM and then install Containerlab on top of it. There’s a small learning curve, especially if you’re not familiar with Docker or Linux, but it’s not too hard to get started. Plus, it’s a great way to learn more about Linux, containers, and how network automation tools actually work under the hood.
If you’re not convinced or just want something simpler, then go for EVE-NG or CML. Both can be installed directly on Proxmox as virtual machines, which makes things easier to manage. Here’s a quick summary to help you decide.
- Proxmox + Linux + Containerlab/Netlab (I want to go crazy) - Great for learning Linux, Docker, and automation. Slightly more setup, but very flexible. You can start with 4 CPU cores and 16GB RAM, but you can change it later.
- Proxmox + EVE-NG or CML (I'm happy learning Proxmox) - Easier to set up, good for traditional network labs. GUI-based, so less Linux knowledge is required. You can start with 4 CPU cores and 16GB RAM, but you can change it later.
- Bare metal install (Just tell me the simple option) - You can install Linux, EVE-NG, or CML directly on your mini PC if you don’t want to deal with Proxmox. It’s simpler, but you lose some flexibility, like snapshots and VM backups.
Choose the route that fits your comfort level and what you want to learn. There’s no single right answer here.
Benchmarks
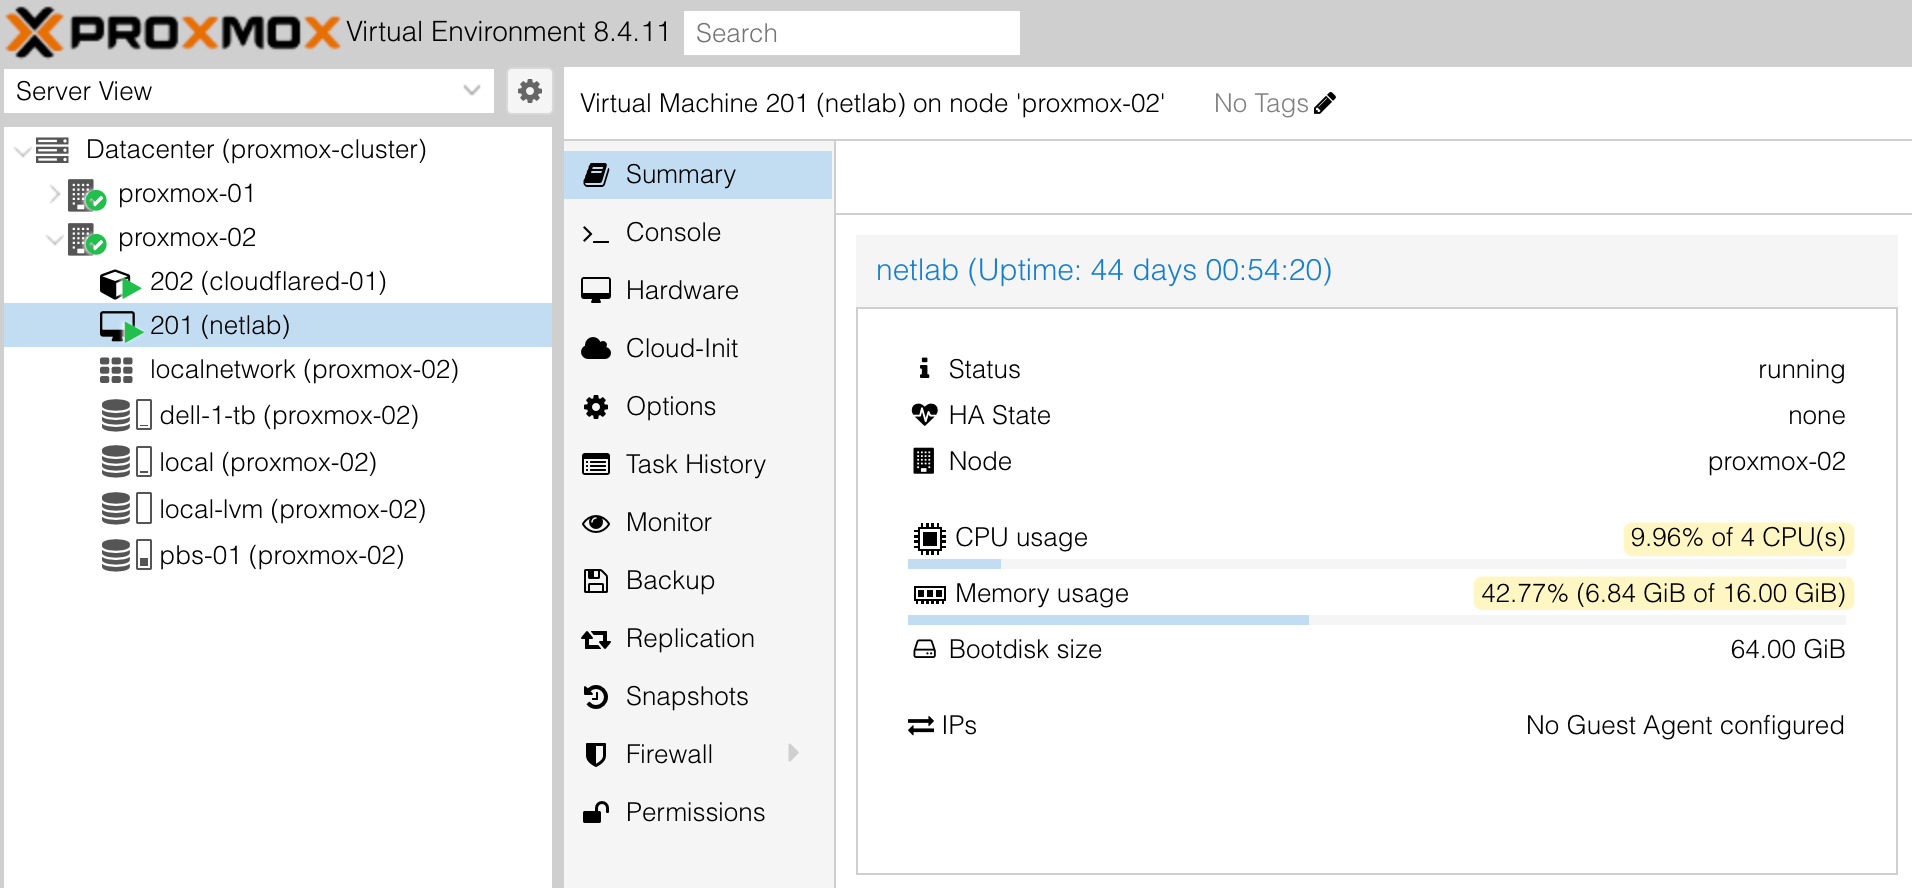
Just to give you an idea of what to expect, I created a lab with 15 Cisco IOL routers running OSPF and BGP between them. The Ubuntu VM has 4 CPU cores and 16GB of RAM. I used Netlab for this, so I didn’t have to configure each device manually, just a few lines in a YAML file and that’s it. I’ll attach the topology file in case you want to take a look at it.
Once all the devices came up, I checked the resource usage using htop and the Proxmox GUI. The system wasn’t even close to being maxed out, so I’m quite confident I could easily run 30 or more nodes on this setup without any issues.
Proxmox Backup Server
Setting up a Proxmox Backup Server is completely optional, but it’s a great addition if you have another mini PC lying around. It doesn’t need to be powerful at all, even a low-spec system will do the job. You can use it to back up all your VMs from your main Proxmox server and schedule the backups to run automatically. The best part is that even if you lose your main Proxmox server, you can easily restore all your VMs from the backup server and get back up and running quickly.
I have a dedicated post on how to set this up, which I’ve linked below if you want to try it out. It’s one of those small things that gives you a lot of peace of mind.
Simplest Option for Absolute Beginners
If you’re a total beginner and just want the simplest setup, here’s what I recommend. Buy a mini PC, install Windows 11, then install VMware Workstation (it’s free for personal use). From there, you can create virtual machines and install Linux, EVE-NG, or CML inside them.

This is by far the most straightforward option. You don’t need to worry about Linux commands or Proxmox setup. Everything runs from a familiar Windows interface, and you can start building your labs right away.
Closing up
That’s pretty much it for this post. The goal here wasn’t to build the ultimate lab, but to show that you can still learn and experiment with networking using simple, affordable hardware. A used mini PC and a few free tools are more than enough to get started.
As always, start small, experiment, and break things. That’s the best way to learn. I’ll cover a more advanced setup with higher-end hardware in a future post, so stay tuned for that. If you have any questions or want to share your own setup, drop a comment below. I’d love to hear what you’re running in your home lab.