Welcome to today's blog post where we'll dive into pan.xapi, a Python interface for working with the PanOS XML API. If you're like me, trying to automate Palo Alto firewalls, you've probably run into some limitations with existing tools. For instance, with Ansible, sometimes you just can't find the right module for what you need to do.
Or maybe you're using the pan-os-python library and hit a wall because it doesn't have the right Classes for certain configurations. That's where pan.xapi comes in. It offers a way to handle pretty much any configuration that the PanOS XML API supports. Let's dive into an example and see why pan.xapi can be a lifesaver for those tricky automation tasks.
Installation
In order to start using pan.xapi, it's important to know that it is included in the pan-python library. This makes installation really straightforward. Just open your terminal and type pip install pan-python. Once that's done, you're all set to begin.
Another option is to use pan-os-python, which also installs pan-python as part of its package. Personally, I prefer using pan-os-python as it gives me more features and a modern approach to automation.
pip install pan-os-pythonCreate Address Objects with pan.xapi
Before diving in, let's clarify something. If you're using pan-os-python, there's already a Class to create an address object, which means you don't necessarily need to use the XML API for this task. But for the sake of simplicity, I'll be using the XML API method here because, let's face it, almost everyone knows what an address object is.
Now, to work with the PanOS XML API, there are two key things you need to be familiar with, the XPath and the XML element (which is the actual XML body). The XPath is the XML path in the API where you're sending your command or config, and the XML element is what you're sending.
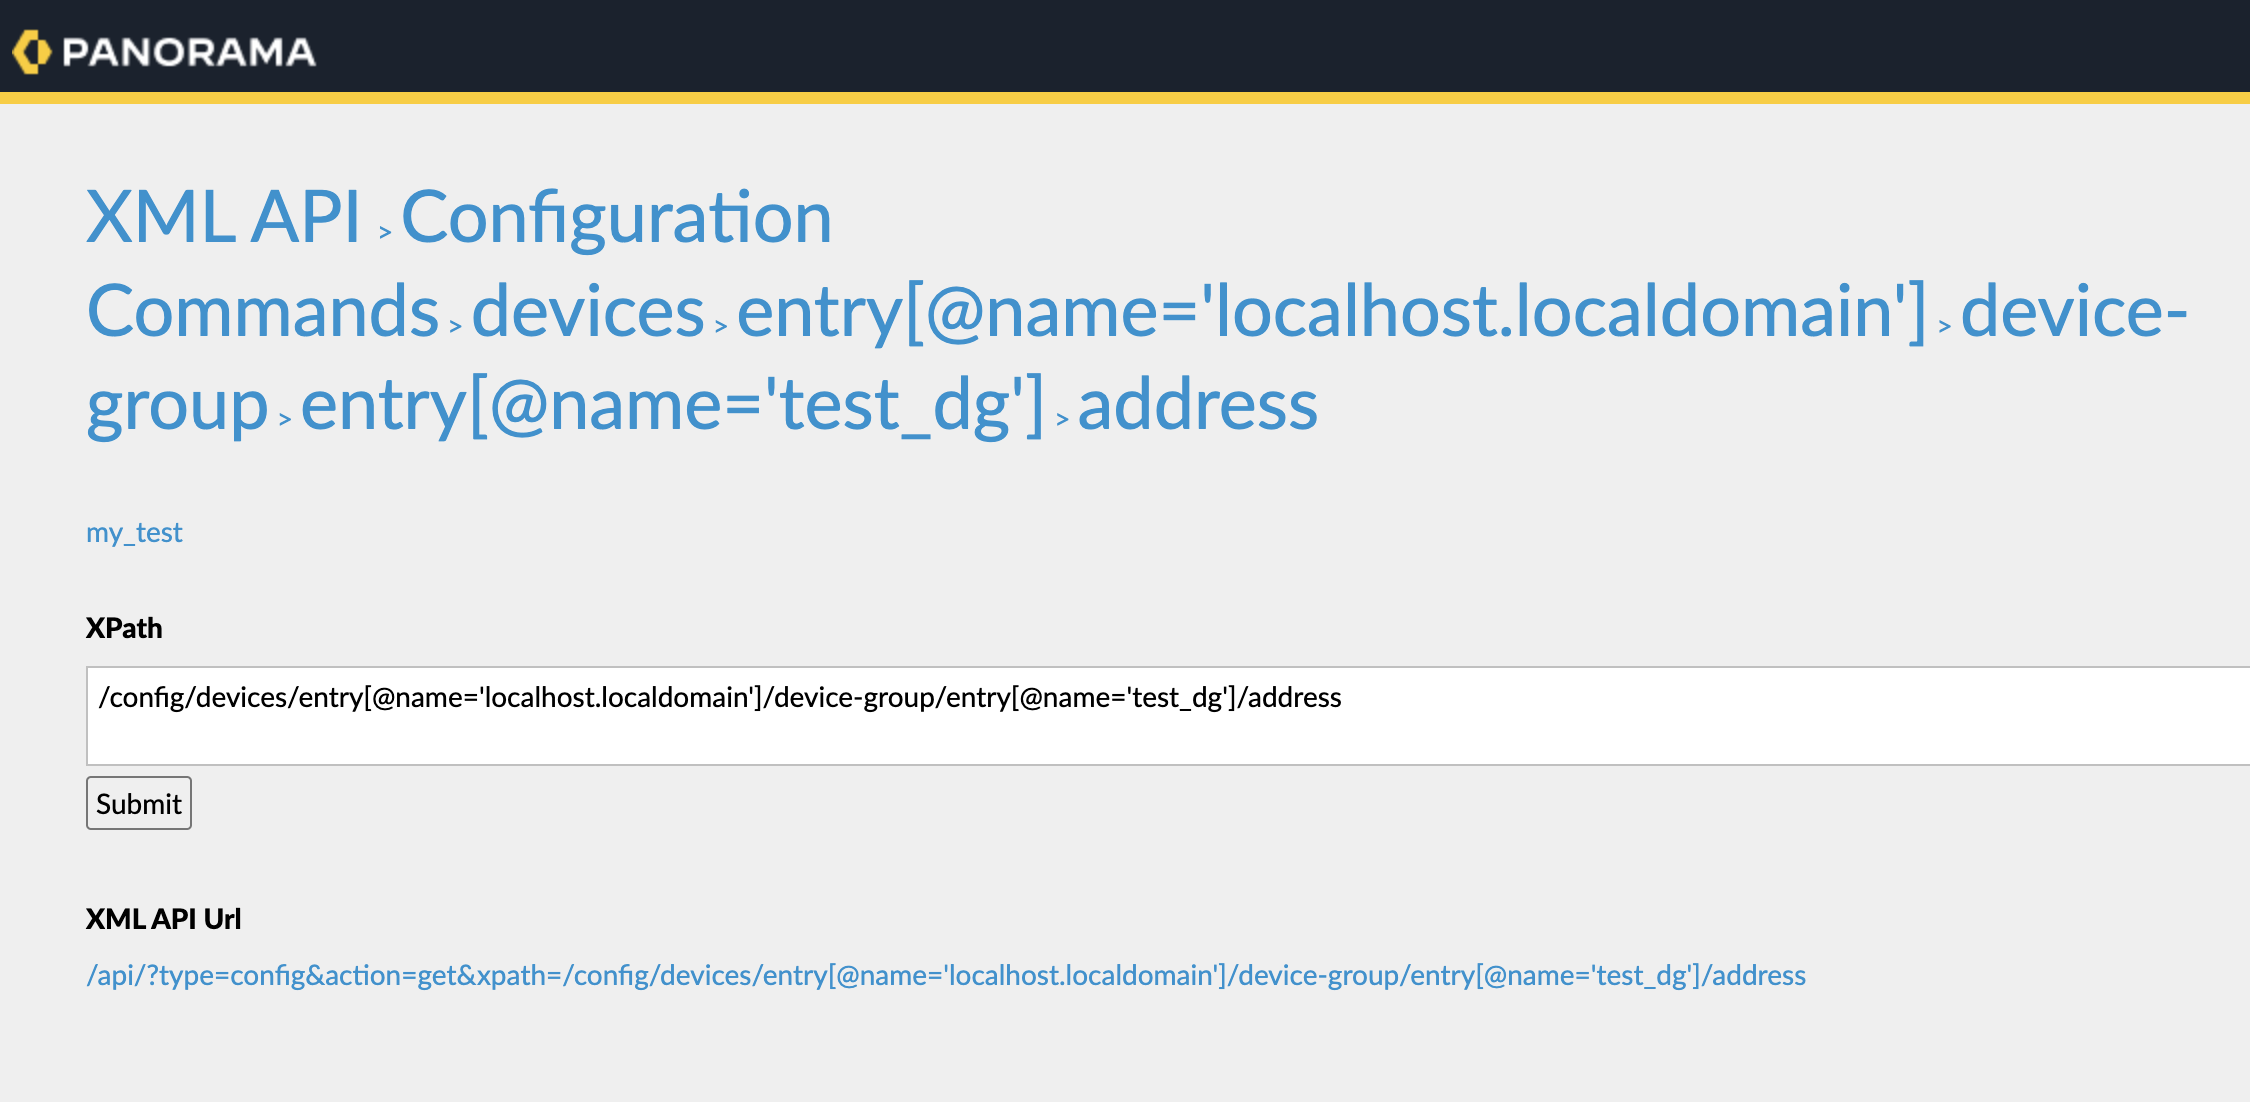
The simplest way to find the XPath for what you want to configure is to head over to your firewall's API browser. Just type https://[your_firewall_ip]/api in your browser and explore. I've included a screenshot in the blog post to show you what this looks like. This tool is incredibly useful for understanding the structure of the API and finding the exact paths you need.
Also, if you already have an address object set up, you can check it to see what the XML body should look like. This can be a great starting point for building your own element.
Panorama
For this first example, I'm using Panorama, but you can just as easily apply this to a standalone firewall. Just remember, the XPath might differ slightly between a Panorama and a standalone firewall.
from panos.panorama import Panorama
import xml.etree.ElementTree as ET
pan = Panorama('10.10.1.1', 'username', 'password' )
def create_object():
xpath = f"/config/devices/entry[@name='localhost.localdomain']/device-group/entry[@name='test_dg']/address"
xml_element = f"""
<entry name="xml_api">
<ip-netmask>1.1.1.1/32</ip-netmask>
</entry>
"""
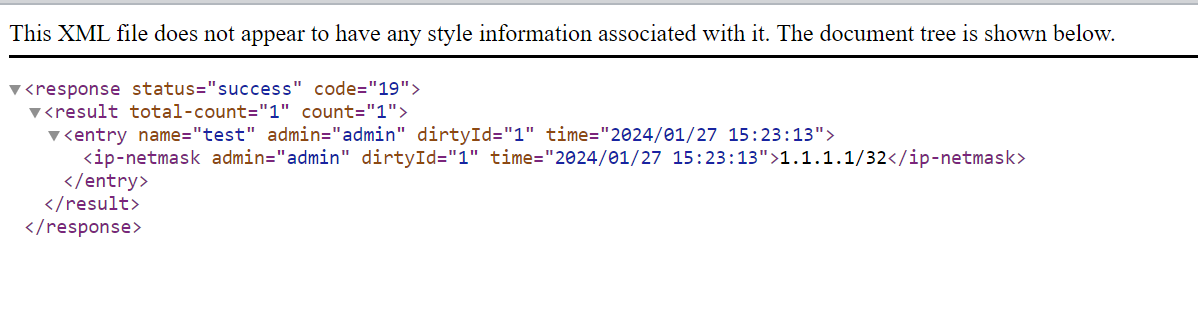
response = pan.xapi.set(xpath=xpath, element=xml_element)
response_xml_str = ET.tostring(response, encoding='unicode')
print(response_xml_str)
create_object()#output
<response status="success" code="20"><msg>command succeeded</msg></response>Firewall
Here is an example if you are targeting the firewall directly.
from panos.firewall import Firewall
import xml.etree.ElementTree as ET

fw = Firewall('10.10.20.34', 'admin', 'password' )

def create_object():
    xpath = f"/config/devices/entry[@name='localhost.localdomain']/vsys/entry[@name='vsys1']/address"
    xml_element = f"""
    <entry name="xml_api_firewall">
        <ip-netmask>10.10.20.100/32</ip-netmask>
    </entry>
    """
    response = fw.xapi.set(xpath=xpath, element=xml_element)
    response_xml_str = ET.tostring(response, encoding='unicode')
    print(response_xml_str)

create_object()
#output
<response status="success" code="20"><msg>command succeeded</msg></response>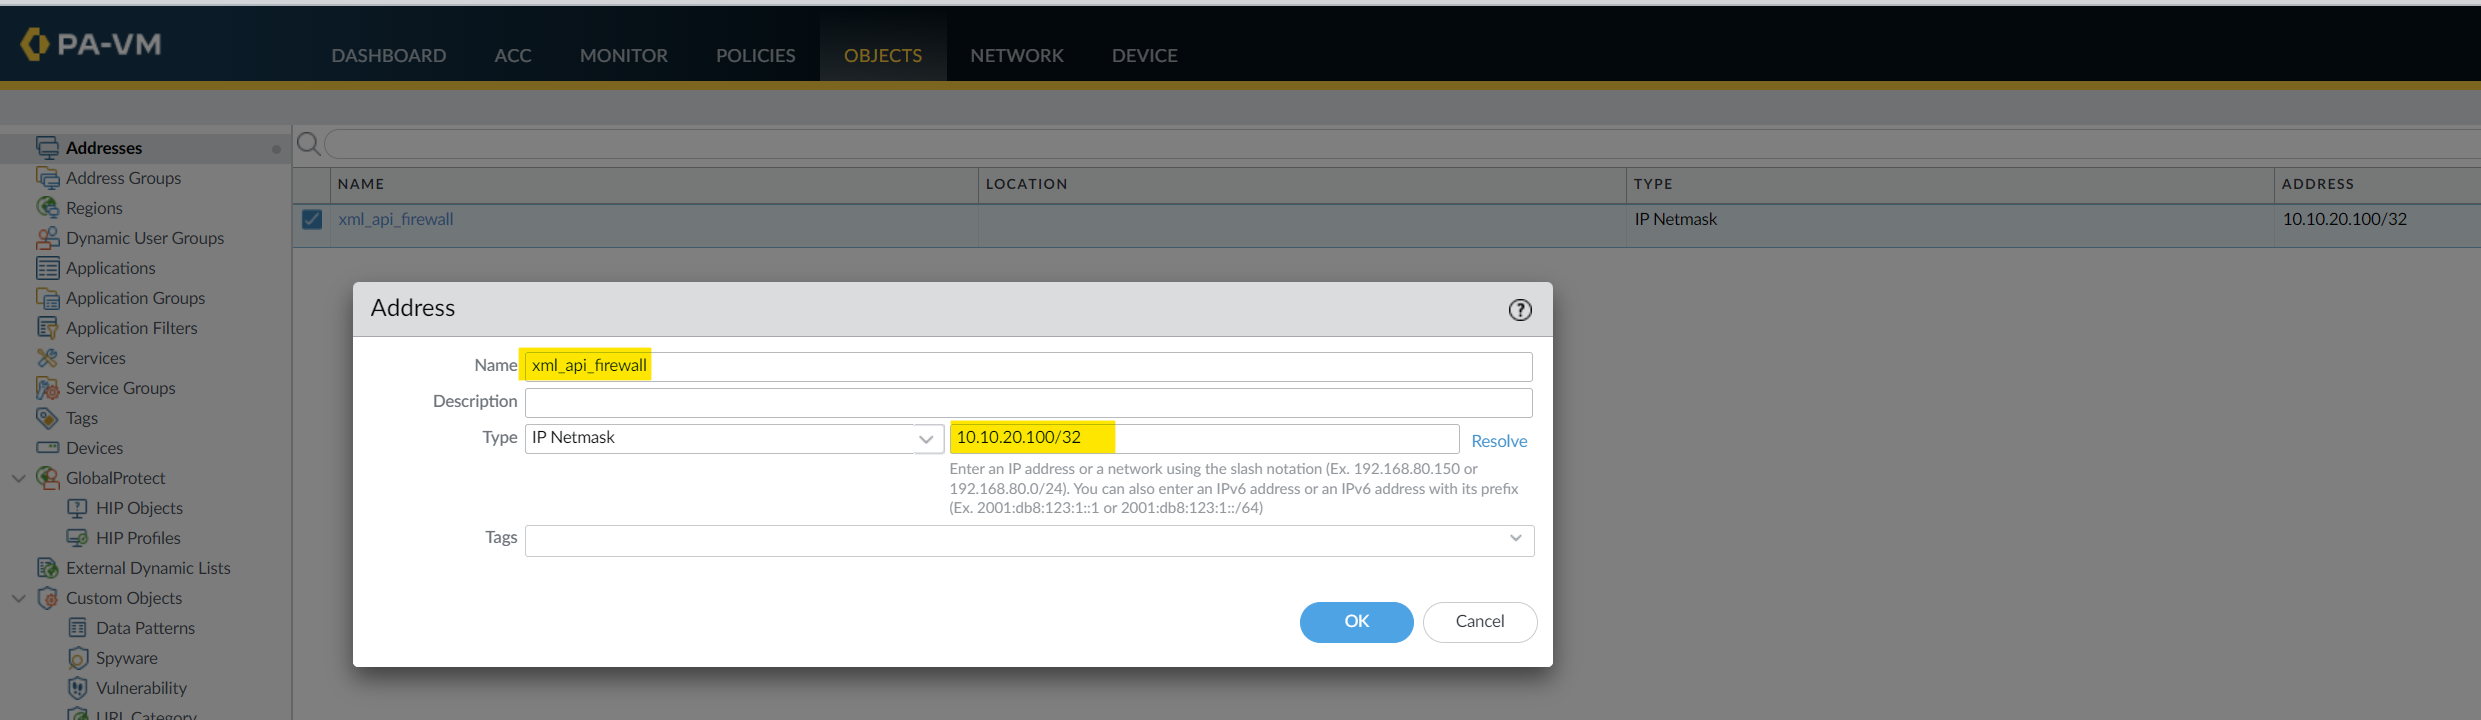
Deleting Resources with pan.xapi
So far, we've seen how to create objects. But what about when you need to get rid of them? Don't worry, deleting resources with pan.xapi is just as easy as creating them. The big difference here is the method we use – this time, it's delete instead of set.
One important thing to remember when deleting is to use quotes around the name of the resource. This ensures that the command targets the specific resource you want to remove.
Here's an example of how to delete an address object we created earlier on the firewall.
from panos.firewall import Firewall
import xml.etree.ElementTree as ET

fw = Firewall('10.10.20.34', 'admin', 'password' )

def delete_object(resource):
    xpath = f"/config/devices/entry[@name='localhost.localdomain']/vsys/entry[@name='vsys1']/address/entry[@name='{resource}']"
    response = fw.xapi.delete(xpath=xpath)
    response_xml_str = ET.tostring(response, encoding='unicode')
    print(response_xml_str)

delete_object('xml_api_firewall')
#output
<response status="success" code="20"><msg>command succeeded</msg></response>In this script, we connect to the firewall and specify the XPath. The delete_object function takes the name of the resource (in this case, 'xml_api_firewall') as an argument. Notice how we've enclosed 'xml_api_firewall' in quotes in the XPath. This is crucial for the delete command to accurately find and remove the specified address object.
Running this script will remove the specified object from your firewall's configuration.
Running Show Commands
In this section, we're going to use the XML API to run 'show system info' command on a Palo Alto firewall and then extract some details from the output. I'll keep it simple here, but keep in mind that working with XML data in Python often involves understanding the ElementTree module, which could be a topic for another post. Here's a basic script to get us started.
Raw CLI Output
admin@palo-01(active)> show system info
hostname: palo-01
ip-address: 10.10.20.34
public-ip-address: unknown
netmask: 255.255.0.0
default-gateway: 10.10.0.1
ip-assignment: static
ipv6-address: unknown
ipv6-link-local-address: fe80::5200:ff:fe01:0/64
ipv6-default-gateway:
mac-address: 50:00:00:01:00:00
time: Tue Jan 30 20:12:26 2024
uptime: 0 days, 0:07:04
family: vm
model: PA-VM
serial: unknown
vm-mac-base: BA:DB:EE:FB:AD:00
vm-mac-count: 255
vm-uuid: 11684ECD-072D-49BA-ACDB-6810DE3C181B
vm-cpuid: KVM:63060000FDFB8B07
vm-license: none
vm-cap-tier: unknown
vm-cpu-count: 2
vm-memory: 4031300
vm-mode: KVM
cloud-mode: non-cloud
sw-version: 10.1.3
global-protect-client-package-version: 0.0.0
device-dictionary-version: 1-211
device-dictionary-release-date:
app-version: 8468-6979
app-release-date:
av-version: 0
av-release-date:
threat-version: 8468-6979
threat-release-date:
wf-private-version: 0
wf-private-release-date: unknown
url-db: paloaltonetworks
wildfire-version: 0
wildfire-release-date:
wildfire-rt: Disabled
url-filtering-version: 0000.00.00.000
global-protect-datafile-version: unknown
global-protect-datafile-release-date: unknown
global-protect-clientless-vpn-version: 0
global-protect-clientless-vpn-release-date:
logdb-version: 10.1.2
dlp: dlp-1.0.4
vm_series: vm_series-2.1.3
platform-family: vm
vpn-disable-mode: off
multi-vsys: off
operational-mode: normal
device-certificate-status: None
from panos.firewall import Firewall
import xml.etree.ElementTree as ET

fw = Firewall('10.10.20.34', 'admin', 'password')
output = fw.op("show system info")
If you try to print the output variable, you'll see something like <Element 'response' at 0x102531810>. This is a representation of an Element object from the ElementTree module, which holds the XML data returned by the firewall.
To navigate through this XML data, we can use the iter() method. This method is super useful for iterating over all elements in the XML tree. It allows you to access each XML element in the document, one at a time. Let's see all the elements in our XML output.
my_list = [elem.tag for elem in output.iter()]
for elem in my_list:
    print(elem)
#output
response
result
system
hostname
ip-address
public-ip-address
netmask
default-gateway
is-dhcp
ipv6-address
ipv6-link-local-address
mac-address
time
uptime
devicename
family
model
serial
vm-mac-base
vm-mac-count
vm-uuid
vm-cpuid
vm-license
vm-cap-tier
vm-cores
vm-mem
relicense
vm-mode
cloud-mode
sw-version
global-protect-client-package-version
device-dictionary-version
app-version
av-version
threat-version
wf-private-version
wf-private-release-date
url-db
wildfire-version
wildfire-rt
url-filtering-version
global-protect-datafile-version
global-protect-datafile-release-date
global-protect-clientless-vpn-version
logdb-version
plugin_versions
entry
pkginfo
entry
pkginfo
platform-family
vpn-disable-mode
multi-vsys
operational-mode
device-certificate-statusNow, let's say you want to find specific information like the management IP and the hostname. You can use the iter() method again but specify the name of the tag you're interested in. The iter() method will then go through the XML tree and return elements that match the tag name, allowing you to access their content. Here's how you can do it.
for elem in output.iter('ip-address'):
    print(elem.text)

for elem in output.iter('hostname'):
    print(elem.text)
#output
10.10.20.34
palo-01This will print the management IP address and the hostname of the firewall. It's a straightforward way to extract specific information from the XML output using the iter() method.