In this second part, we will cover what the Python interpreter is, how to run a simple script, how to install VS Code, and how to run a very basic program in it. Our ultimate goal here is to run a Python program that prints out Hello World! in the terminal. If you can do this successfully, welcome to the Python Club.
Python Interpreter vs Python File
When you first install Python, you can run your code in two common ways. The first is by using the Python interpreter directly. You can open a terminal and type python3, and you will see a prompt where you can type commands line by line. For example, typing print('hello') will immediately show hello as output. This is useful for quick testing or trying out small bits of code.
python3
Python 3.10.12 (main, Jun 21 2024, 21:09:27) [Clang 15.0.0 (clang-1500.3.9.4)]
Type "help", "copyright", "credits" or "license" for more information.
>>> print('Hello')
Hello
>>> quit()
The second way is by creating a Python file. You can open any text editor, write your code, save it as something like test.py, and then run it by typing python3 test.py in your terminal. This is how you usually handle longer code because you can save your work, edit it later, and share it easily.
#test.py
print('Hello')
python3 test.pyBoth methods are valid, but for anything beyond quick tests, saving your code in a file and running it is a better approach.
Visual Studio Code
When you start writing more than a few lines of code, working directly in the interpreter is no longer practical. For larger code bases, you would typically use an IDE or a good code editor. This is where VS Code comes in. It is a lightweight editor with powerful features like syntax highlighting, code completion, and built‑in debugging tools. These features make it easier to write, manage, and troubleshoot your code. Let’s go ahead and install VS Code so we can use it to run our Python scripts.
You can easily download and install VS Code just like any other application. Head over to the official website, download the version for your operating system, and follow the installation steps. Once the installation is complete, you are ready to launch VS Code and start using it.
After installing VS Code, go ahead and create a new directory (or folder) anywhere you like. This will be our workspace or project folder. Open this directory in VS Code to start creating and managing your files directly from the editor.
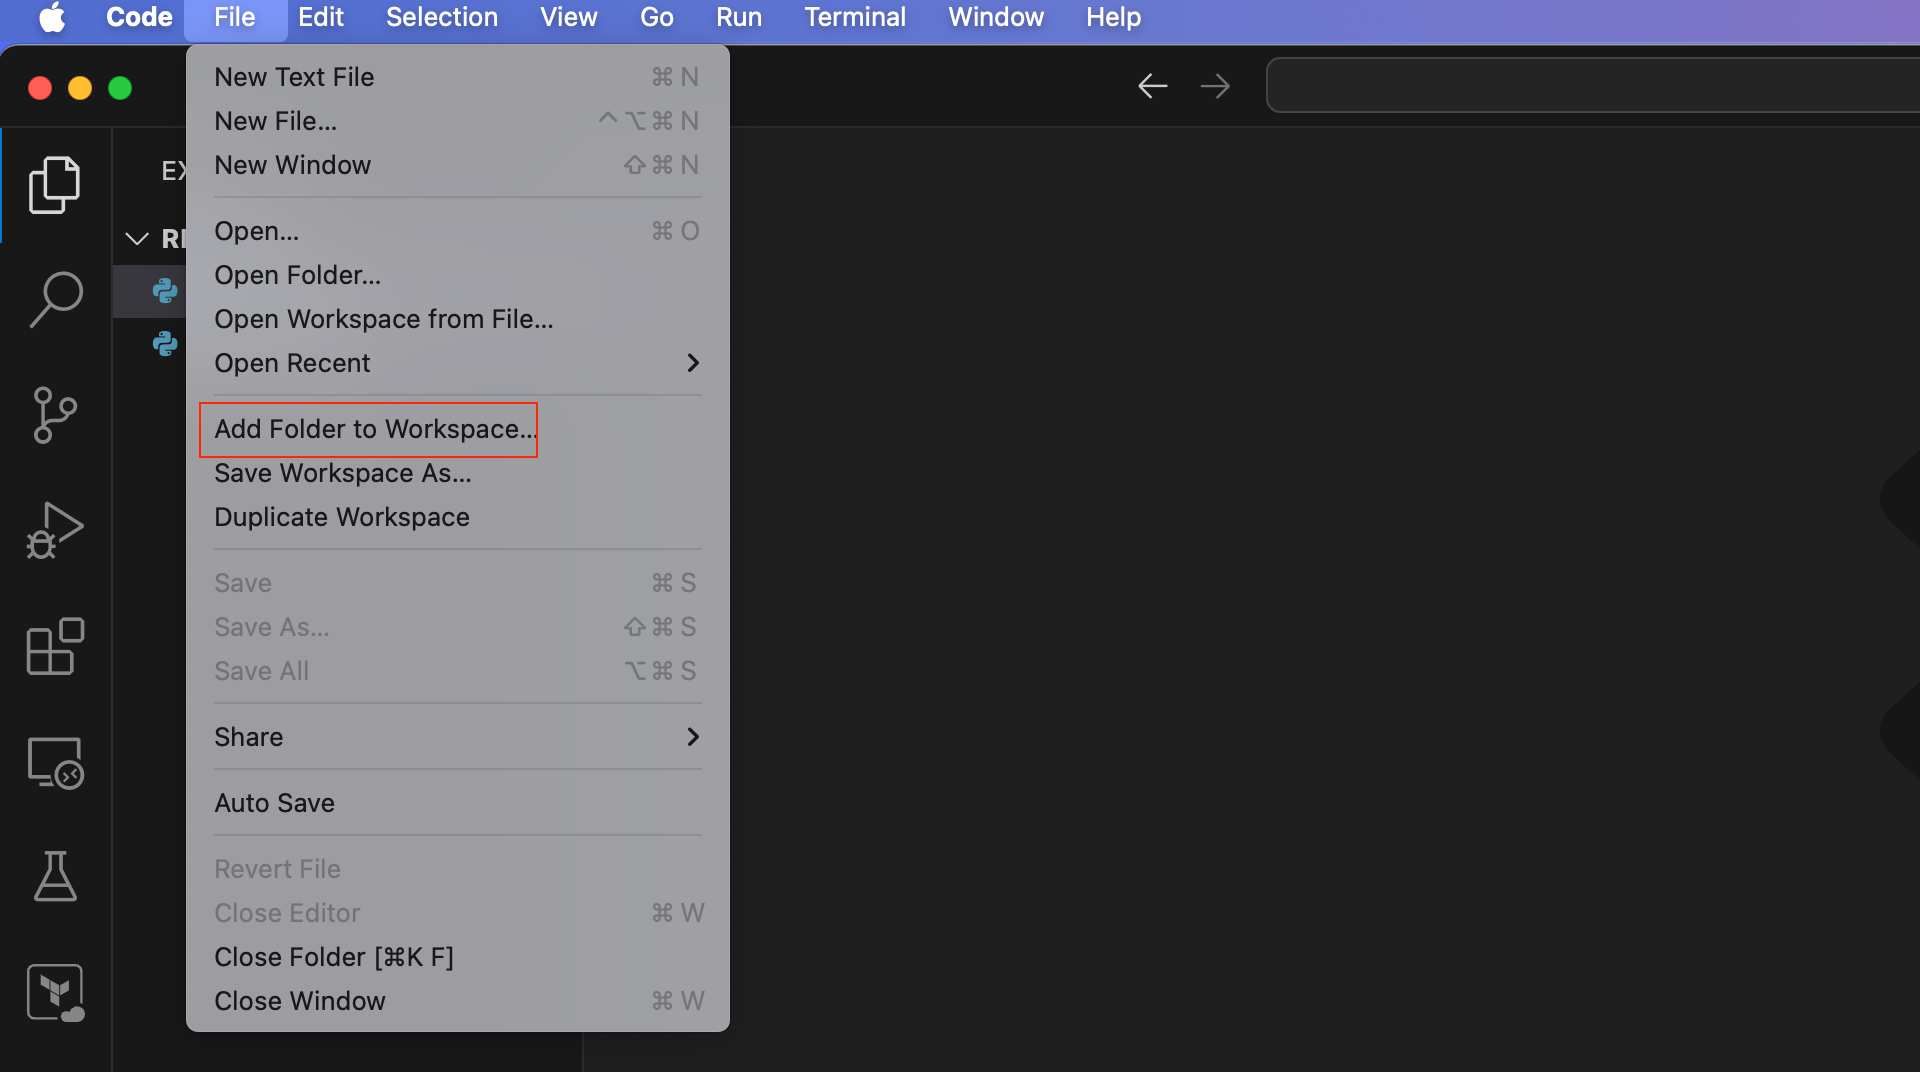
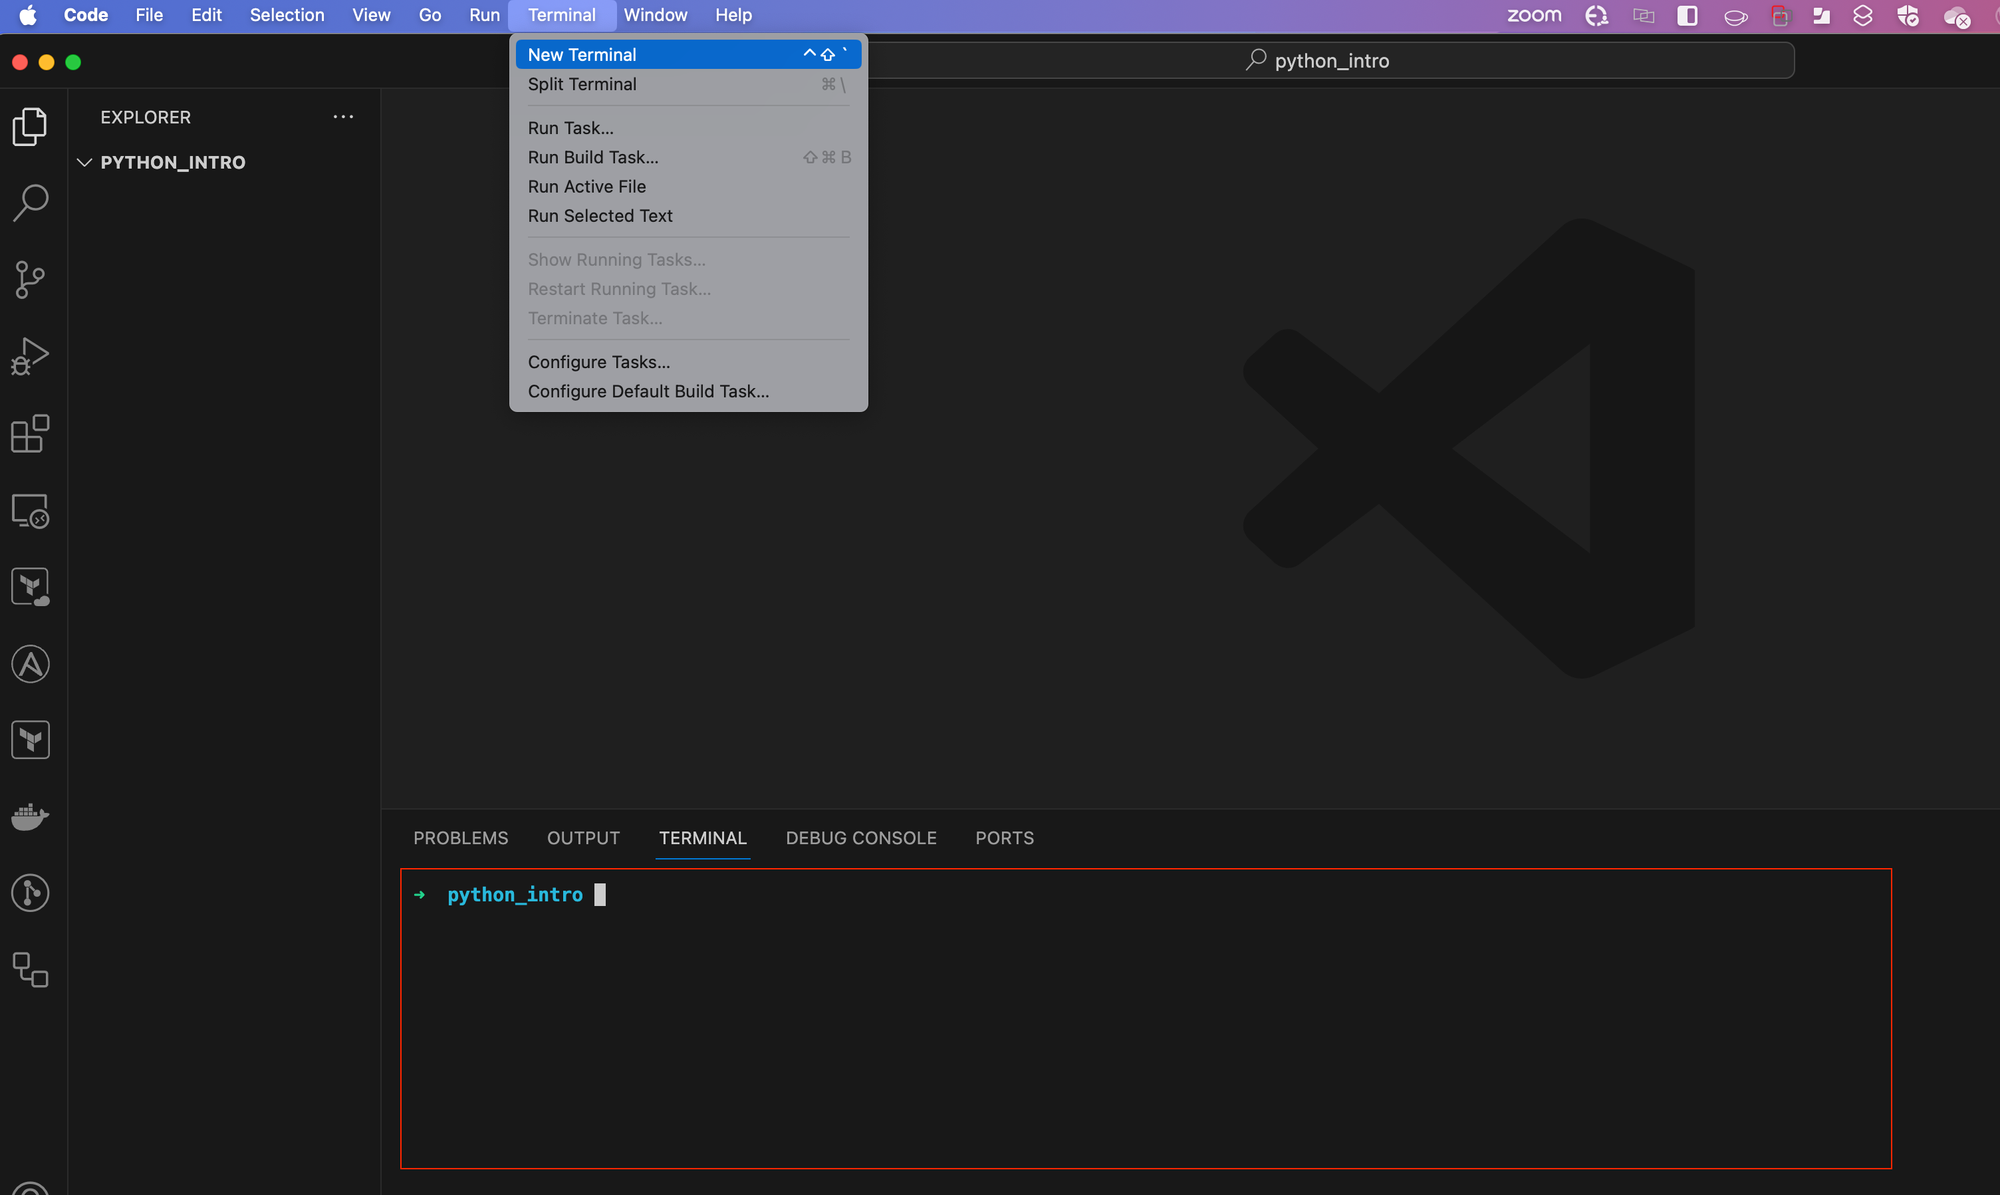
VS Code also has an integrated terminal, so you can run commands or scripts without leaving the editor. To access it, go to Terminal > New Terminal. This convenience means you won't have to switch back and forth between VS Code and your system's terminal.
Our First Code
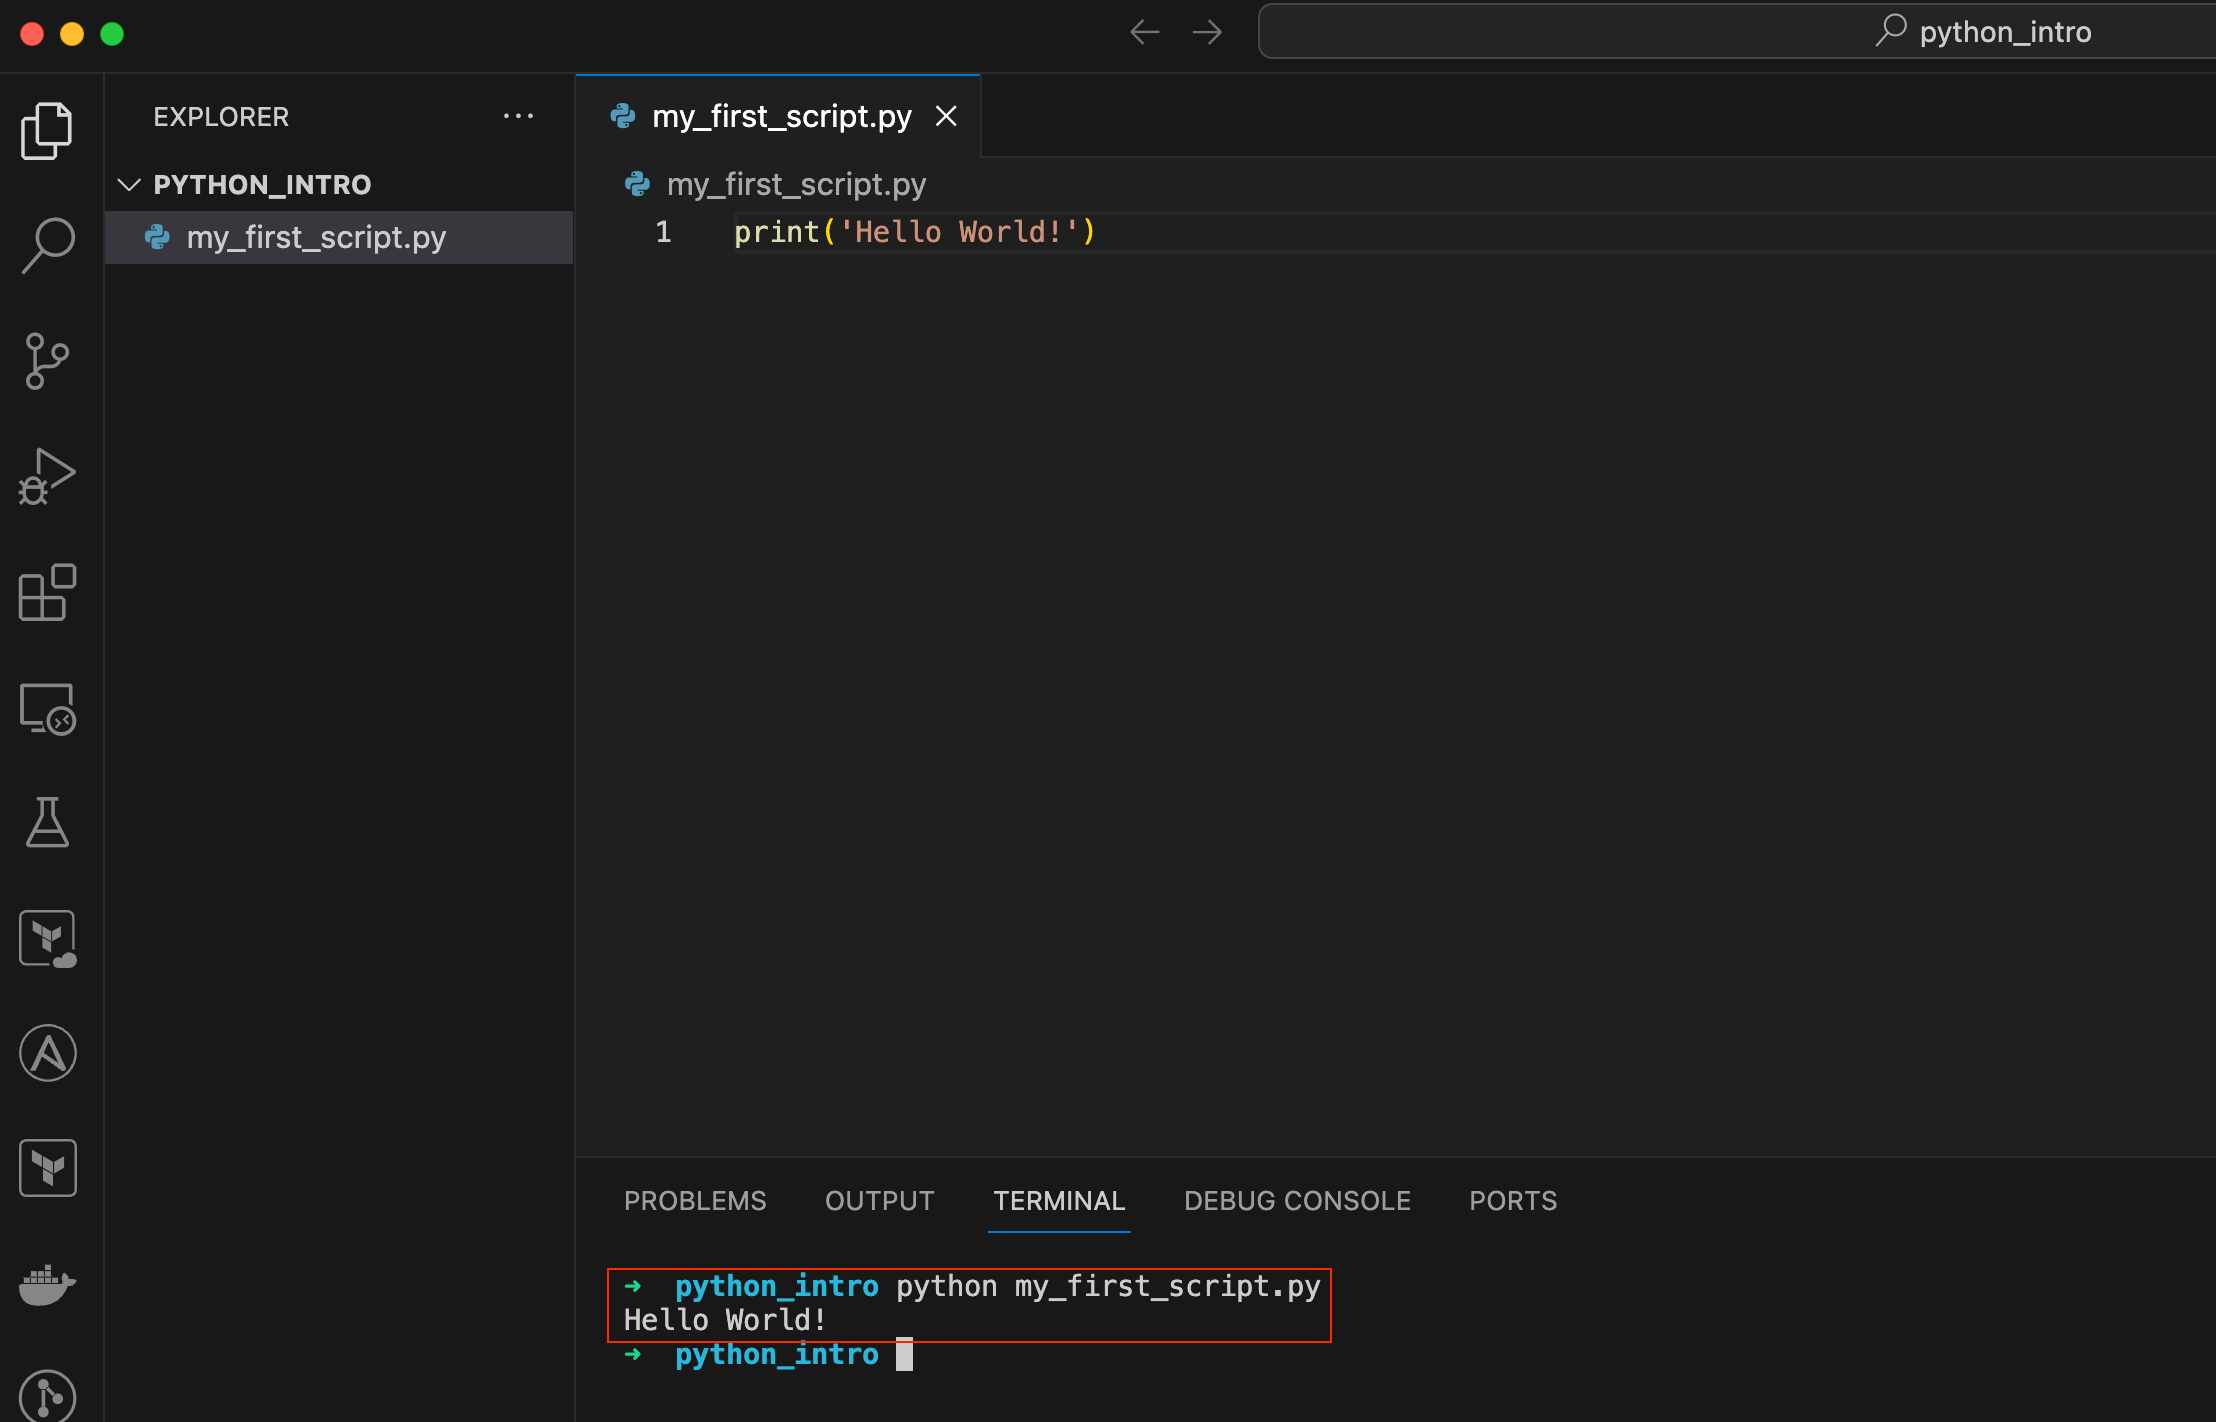
To get started with our first Python program, we need to create a Python file. You can name this file anything you like, but for our example, let's call it my_first_script.py. This naming helps us remember that this is our very first step into Python programming.
Inside my_first_script.py, we're going to add a single line of code.
#my_first_script.py
print('Hello World!')
When we run this file (by running python my_first_script.py on the terminal), the goal is for our terminal to display the message: 'Hello World!'. Let's break down how this works and what each part of the line means.
print- This is a built-in Python function that outputs information to the terminal. Think of it as a way of sending messages from your code to the screen, so you can see what your program is doing or thinking.('Hello World!')- These are the contents we want to print. In Python, anything enclosed in quotes (single'or double"quotes) is considered a string, which is a type of data representing text.- The whole line
print('Hello World!')- When Python executes this line, it calls theprintfunction and passes 'Hello World!' as an argument. The function then does its job by displaying 'Hello World!' in your terminal.
By running this simple line of code, you're telling Python to execute a command that outputs a message. This is a fundamental concept in programming, using functions to perform tasks, and in this case, the task is to display a message.
To run this command, just open the terminal in your VS Code and type python my_first_script.py as shown in the screenshot. This is how you'll make your Python script work and see what it does. Running your script from the VS Code terminal is simple and keeps everything in one place. When you see 'Hello World!' on your screen, you've taken your first step into Python programming, showing that you've written and run your first Python script successfully.
Multiple Print Statements
Another useful thing to know about the print function is that you can use it multiple times to display different pieces of information on separate lines. This is very handy when you want to share several messages or pieces of data one after the other. For example, if you want to print a greeting and then ask a question, you could write.
print('Hello World!')
print('How are you today?')
#output
Hello World!
How are you today?Each print statement works independently, so each message appears on its own line. This way, you can organize your output to make it clear and easy to read.
Feel free to try adding more print statements to your script to see how they work together. It's a great way to get comfortable with writing and running Python code.
 Suresh Vina