Last year I bought a UGreen NASync DXP2800 for my homelab, along with two Seagate IronWolf 8TB HDDs. This was my first NAS, and I've been using it for just over a year now, and I'm very happy with it. I back up two of my Macs using Time Machine, store a lot of media, documents, photos, videos, etc, pretty much what a NAS is designed to do. I also run some Docker containers and Proxmox Backup Server as a VM. Even though it has an N100 CPU, so far I've never had a single issue in terms of resources. For £249, it was a bargain.
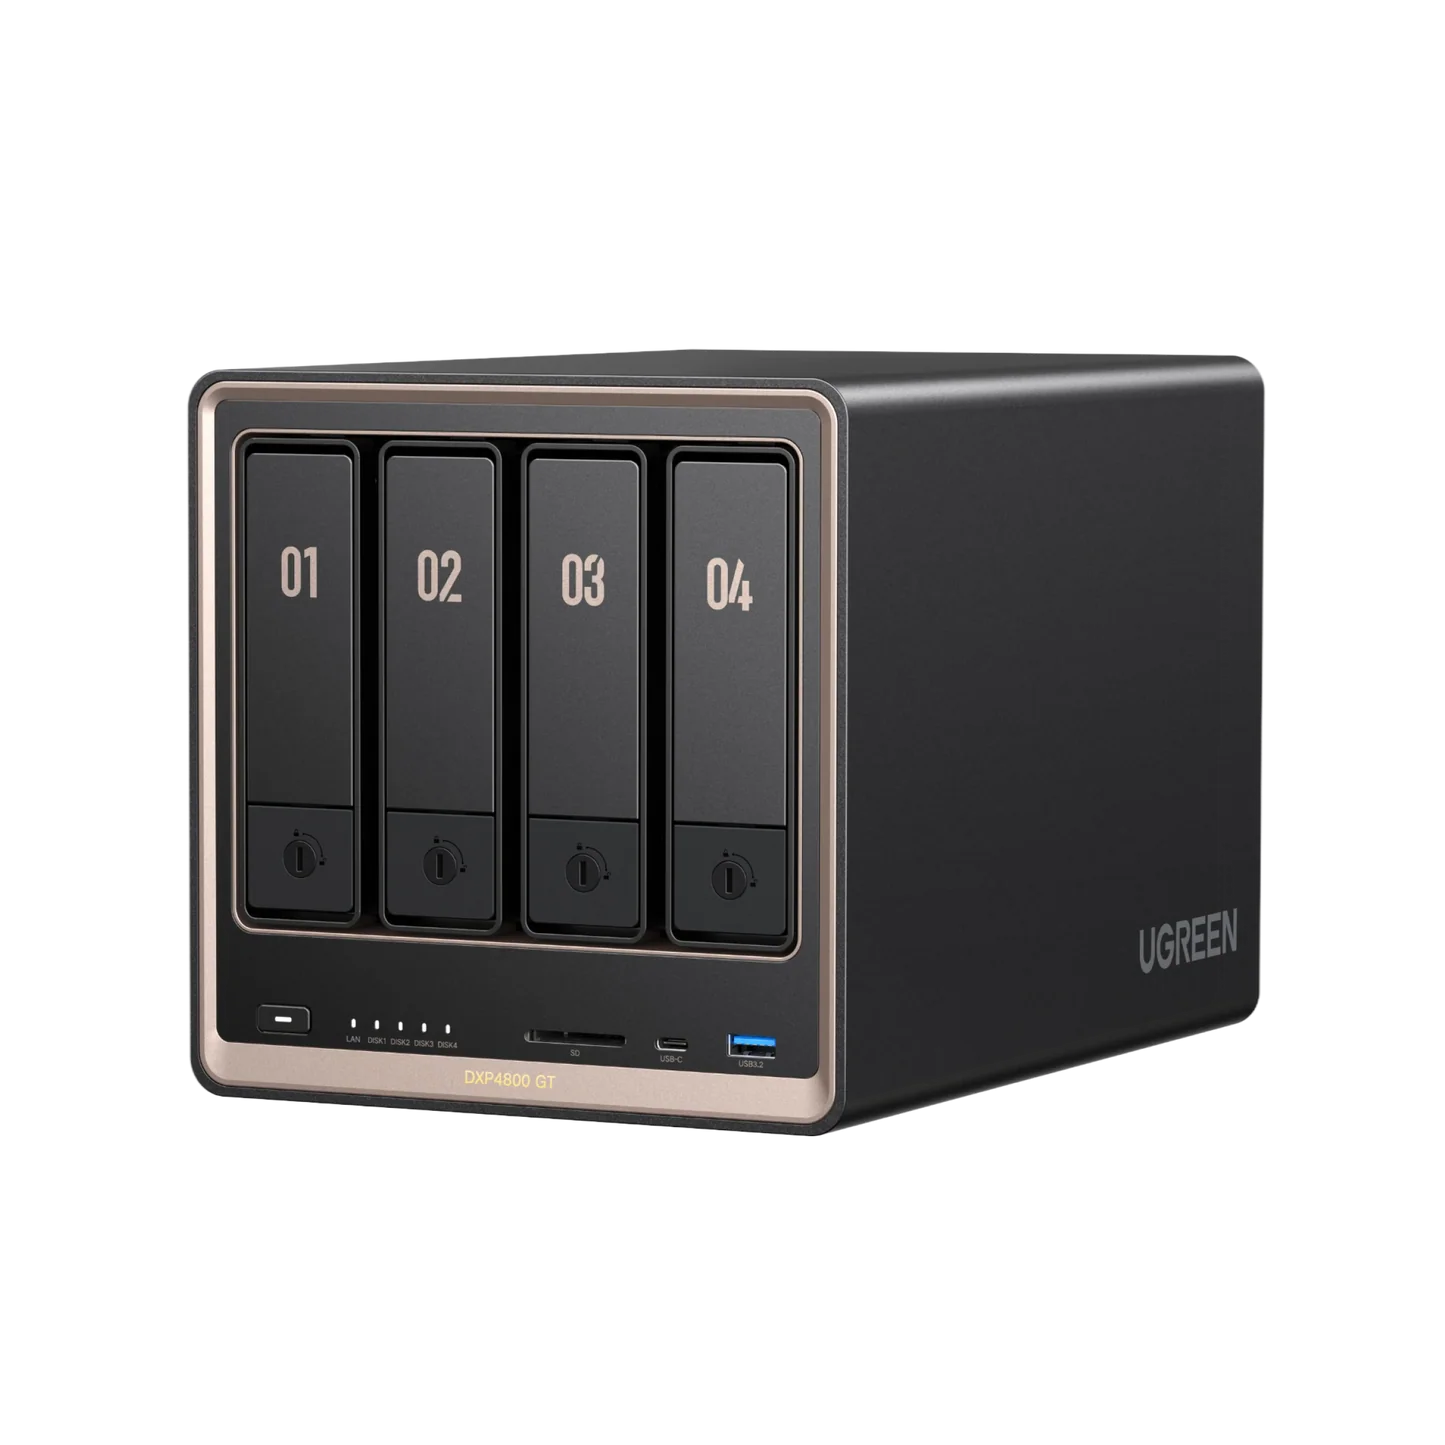
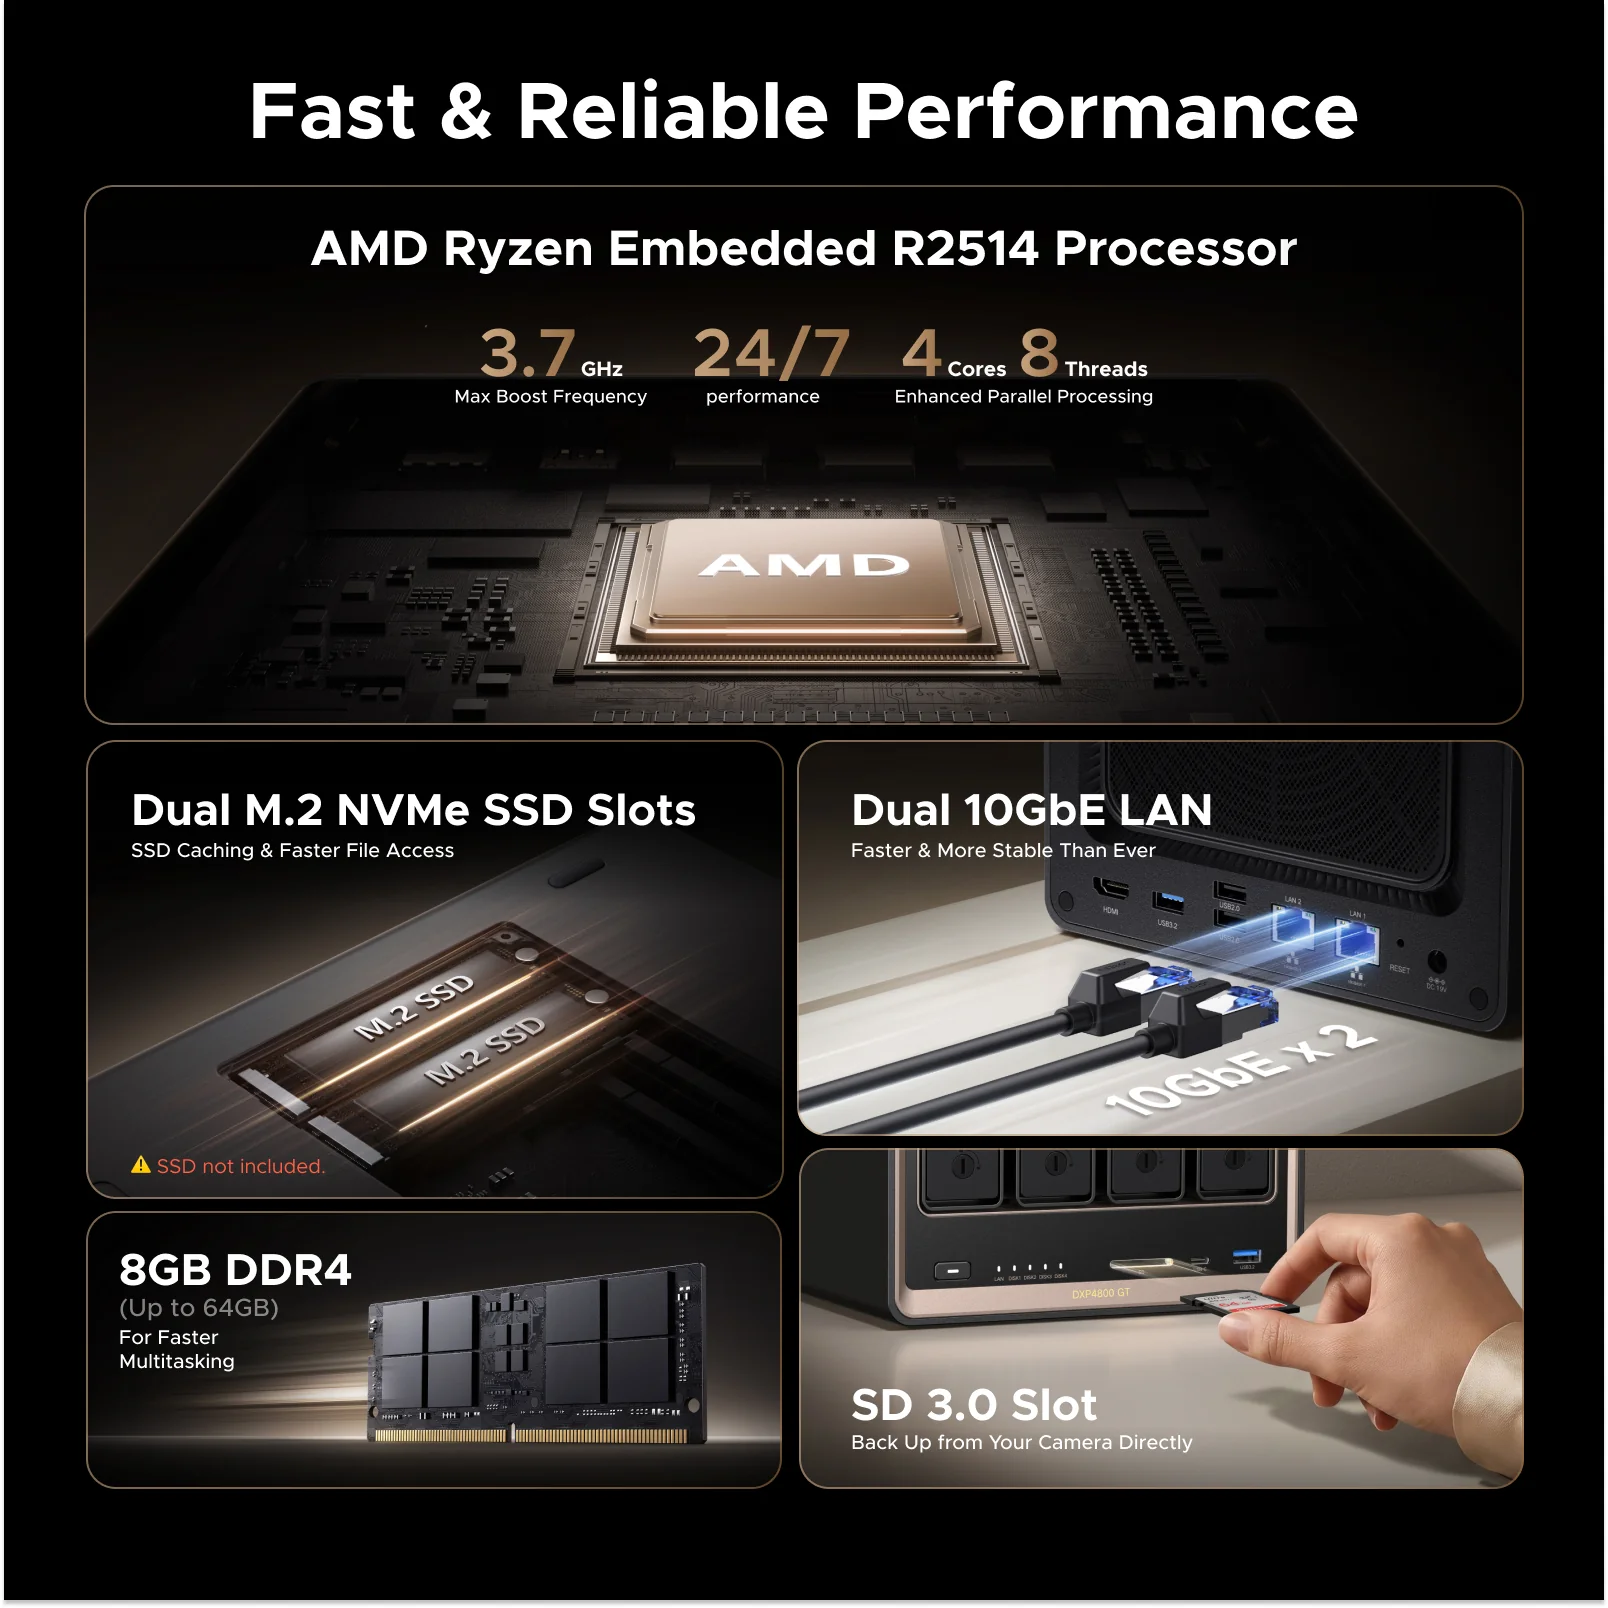
Fast forward to today, and UGreen released the NASync DXP4800 GT, a 4-bay NAS that comes with an AMD Ryzen Embedded R2514, dual 10GbE LAN, and dual M.2 NVMe SSD slots for £529 at the time of writing here in the UK. It looked like a great addition to my homelab setup, giving me a lot more power and flexibility compared to my current NAS. I was lucky enough to get my hands on a unit from UGreen to try out, so let's get into it.
Disclaimer - This unit was sent to me by UGREEN to try out. All views and opinions in this post are my own.
ugreen dxp4800 gt
Here's a quick summary of the key specs before we dive into the details and Initial setup.
- Storage - 4x SATA HDD slots (max 32TB/drive) plus 2x NVMe SSD slots giving up to 144TB of expandable storage.
- Networking - Two 10GbE ports with link aggregation up to 20Gbps, good for 4K/8K video editing, VM deployment, and large file transfers.
- CPU - AMD Ryzen Embedded R2514 (4 cores, 8 threads), enough to handle multiple Docker containers, VMs, and concurrent high-load tasks.
- Memory - Supports up to 64GB of RAM, and interestingly supports ECC RAM too, though it ships with 8GB non-ECC out of the box.
- Front ports - SD 3.0 card slot, HDMI, 10Gbps USB-C, and USB 3.2 ports for easy access and quick backups.
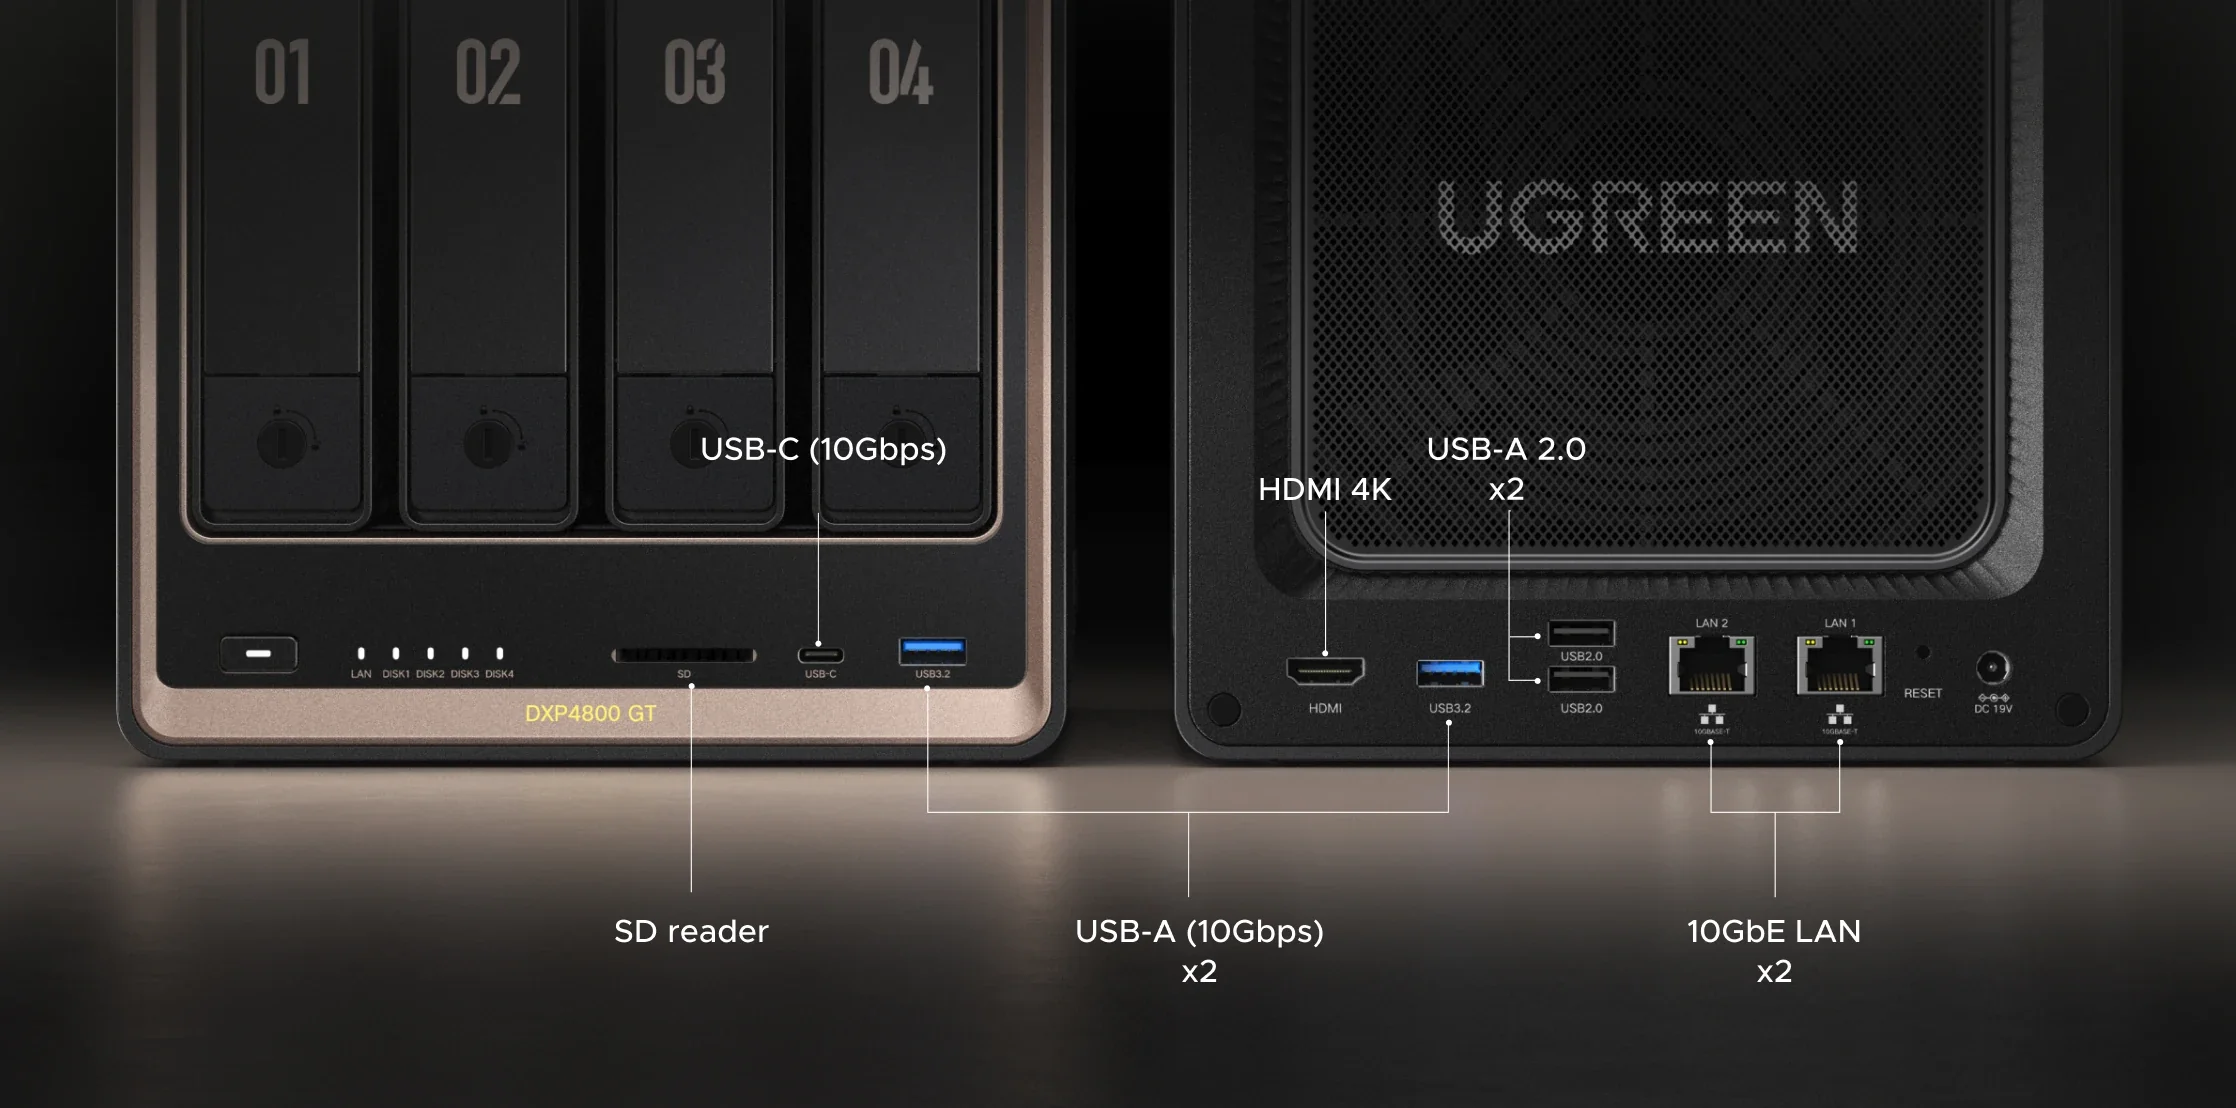
Bays 1 and 2 support U.2 SSDs at PCIe Gen 3x4 speeds, which is a nice touch on a NAS in this price range. This means you can use those bays for fast, all-flash storage instead of just spinning HDDs, useful if you want to run VMs, containers, or databases that benefit from low latency storage rather than being limited to HDD speeds.
Beyond the U.2 bays, the NVMe slots can also be used as cache, either read-only or read-write.
- Read-only cache speeds up reads by keeping frequently accessed data on the faster NVMe drive, while all writes still go straight to the HDDs. It's the safer option since there's no risk of data loss if the NVMe drive fails.
- Read-write cache speeds up both reads and writes, since writes land on NVMe first before being flushed to the HDDs. This gives better performance but carries more risk, so it's worth mirroring the NVMe drives if you go this route.
If your workload is mostly reads, like serving media, read-only cache is the simpler choice. If you're running VMs or Docker containers with a lot of writes, read-write cache makes more of a difference; just make sure you have redundancy on the cache drives.
Initial Setup
As you'd expect from UGREEN, it came well packaged, with an HDMI cable, power cable, screwdriver, and Ethernet cables included.
I'm going to start by installing 2x 2TB hard disks in RAID 1. If you're not familiar with it, RAID 1 mirrors your data across both drives, so if one drive fails, your data is still safe on the other. The tradeoff is you only get the capacity of one drive, so with two 2TB disks you end up with 2TB of usable storage, not 4TB. It's a good option if data protection matters more to you than raw capacity.
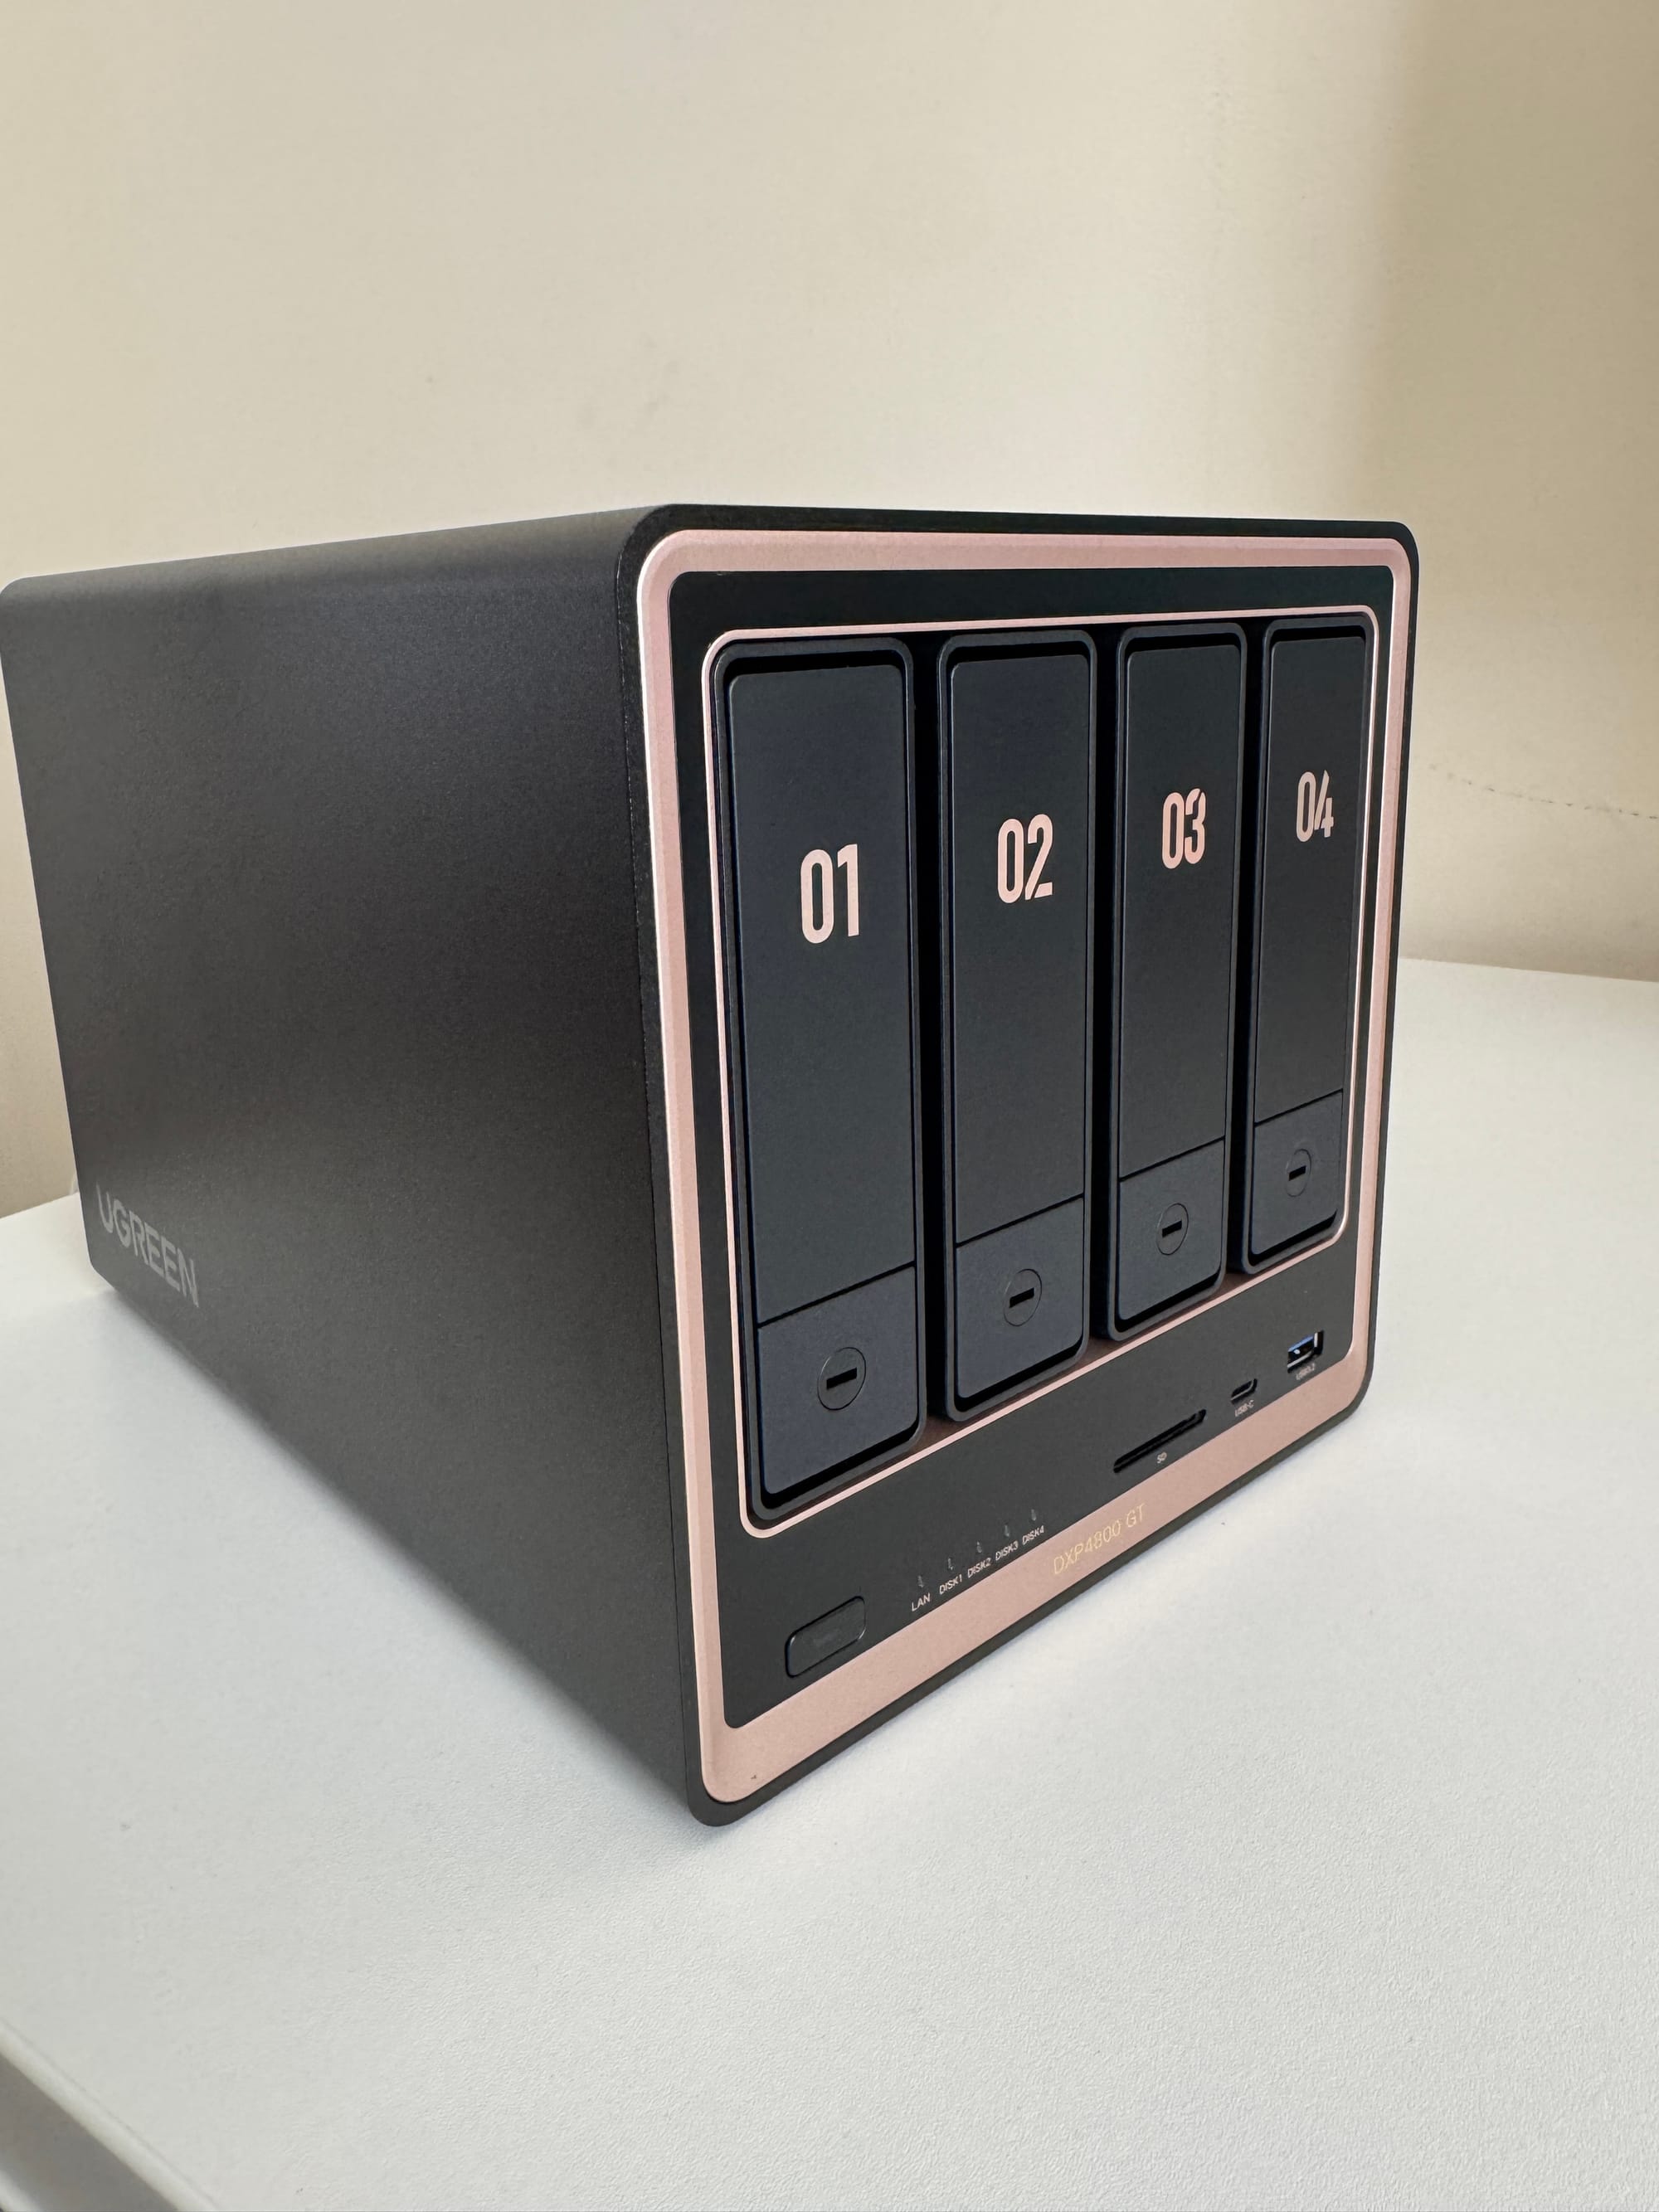
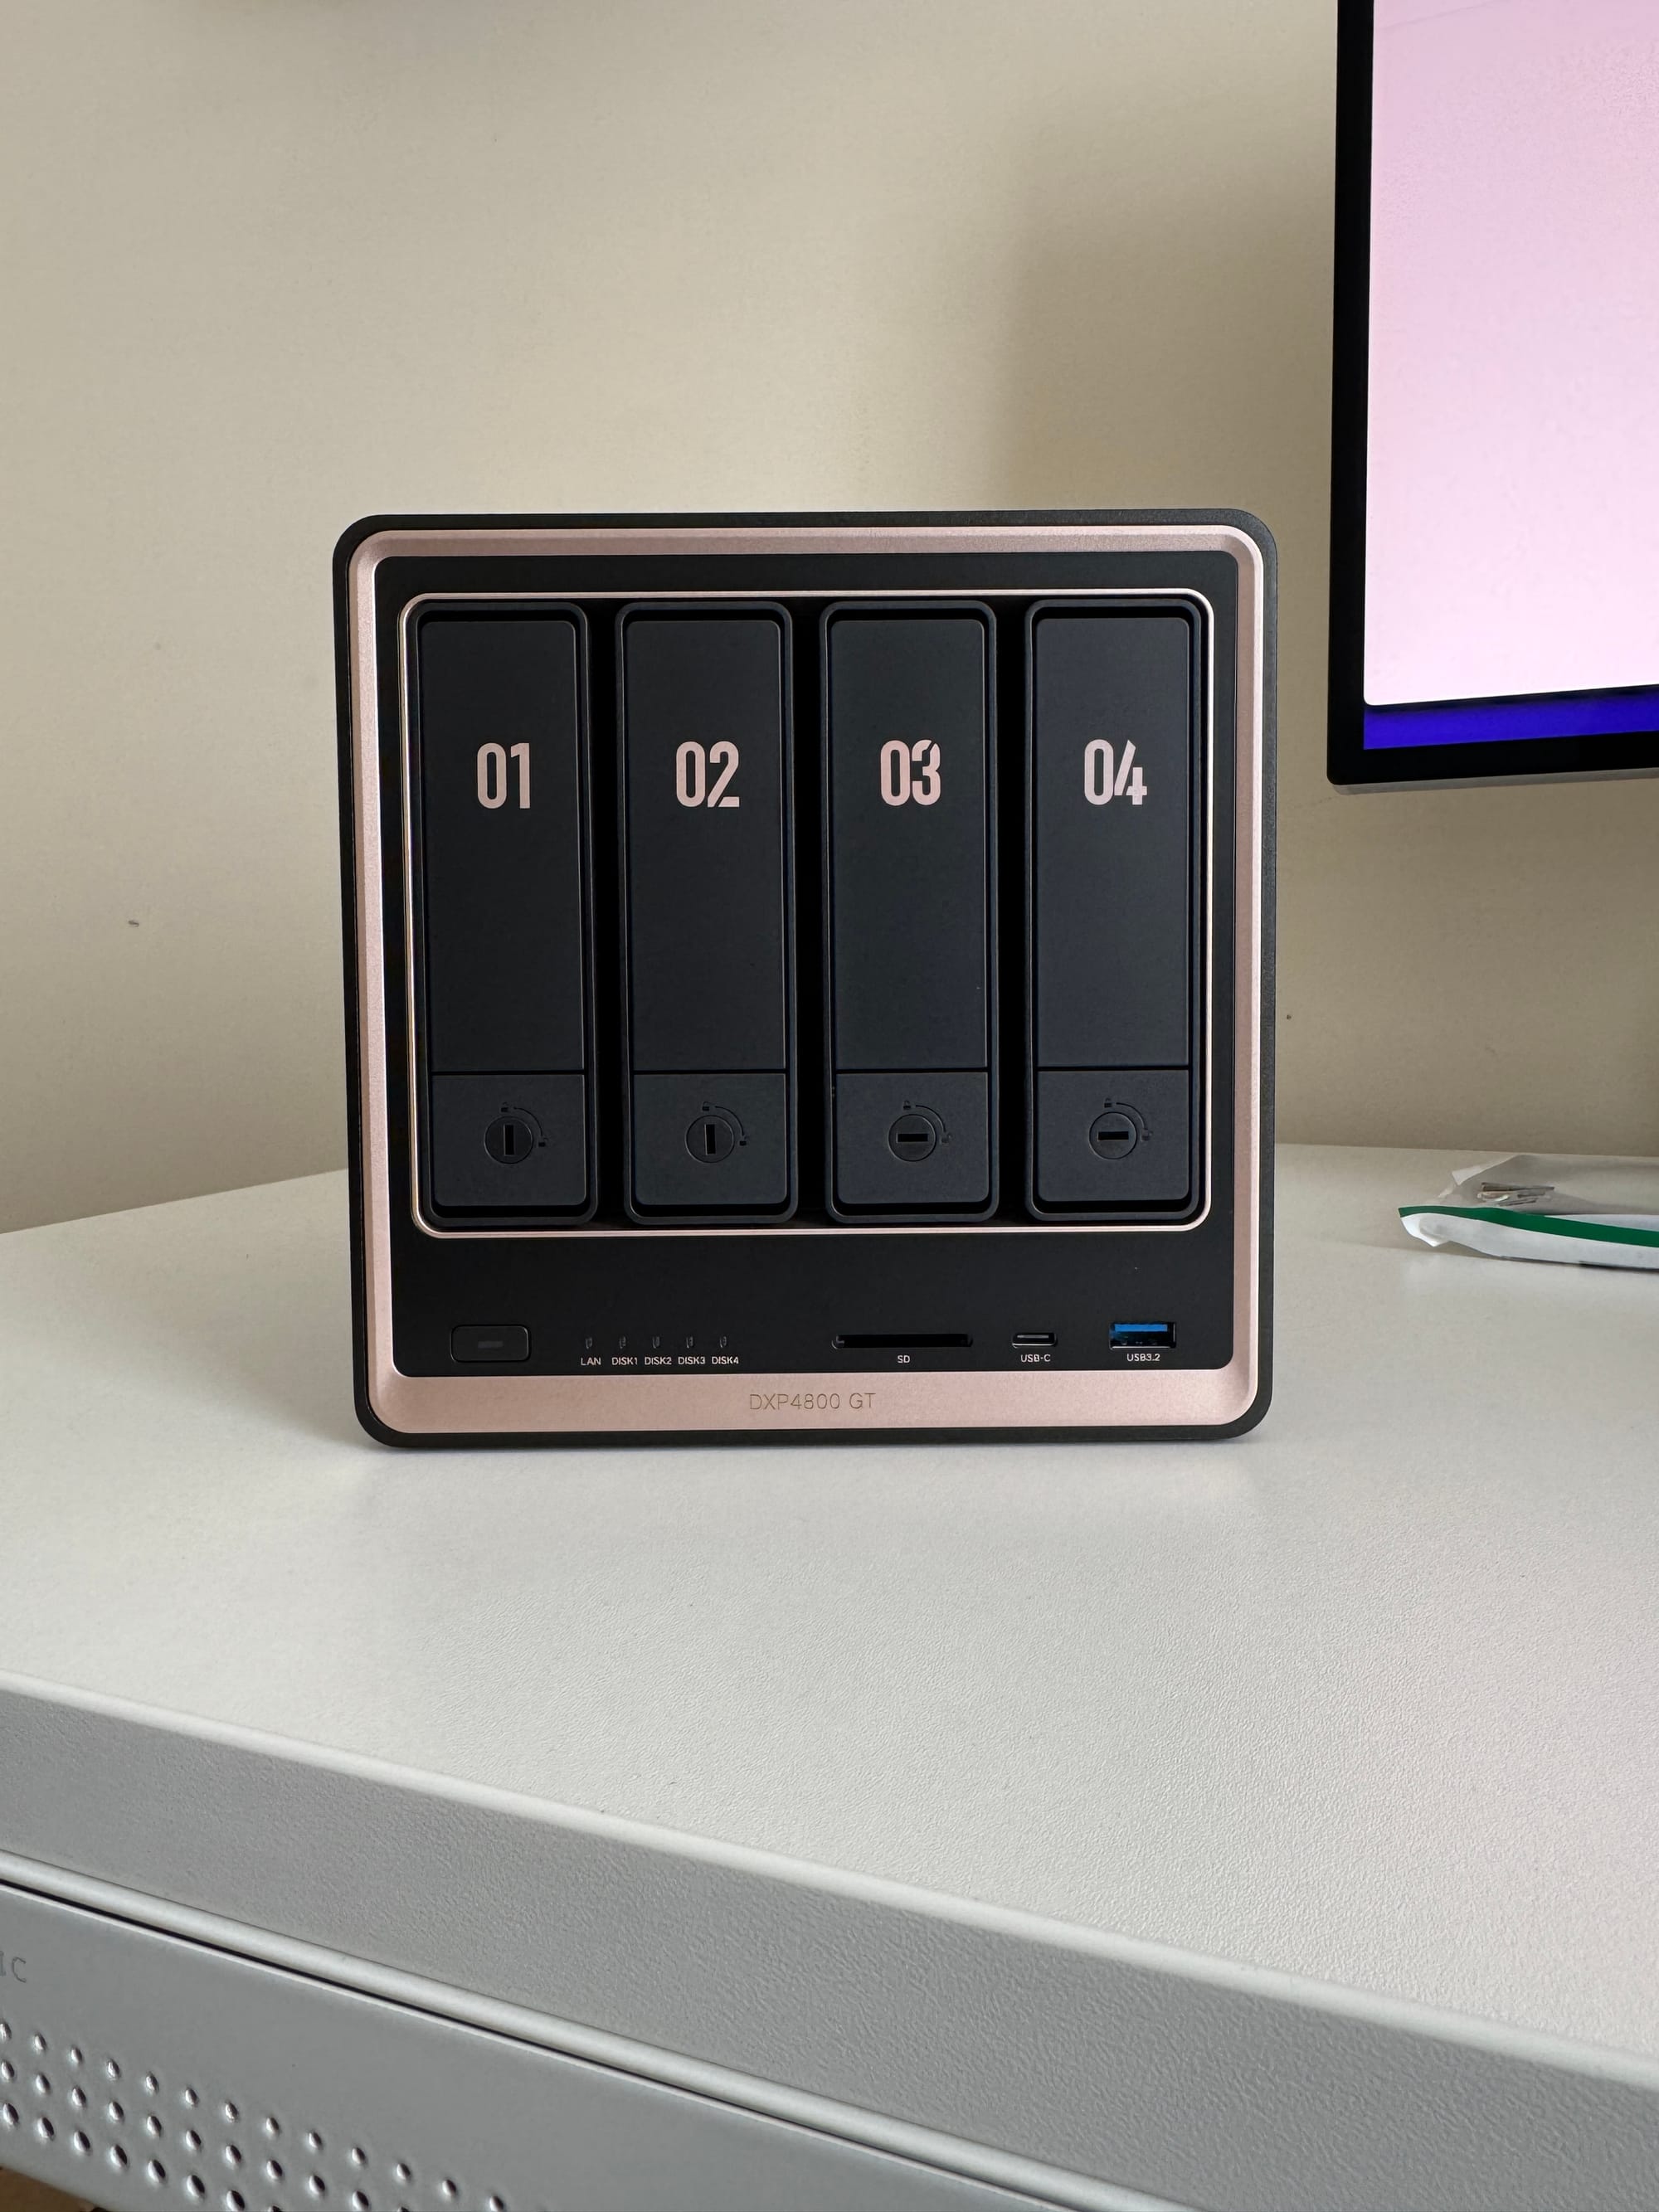
ugreen dxp 4800 gt unboxing
Setup itself is super simple. Connect the power and Ethernet cable, power it on, wait a minute or so, then go to the IP address on port 9443 to access the GUI.
Of course, this assumes your network has DHCP, and you know what IP has been handed out to the NAS. Since my DHCP server is my firewall, I already know what IP to connect to, but that's not the case for everyone. If you're not sure, another option is to visit find.ugnas.com in your browser, and it'll find the devices on your network automagically. Here you can see both my old NAS and the new one, along with their IP addresses.
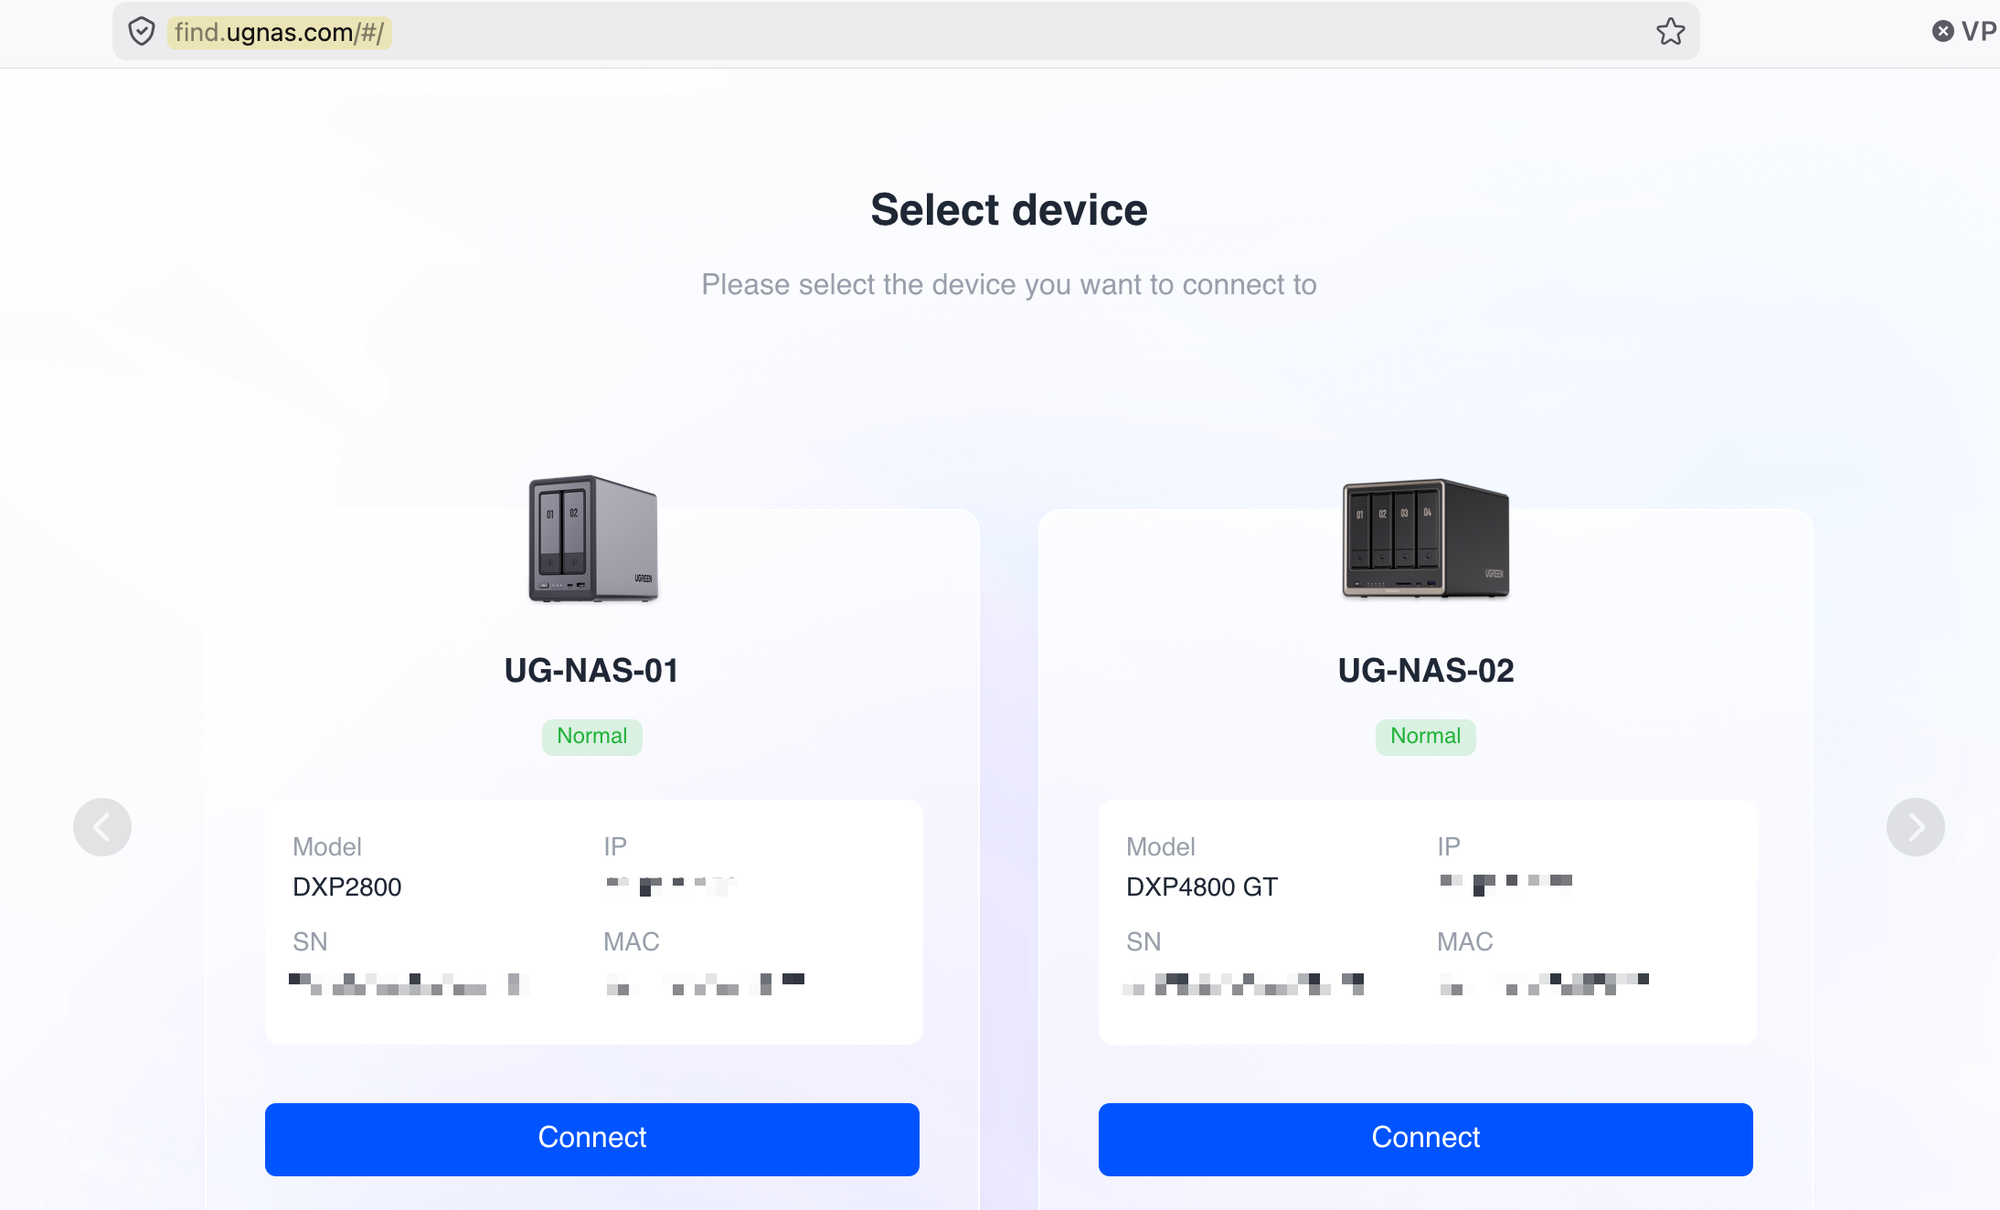
Click on the one you want, in my case the DXP4800 GT, and it'll connect straight to it.
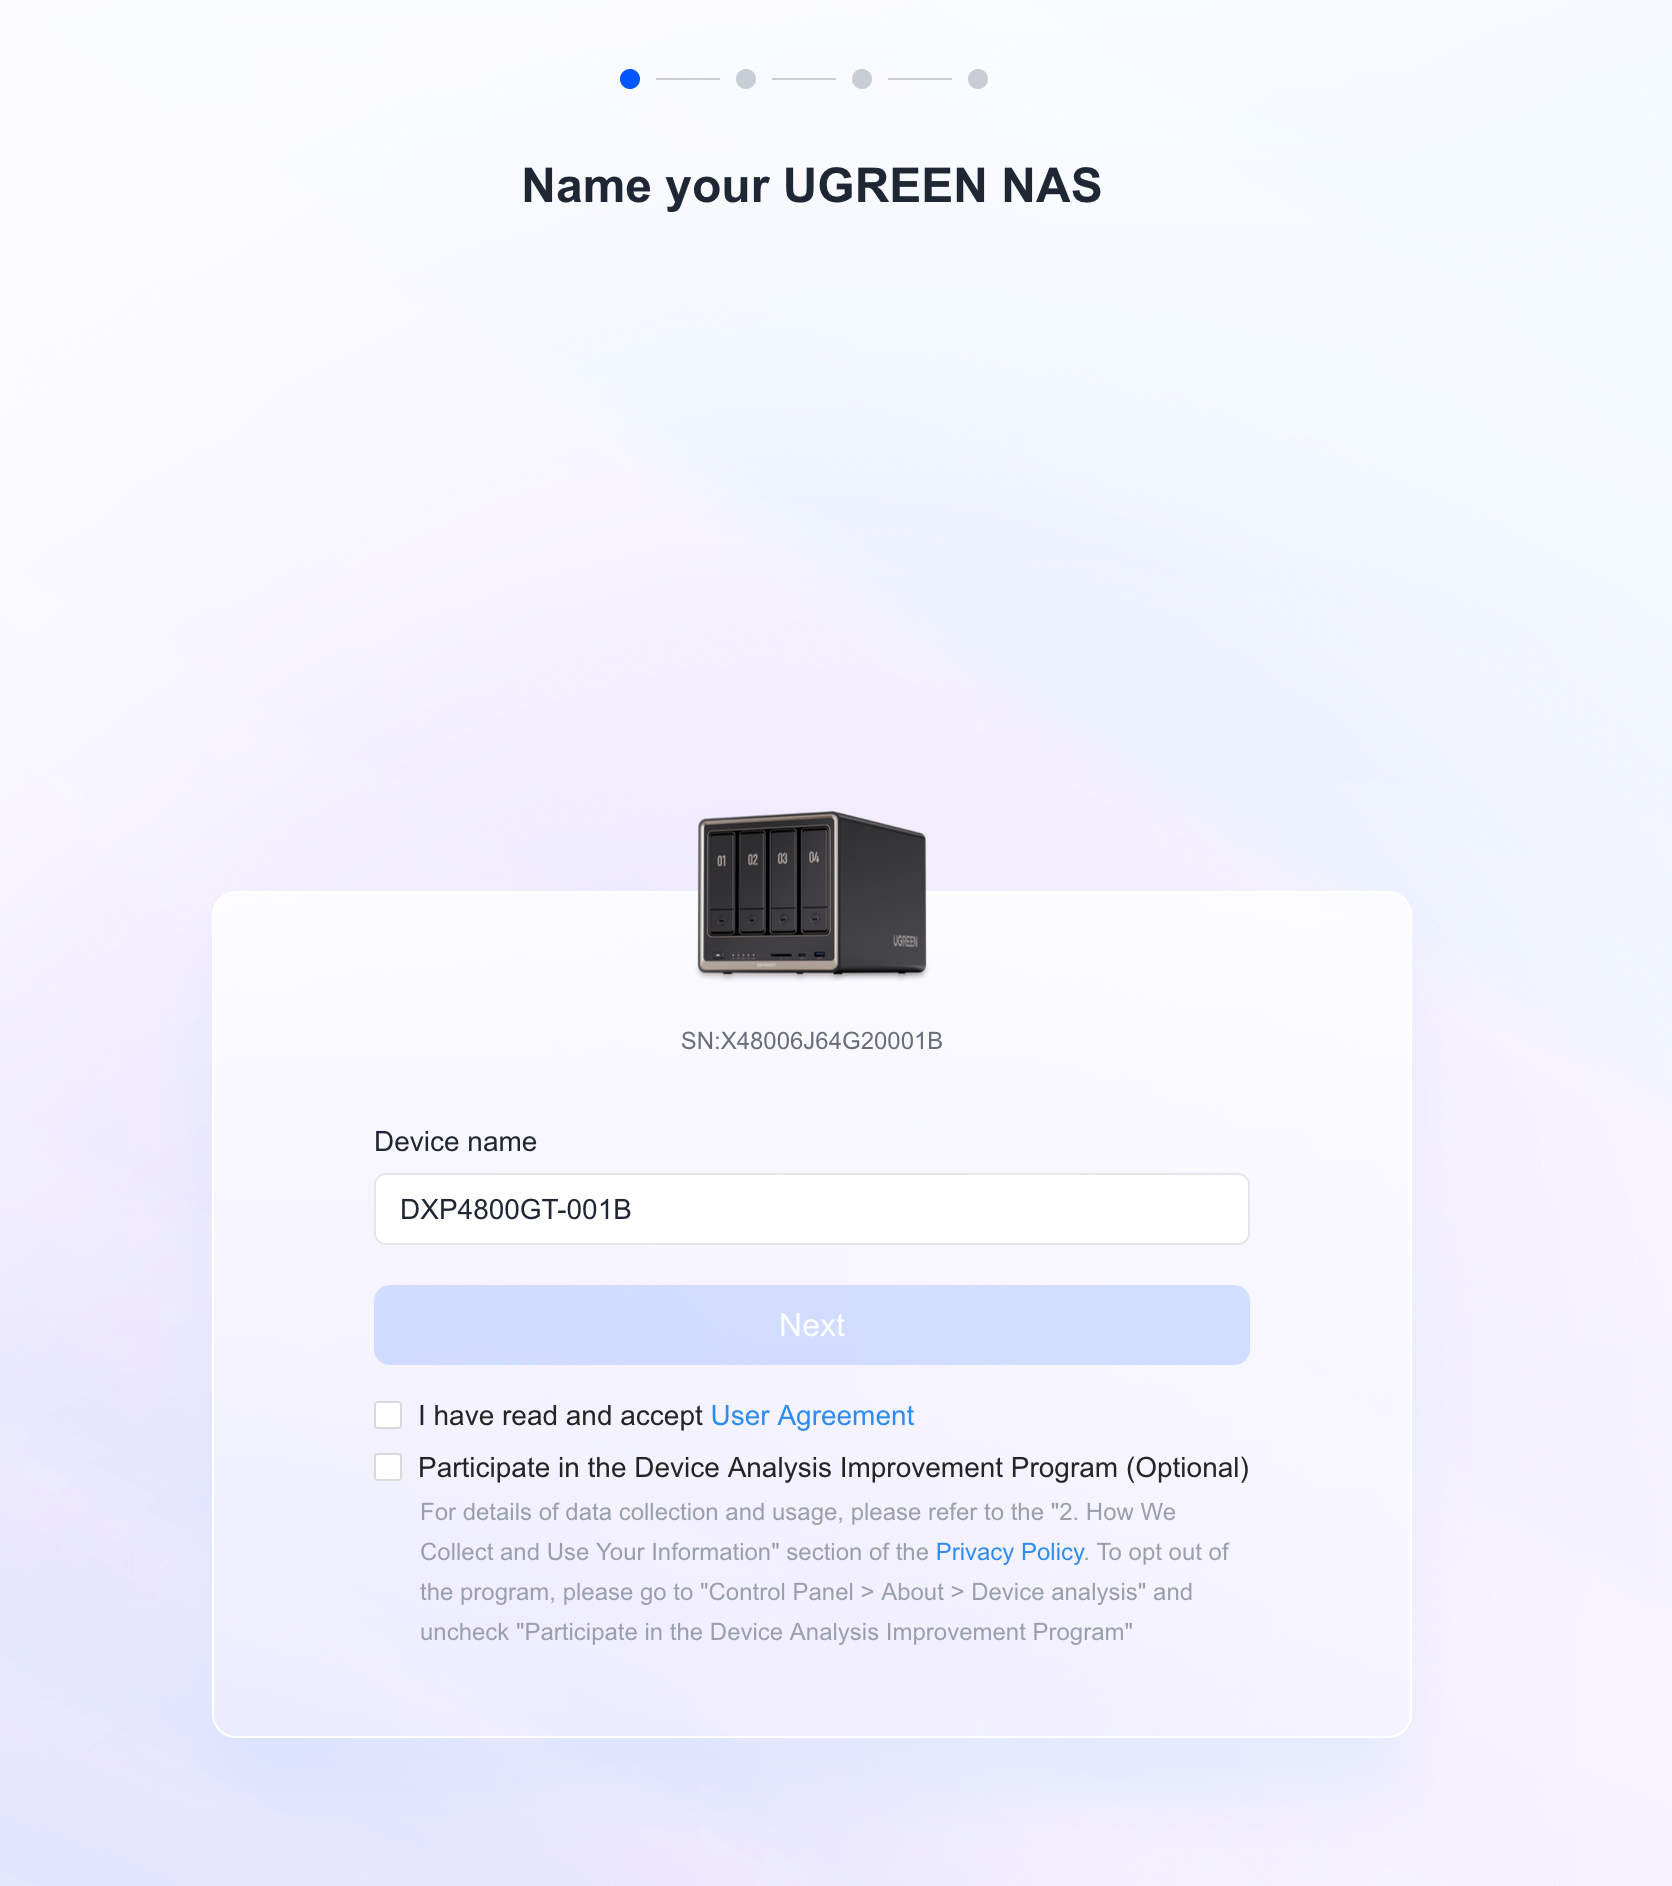
First thing you do is give your NAS a name. Then you set up a local admin account. This is stored on the device itself and used to log in.
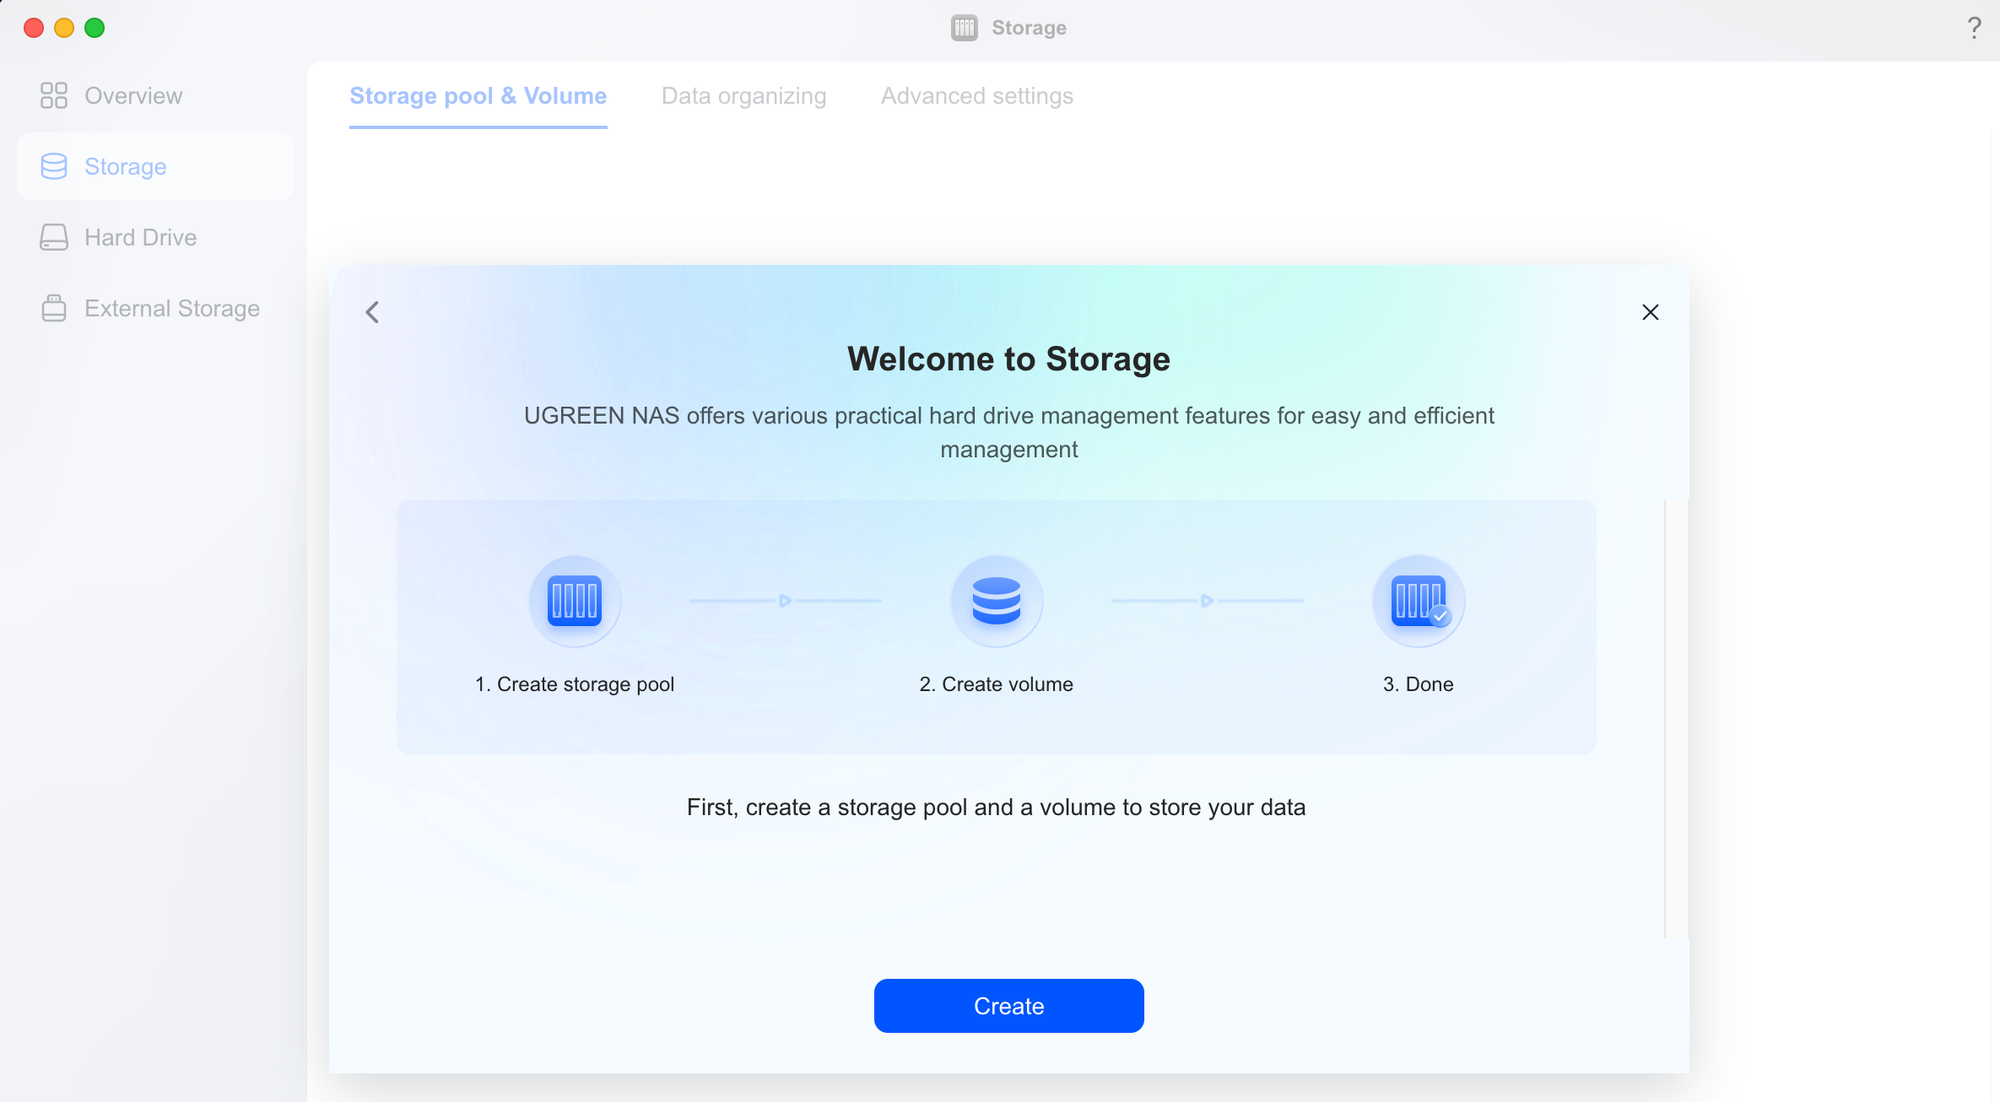
Once that's done, you land on the Storage section, which gives a quick explanation of storage pools, volumes, and disks.
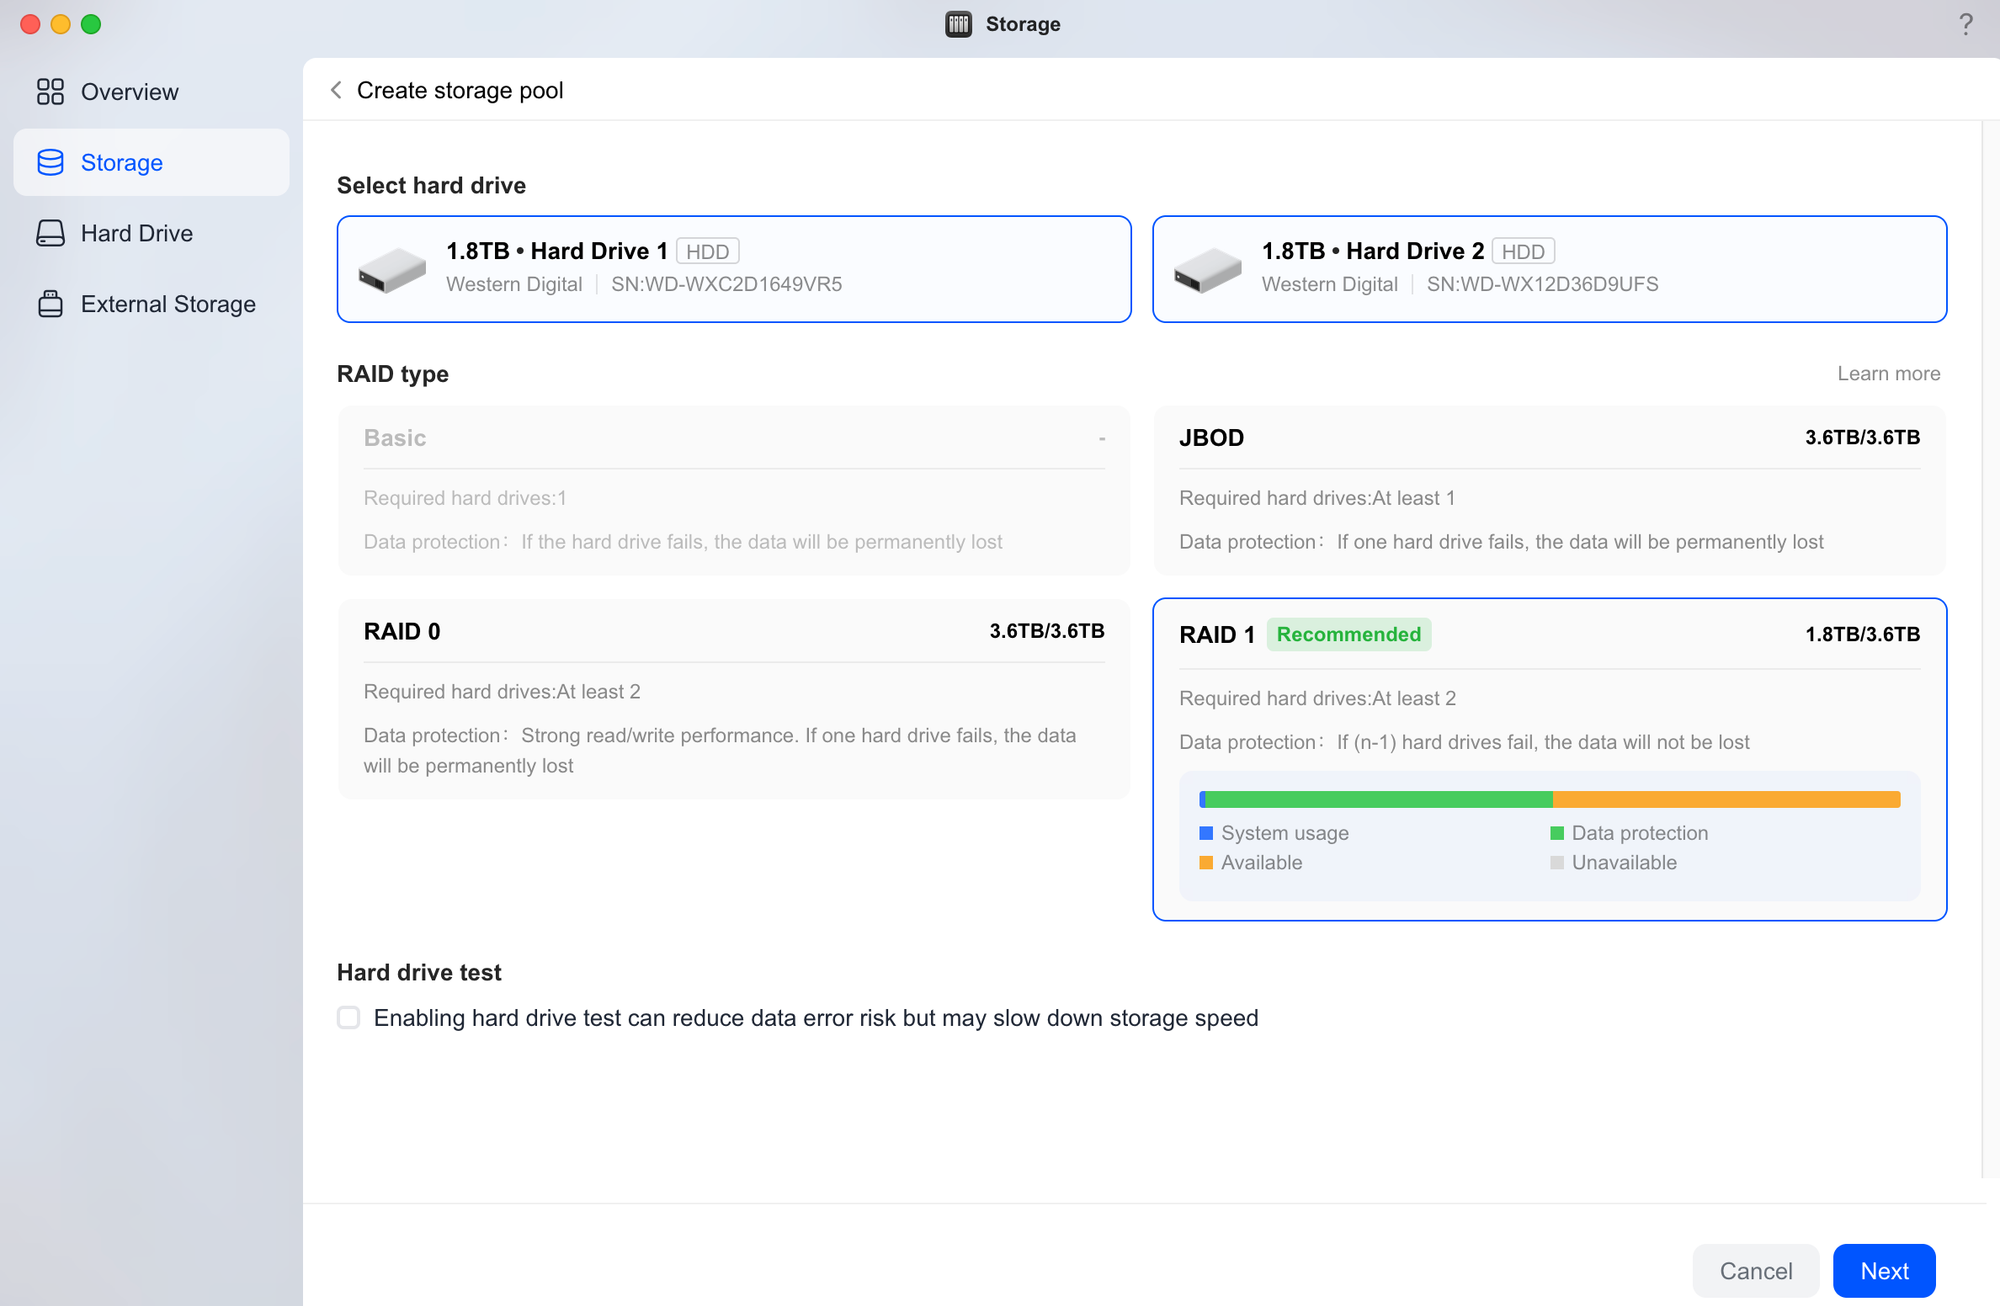
From here, you create a storage pool and volume to actually start using the space. I selected both 1.8TB drives and picked RAID 1 as the RAID type.
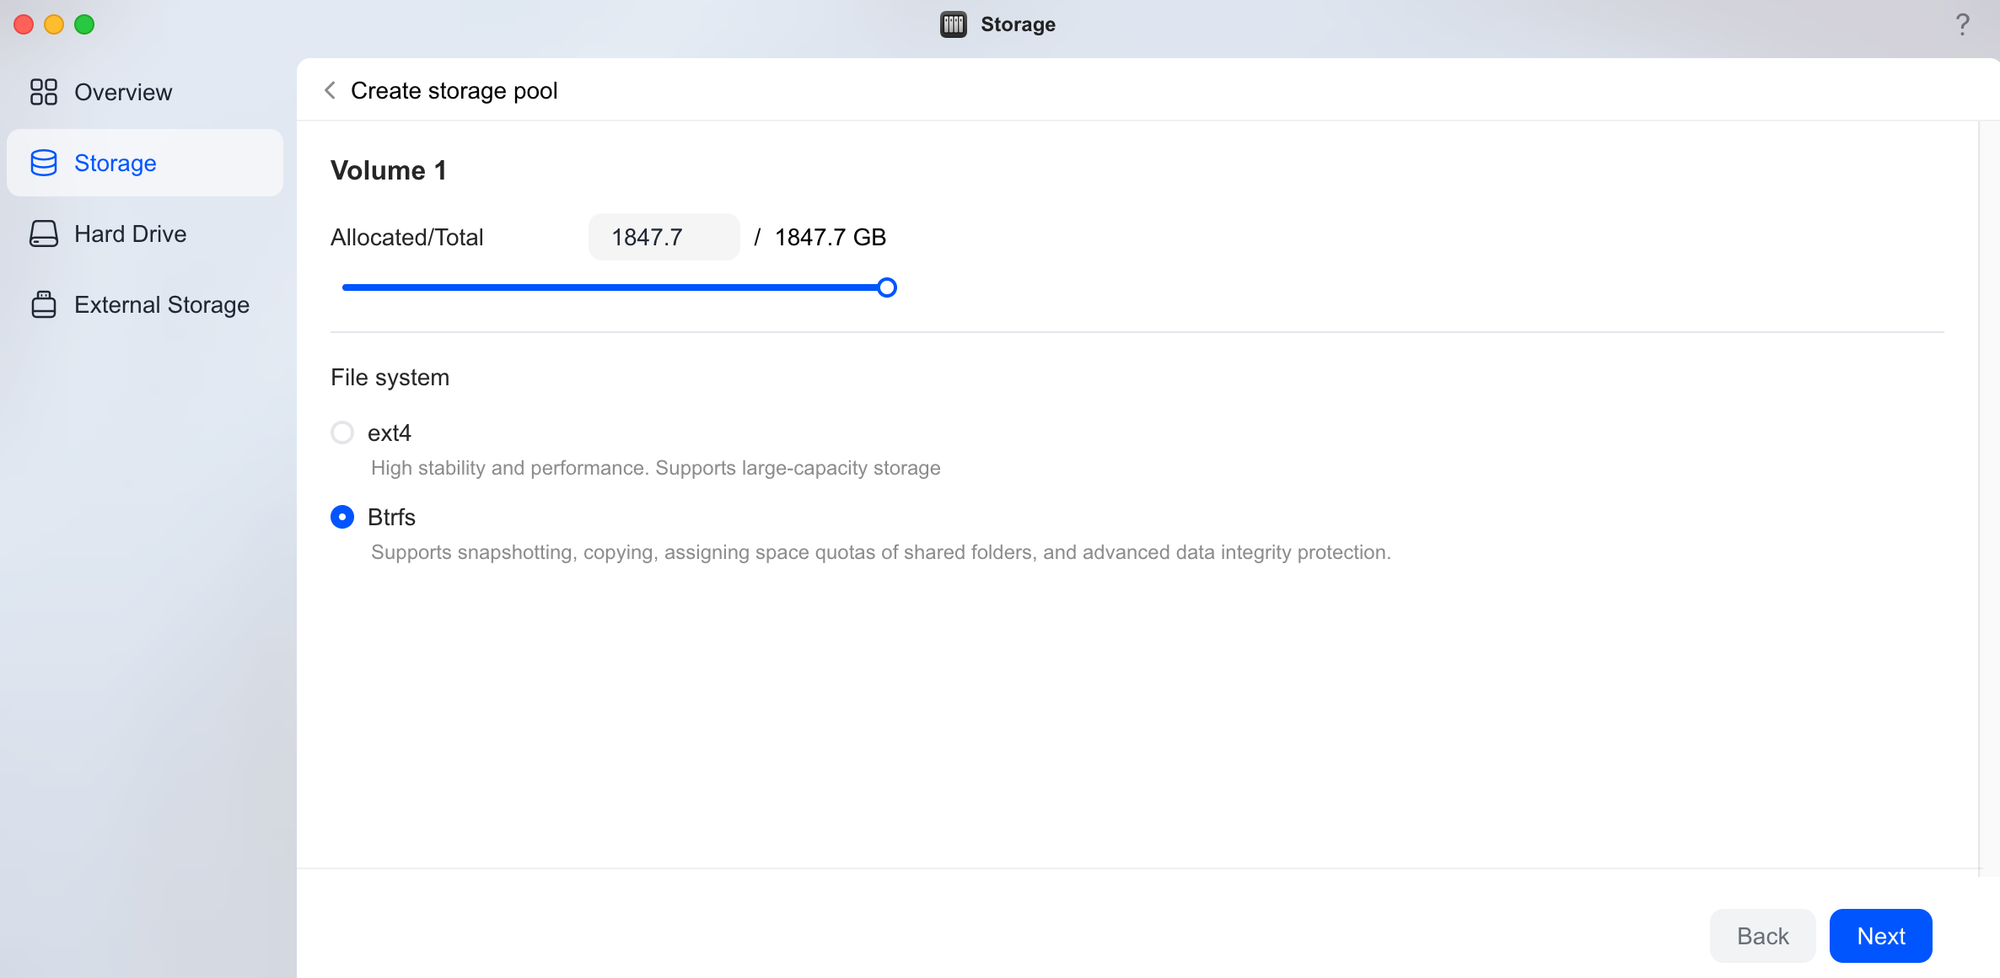
Next, you choose the file system. There are two options here, ext4 and Btrfs. Ext4 is solid for stability and performance, but Btrfs is the better choice for a NAS since it supports snapshotting, copying, and space quotas for shared folders, on top of stronger data integrity protection. I went with Btrfs.
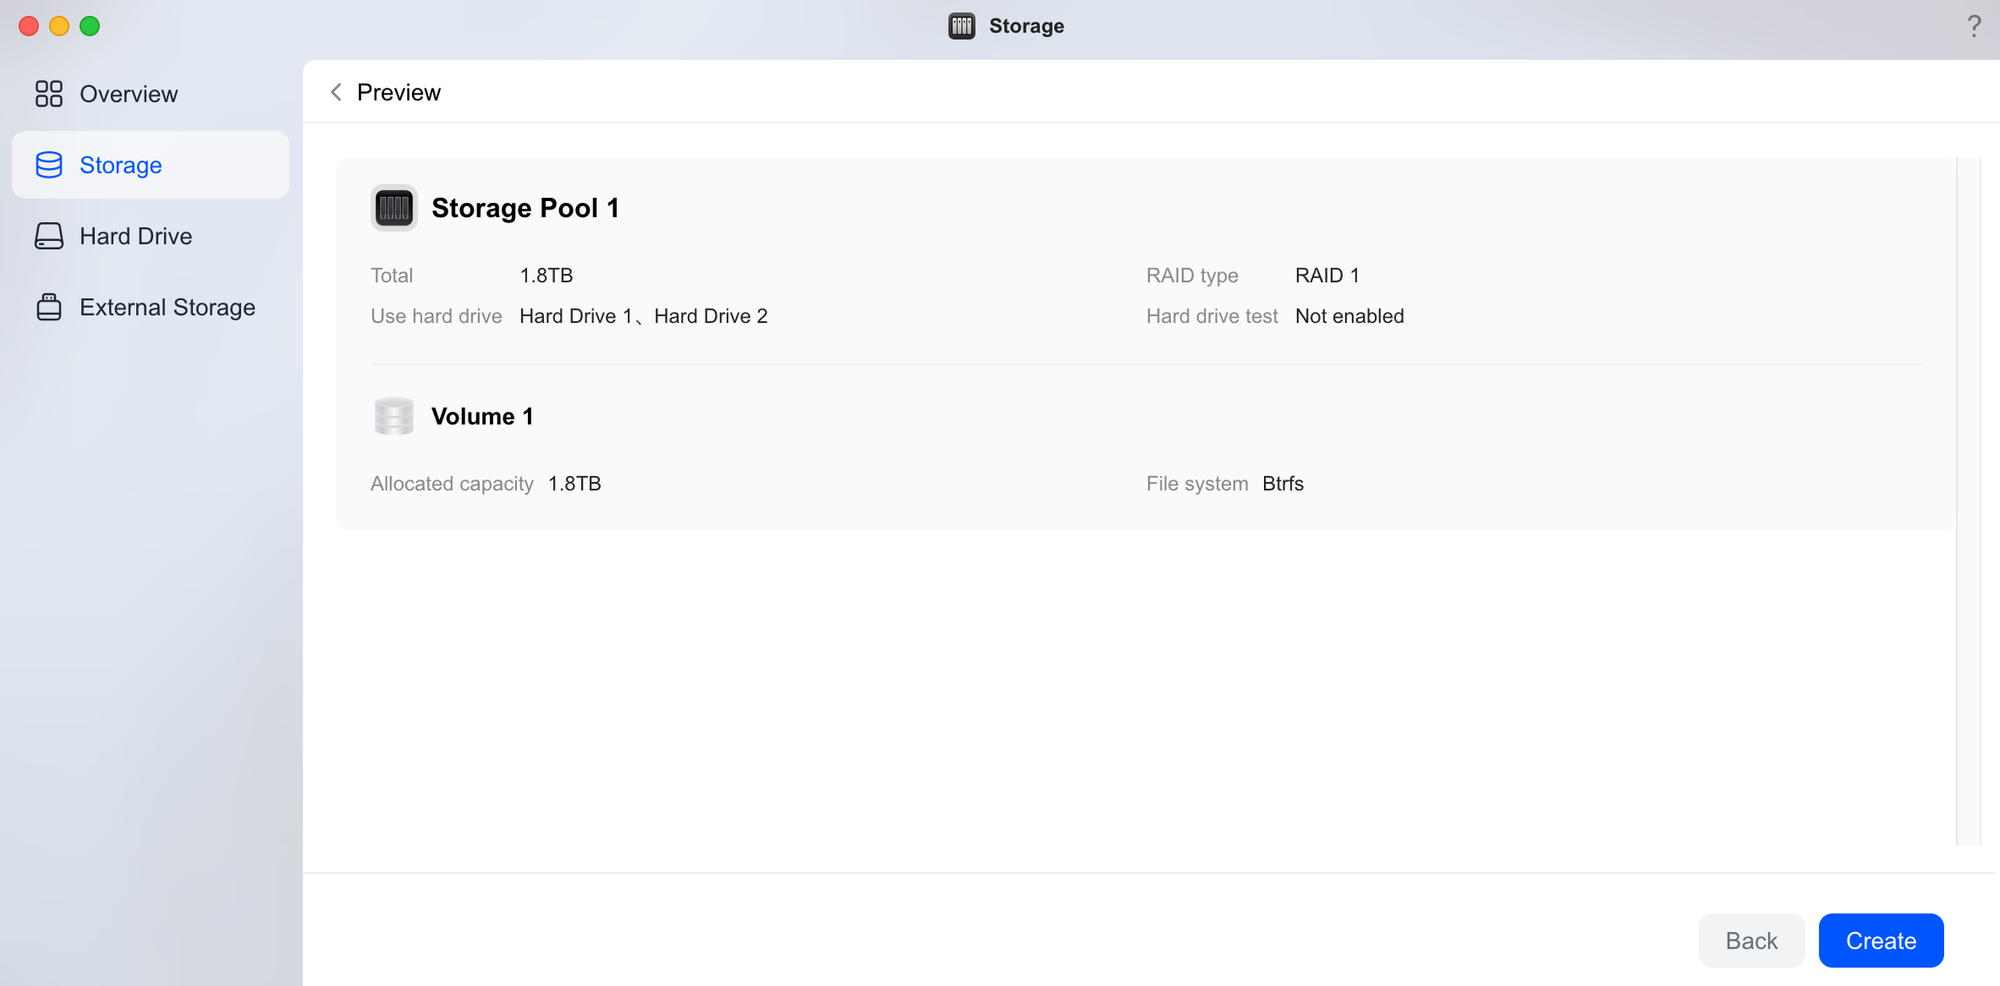
And that's it; the storage pool and volume are created, showing 1.8TB usable under RAID 1.
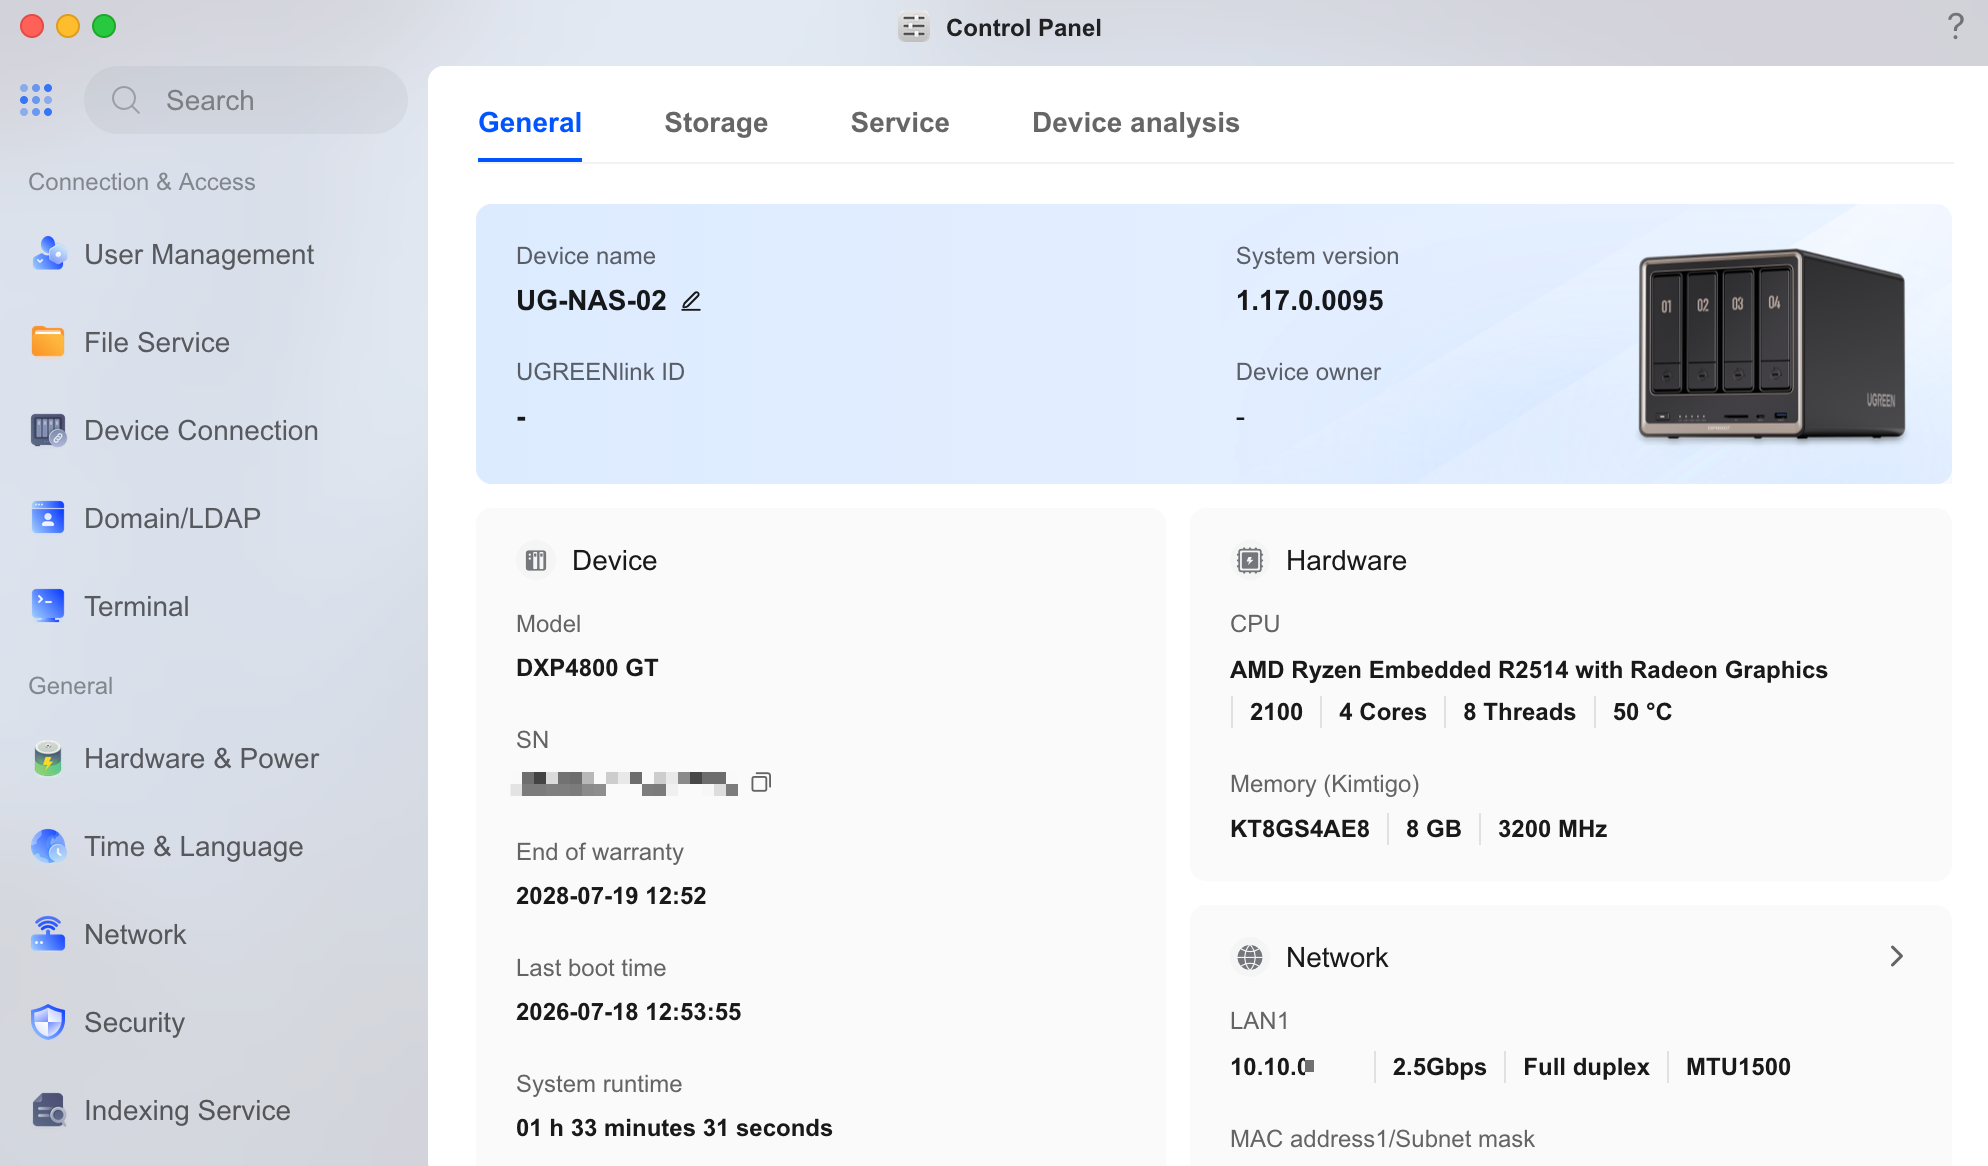
File Services
Under Control Panel > File Service, you'll find all the options for how you access your NAS over the network, including SMB, NFS, FTP, rsync, and WebDAV.
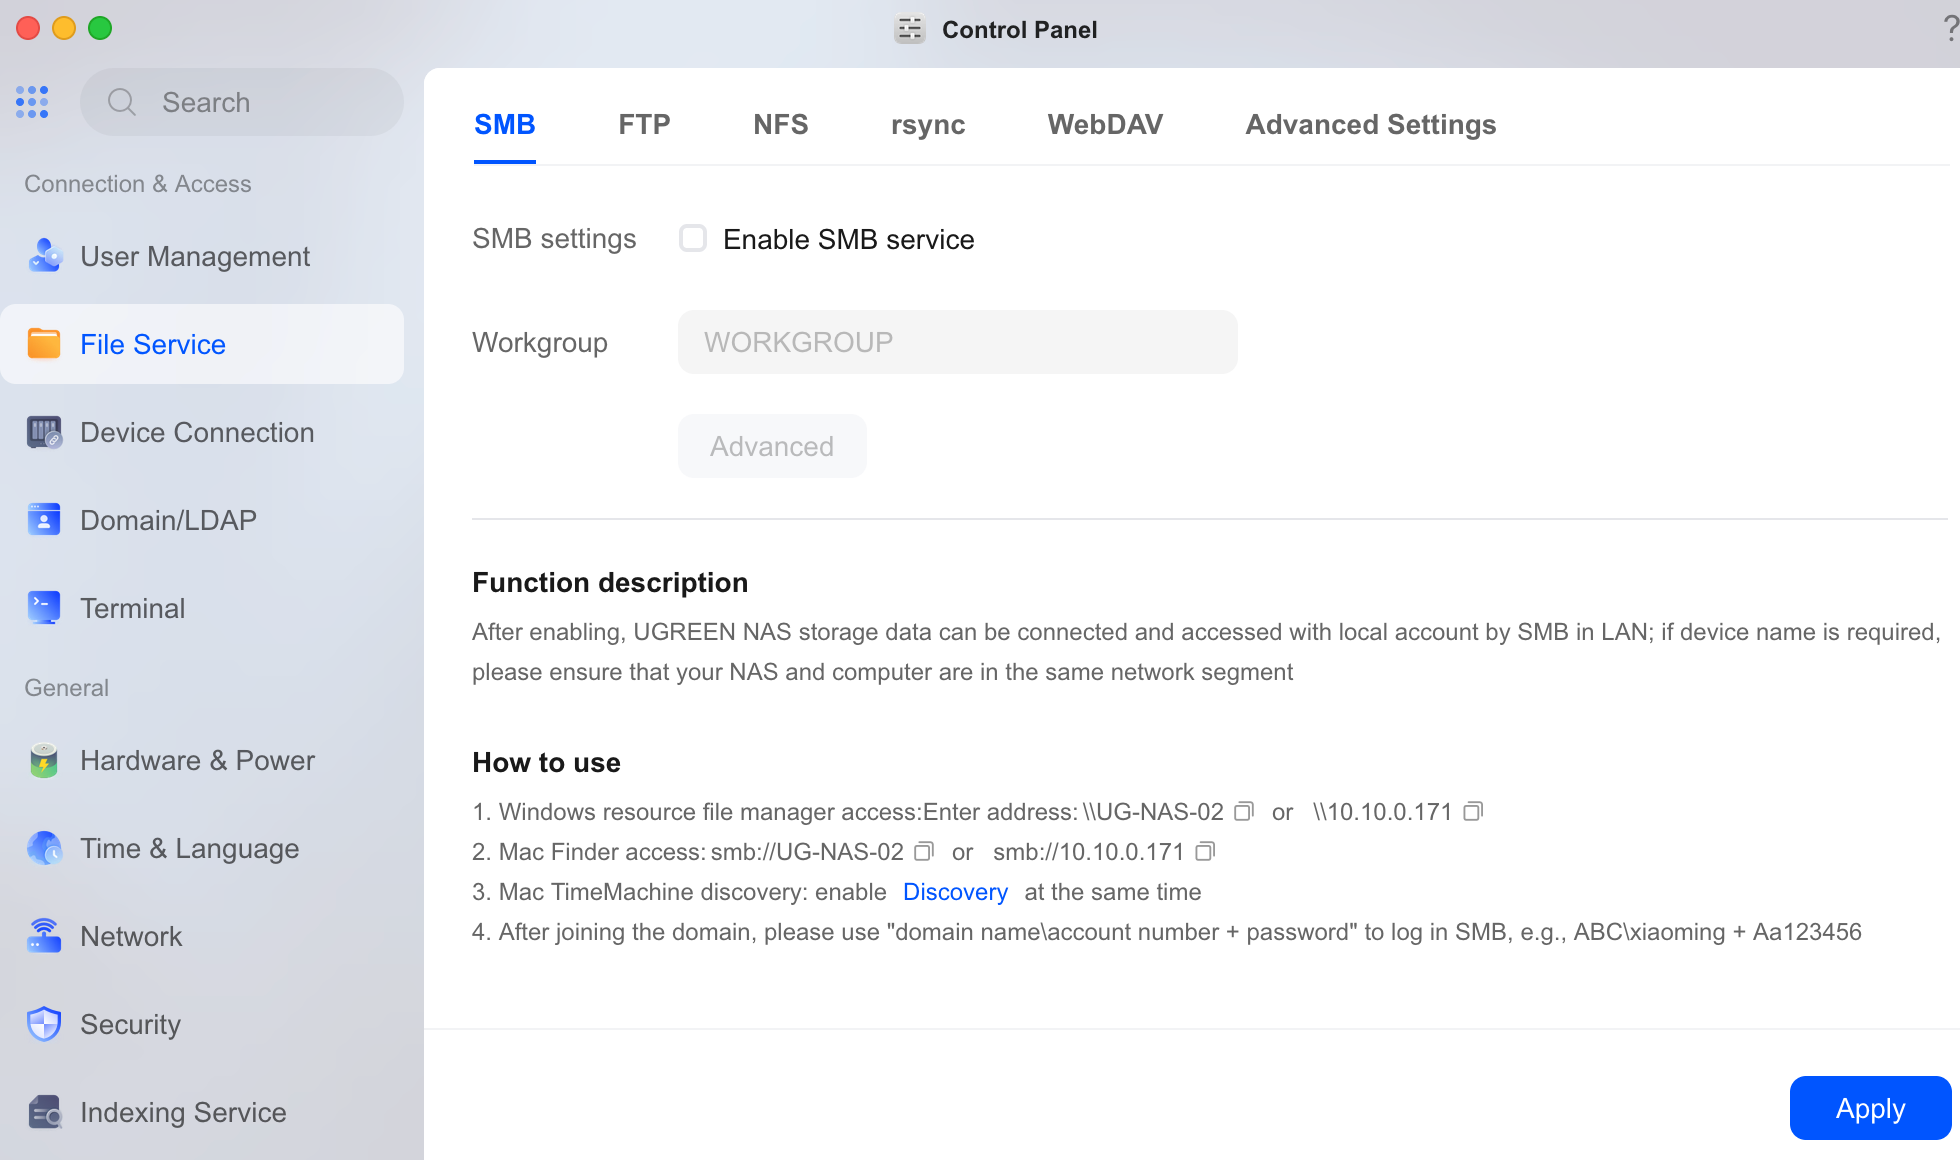
SMB is what most people will use; it's the protocol Windows and Mac use to browse and connect to shared folders over the network. Once enabled, you can access your shared folders from Windows using \UG-NAS-02 or the IP address, and from Mac using smb://UG-NAS-02 in Finder.
If you're on a mix of Linux systems, NFS is worth enabling too; it's generally more efficient for Linux-to-Linux file sharing and is commonly used for mounting shares on servers or other NAS devices.
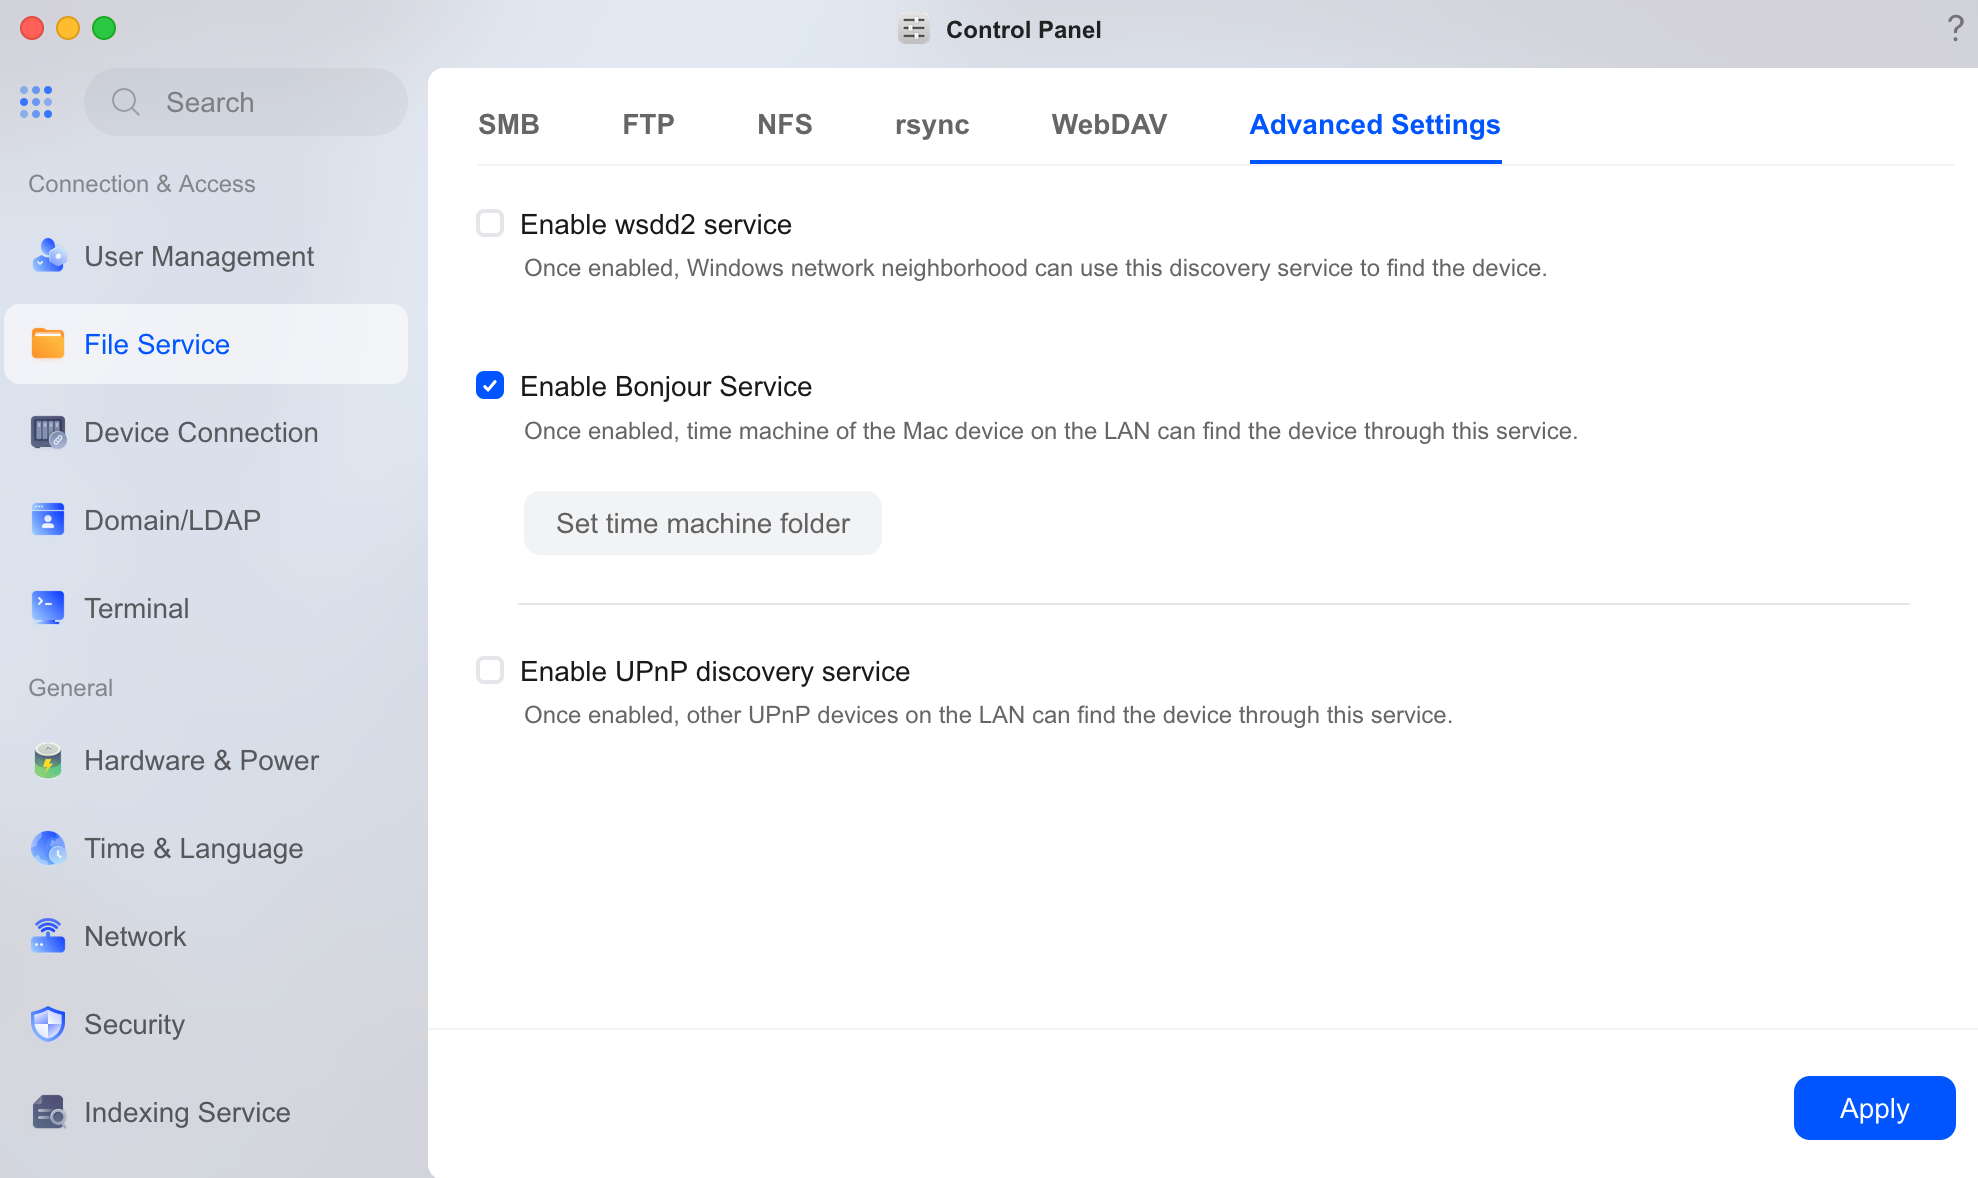
For Time Machine backups on a Mac, you need Bonjour Service enabled under Advanced Settings; this lets your Mac discover the NAS on the network as a Time Machine destination. From here you can also set a dedicated Time Machine folder rather than using a general shared folder.
Creating shared folders themselves is straightforward too; you just define a folder, set which users or groups can access it, and it becomes available over whichever protocols you've enabled.
Docker Setup
Running Docker containers on this NAS is refreshingly simple.
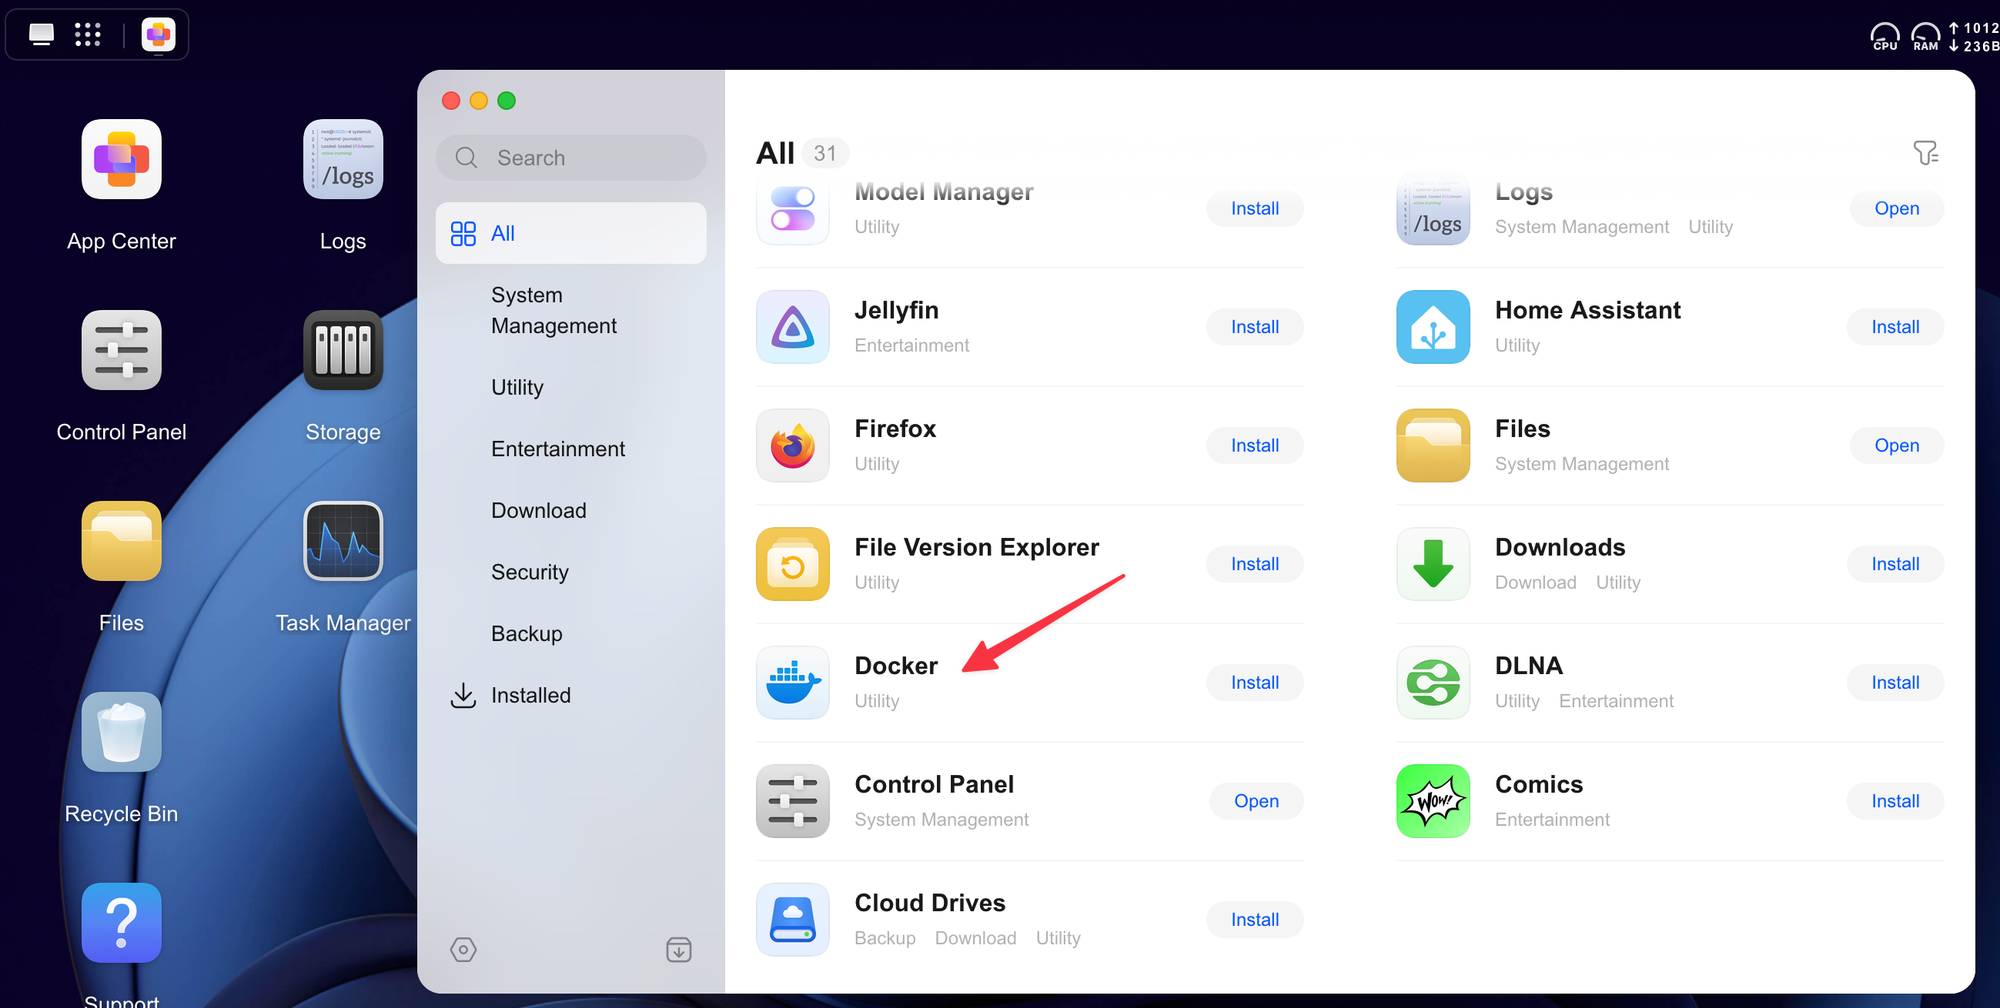
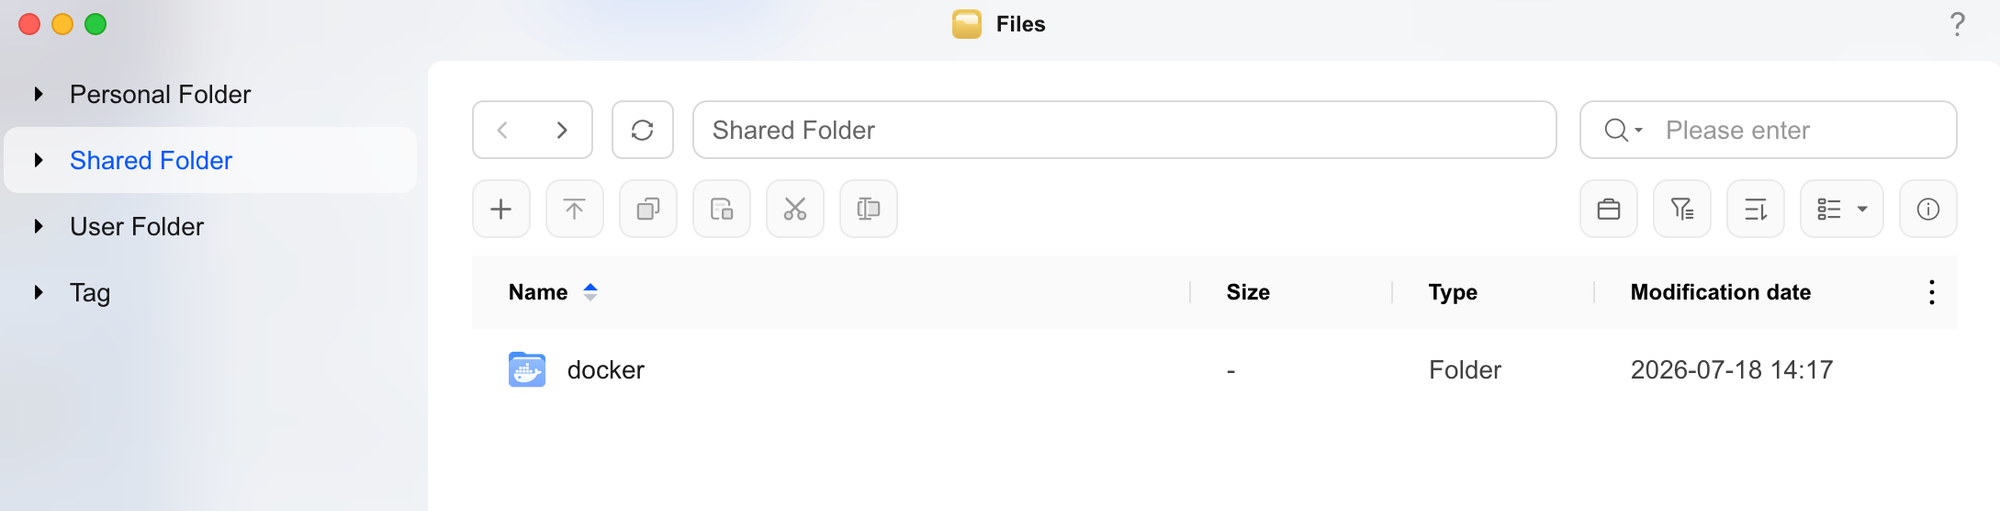
You install Docker from the App Center, the same place you'll find other apps like Virtual Machine, Photos, and Theatre. Once installed, it automatically creates a shared 'docker' directory for you.
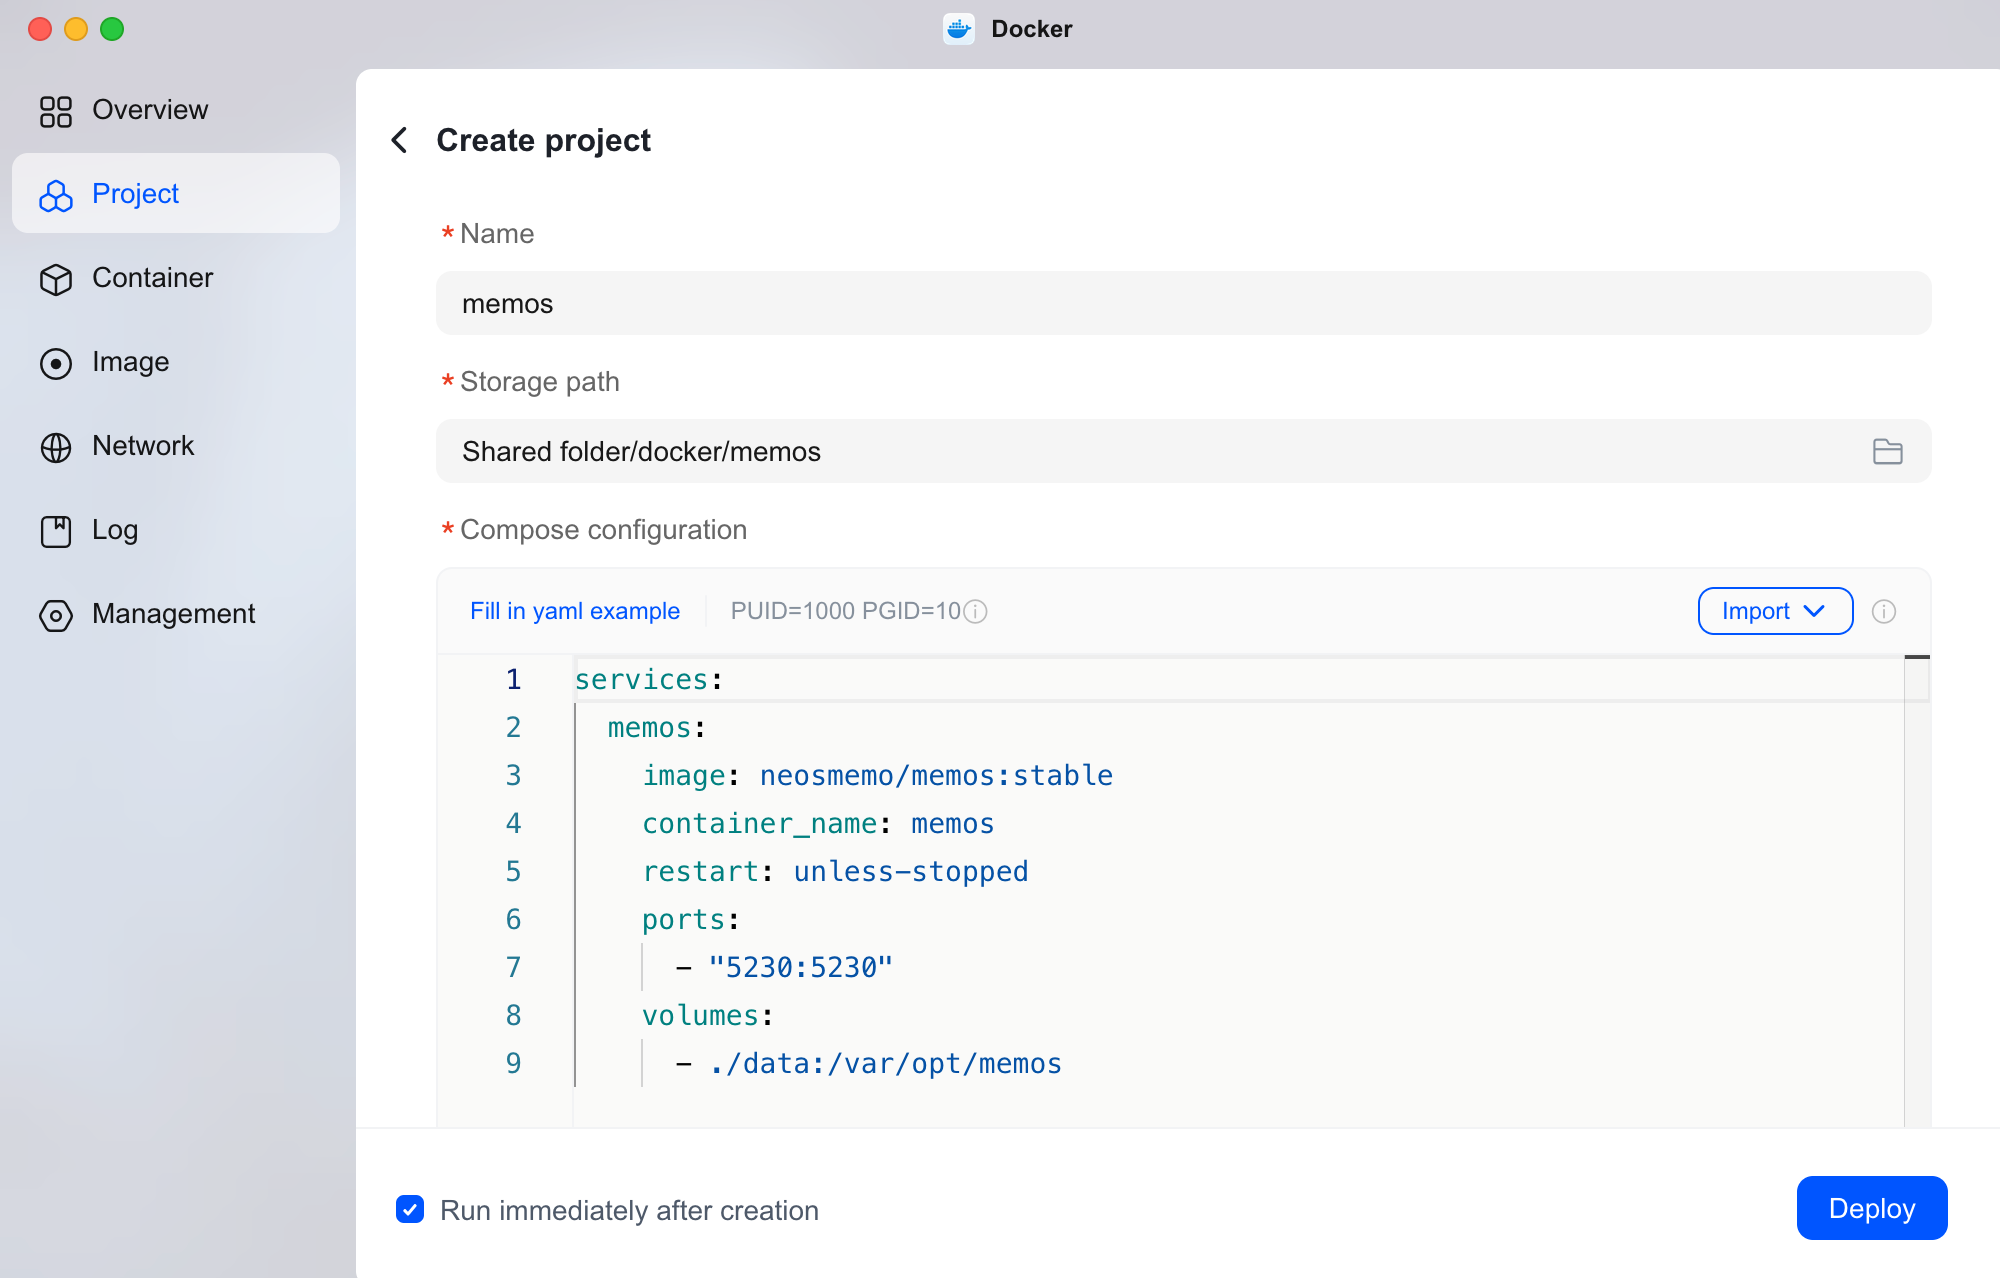
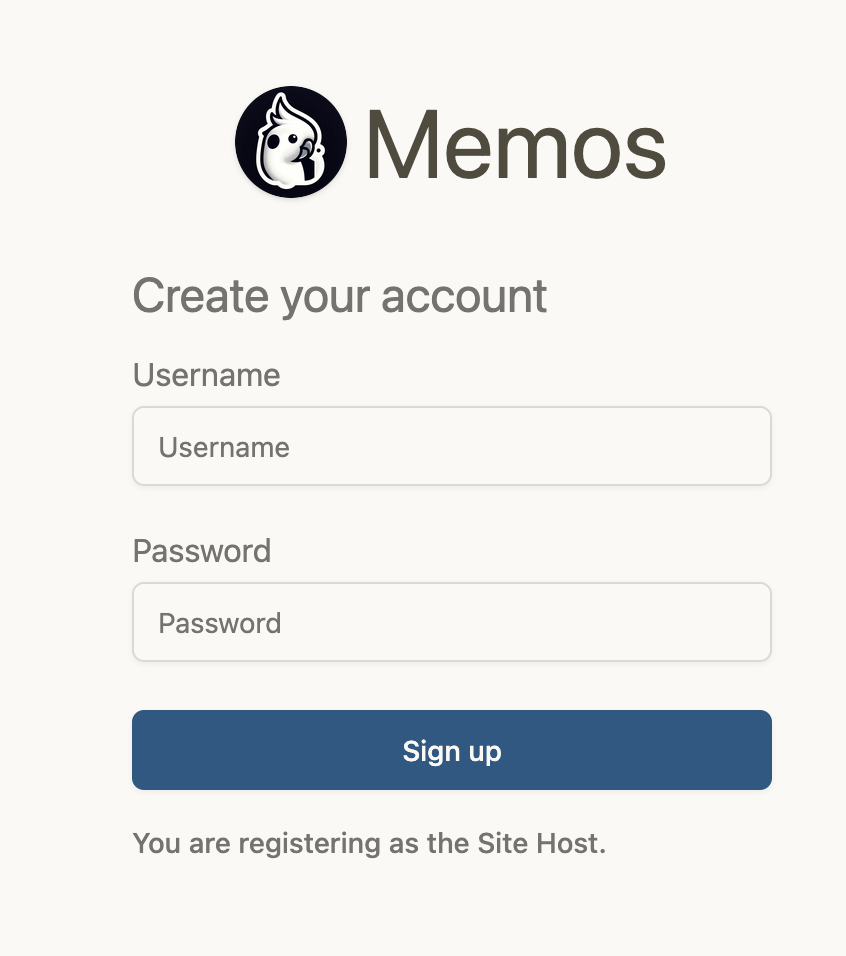
Open the Docker app, head to Project, and create a new project. Here you paste in your docker-compose file, which is just a YAML file that defines the container, its image, ports, and volumes, so you don't have to run everything manually through the command line. For this example, I'm using one of my favourite apps, memos.
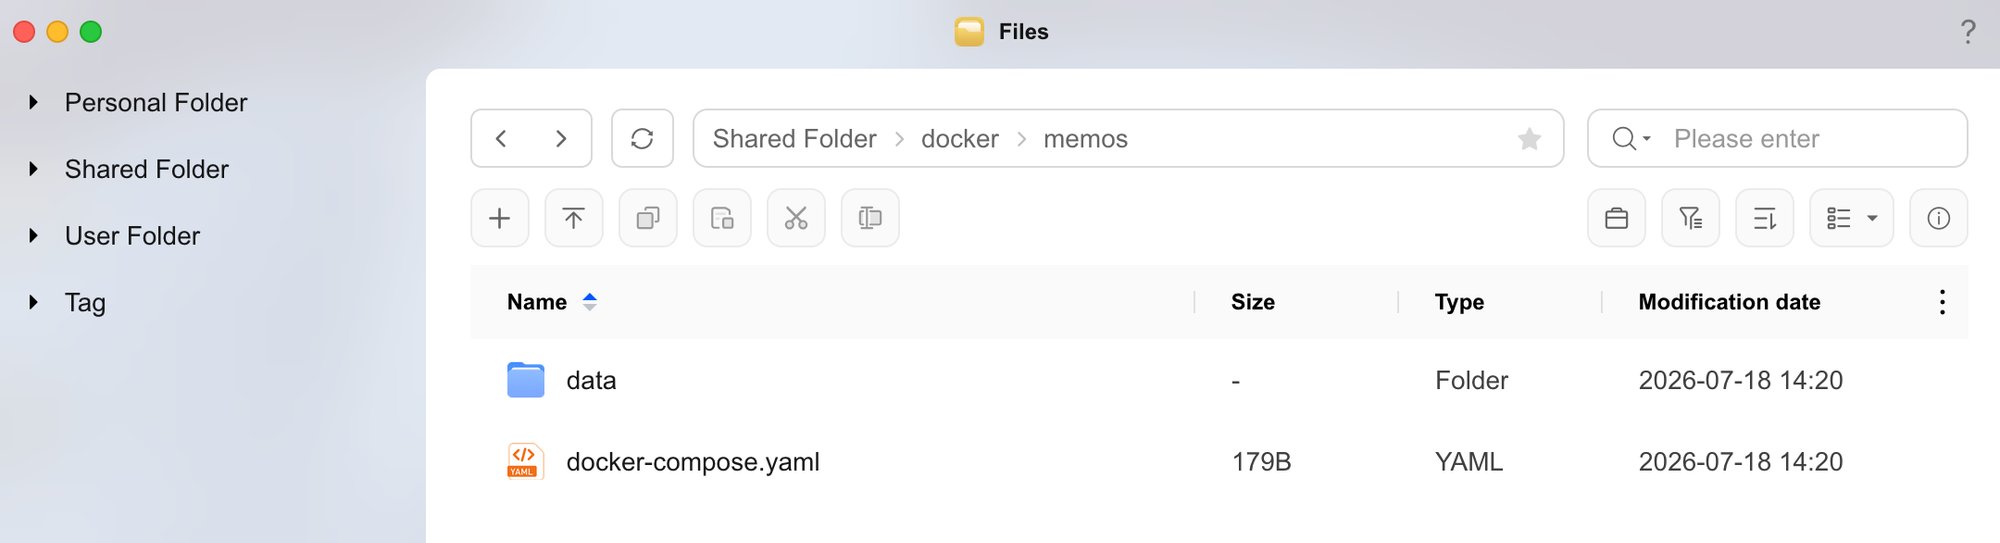
Once you deploy, it creates a new directory inside the Docker folder for that project. If your Compose file uses a bind mount, as I did here for the data folder, it automatically creates that directory under the project folder too.
And that's it; the app is up and running. Memos is a lightweight, self hosted note taking app, kind of like a mix between a notes app and a private Twitter feed. You jot down quick memos, tag them, and everything is stored locally on your own NAS instead of some third party cloud. It's become my favourite note taking app since I started self hosting it.
From the Docker app, you can view logs, check resource usage, and manage the container without needing to touch a terminal at all.
Link Aggregation (LACP)
Link aggregation lets you combine two or physical network ports into a single logical connection, giving you more combined bandwidth and some fault tolerance if one link drops. The DXP4800 GT supports this, and you can set it up under Control Panel > Network > Network Connection.
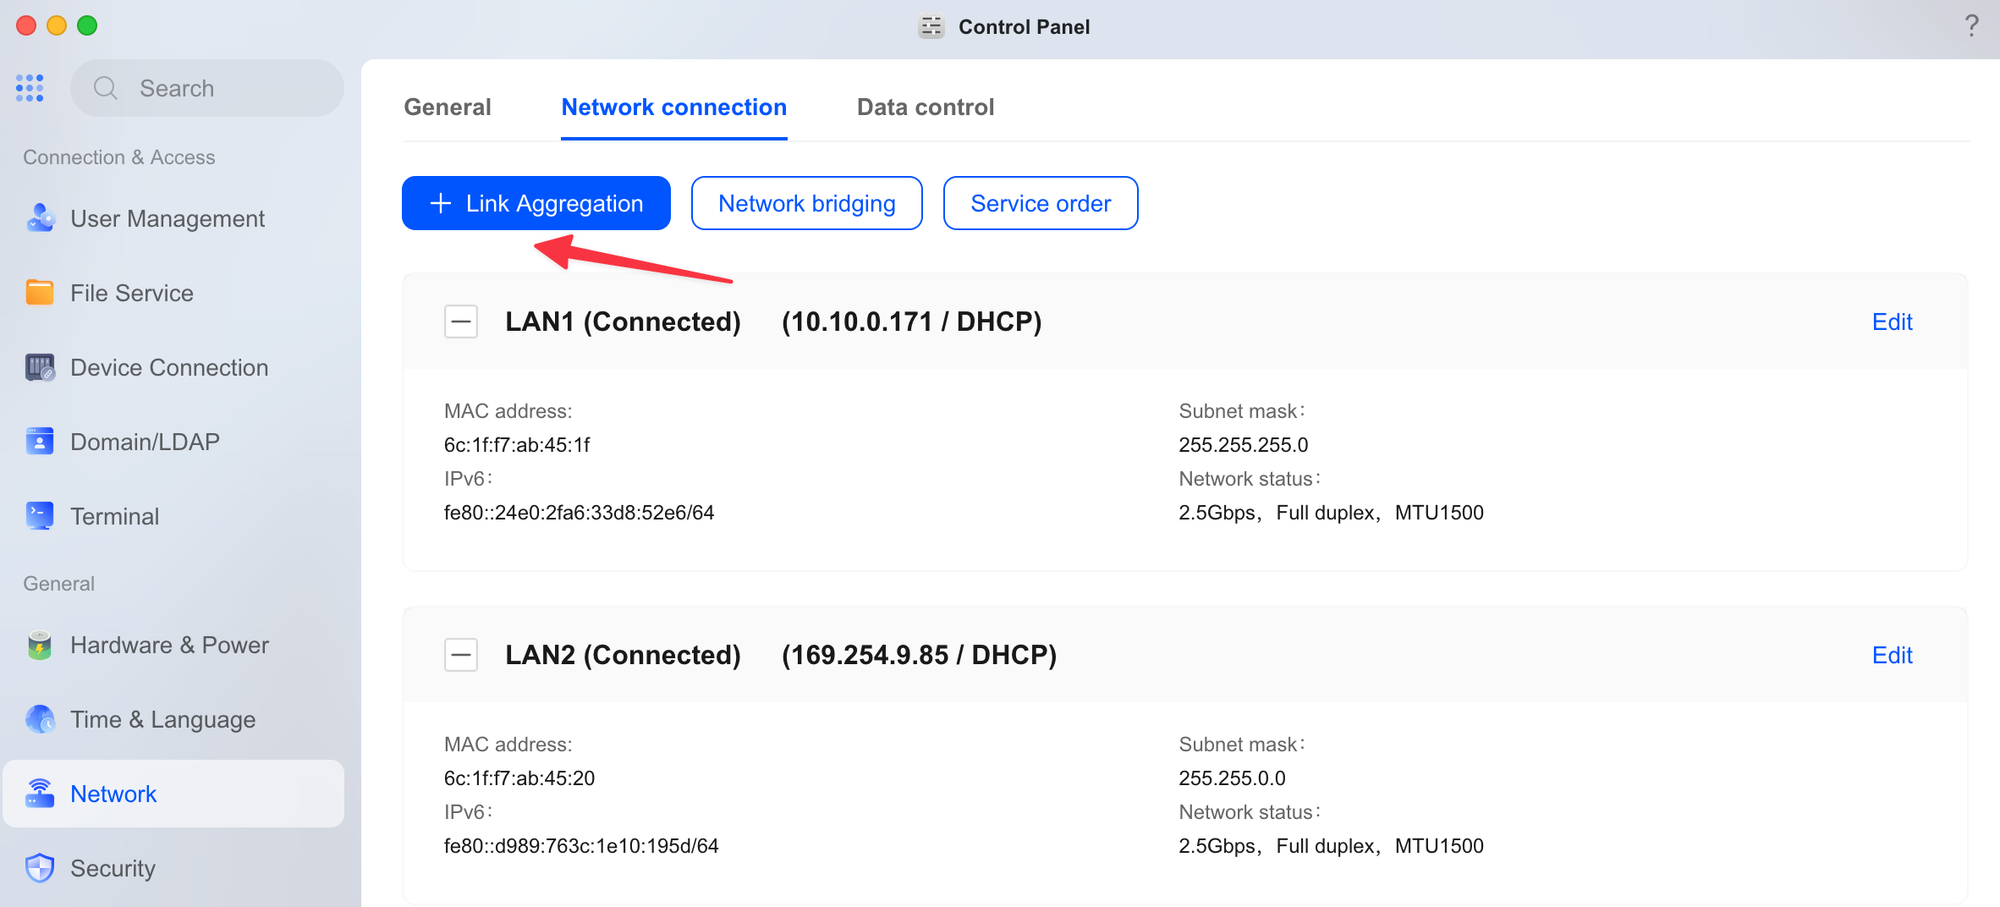
It's best to configure the NAS side of the link aggregation first, before touching the switch. If you configure the switch side first, you risk losing access to the NAS altogether, since the switch port would expect LACP before the NAS is set up to speak it, effectively cutting the link before you've had a chance to configure anything on the NAS. Doing the NAS side first avoids that problem entirely, and by the time you enable LACP on the switch, the NAS is already waiting for it.
There are several modes to choose from, including adaptive load balancing, active/backup, and dynamic link aggregation using LACP.
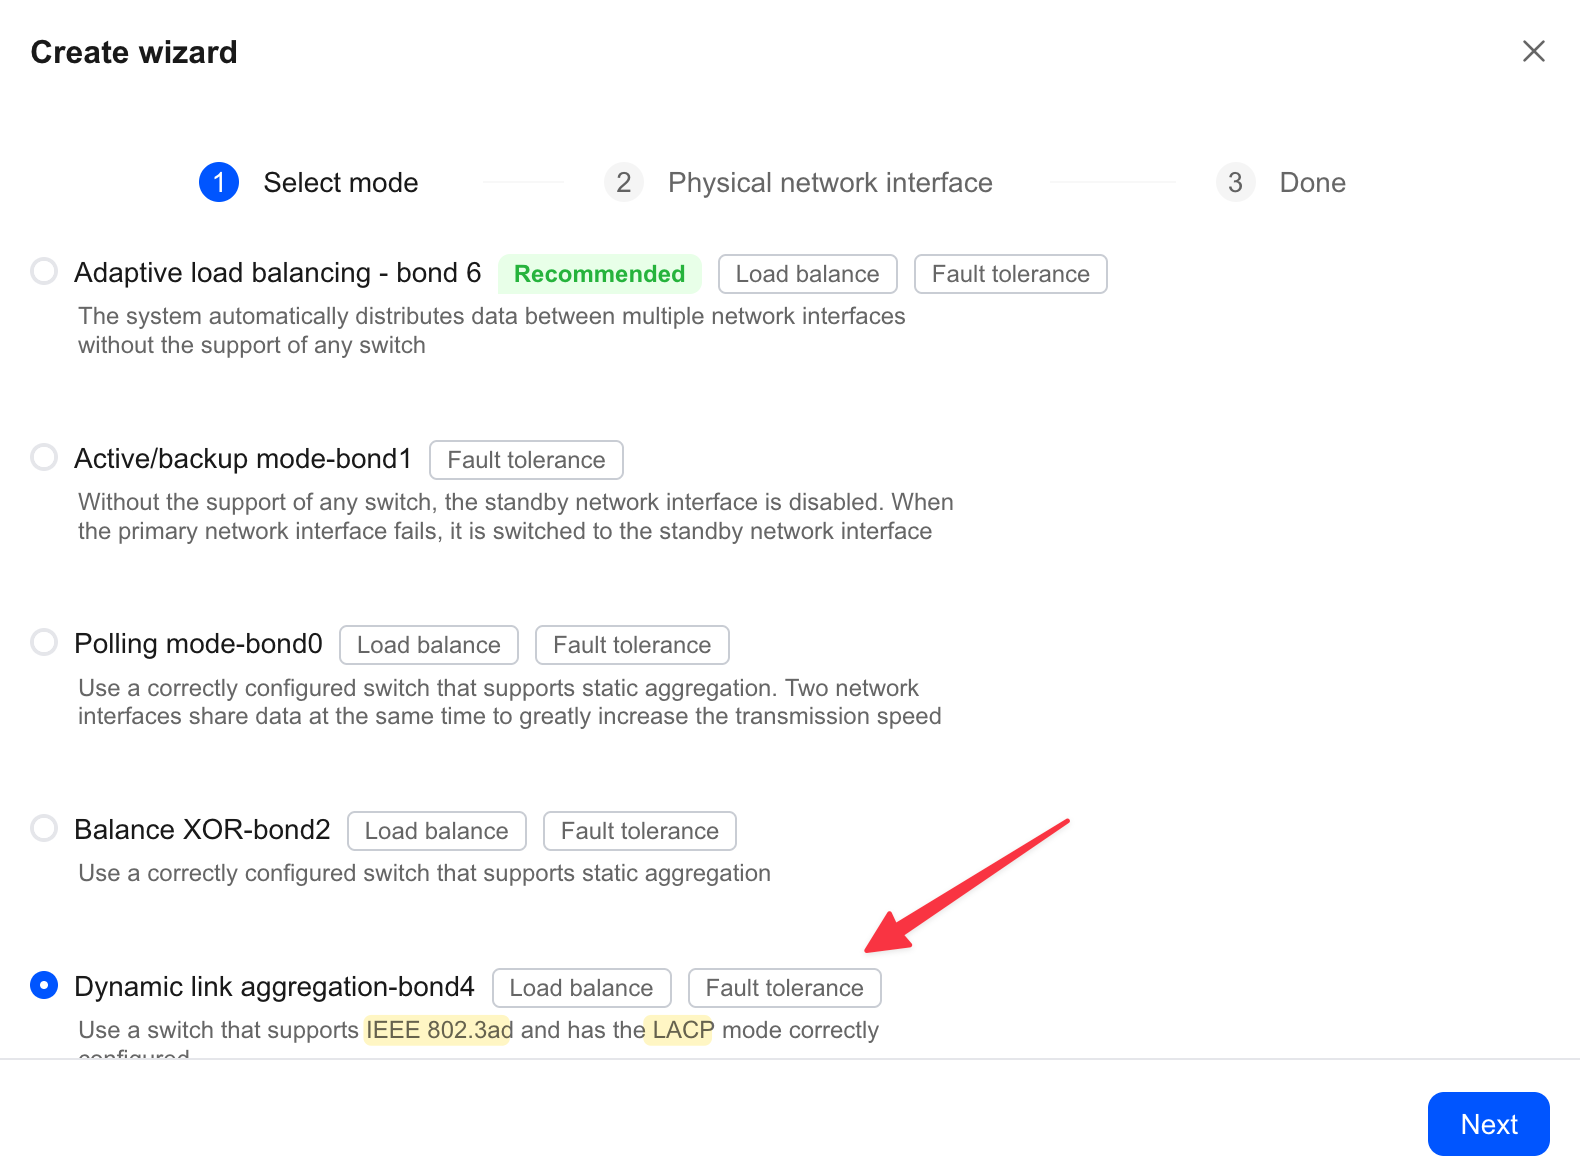
If your switch doesn't support LACP or 802.3ad, go with Adaptive Load Balancing (bond6), which is the recommended option since it doesn't need any special switch support and still distributes traffic across both interfaces. Since my switch does support LACP, I went with Dynamic Link Aggregation (bond4) instead, which requires a properly configured switch on the other end.
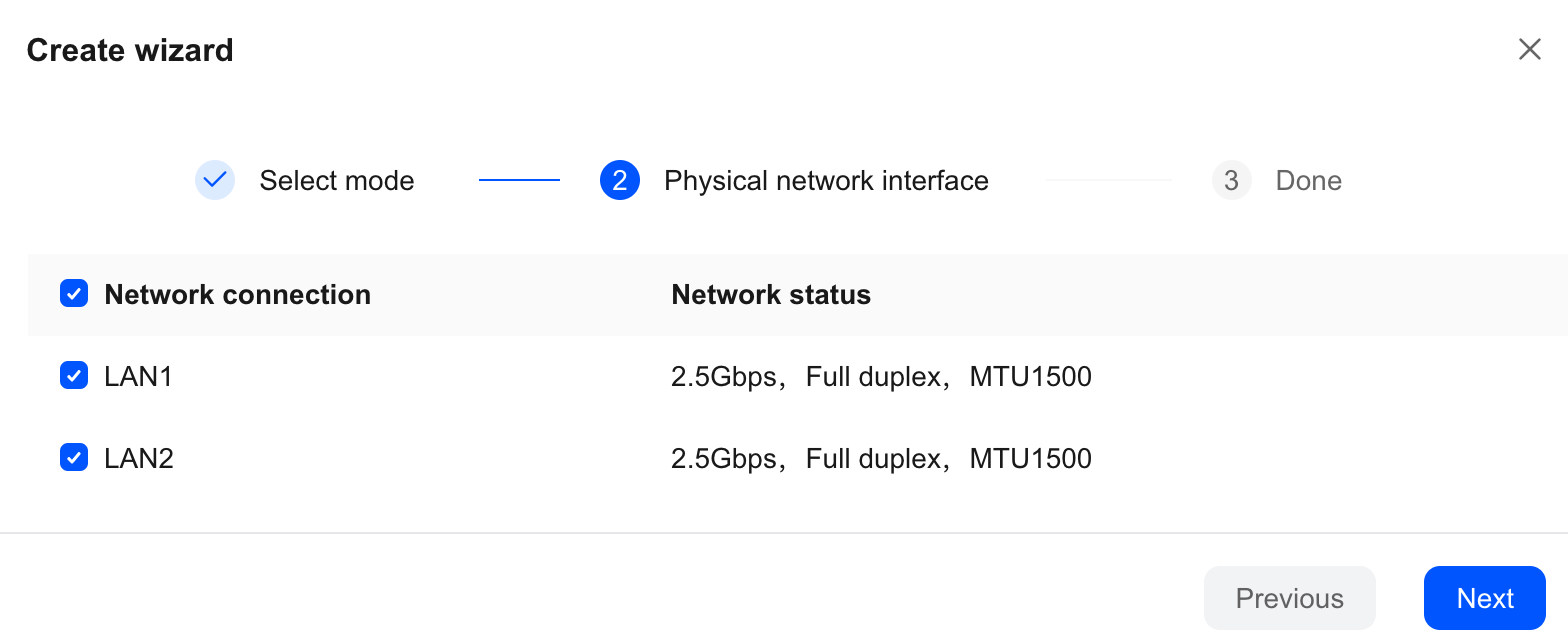
From here, you select which physical interfaces to include, in my case both LAN1 and LAN2.
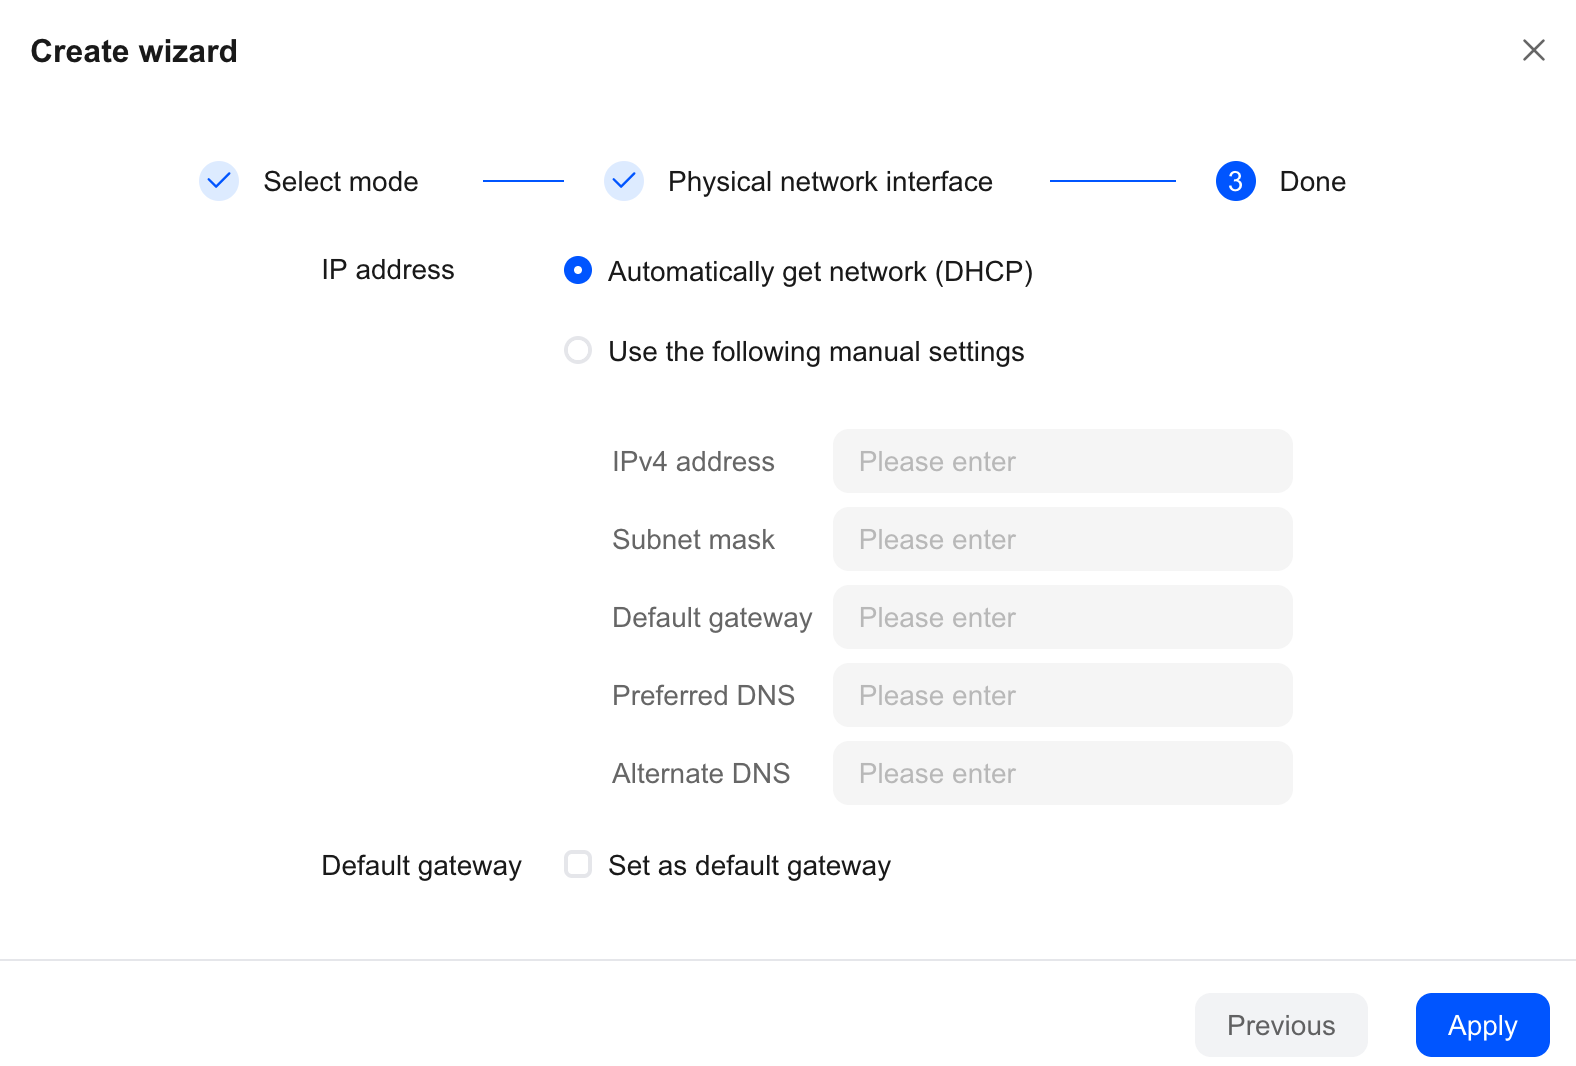
Then you set the IP addressing, I kept it on DHCP.
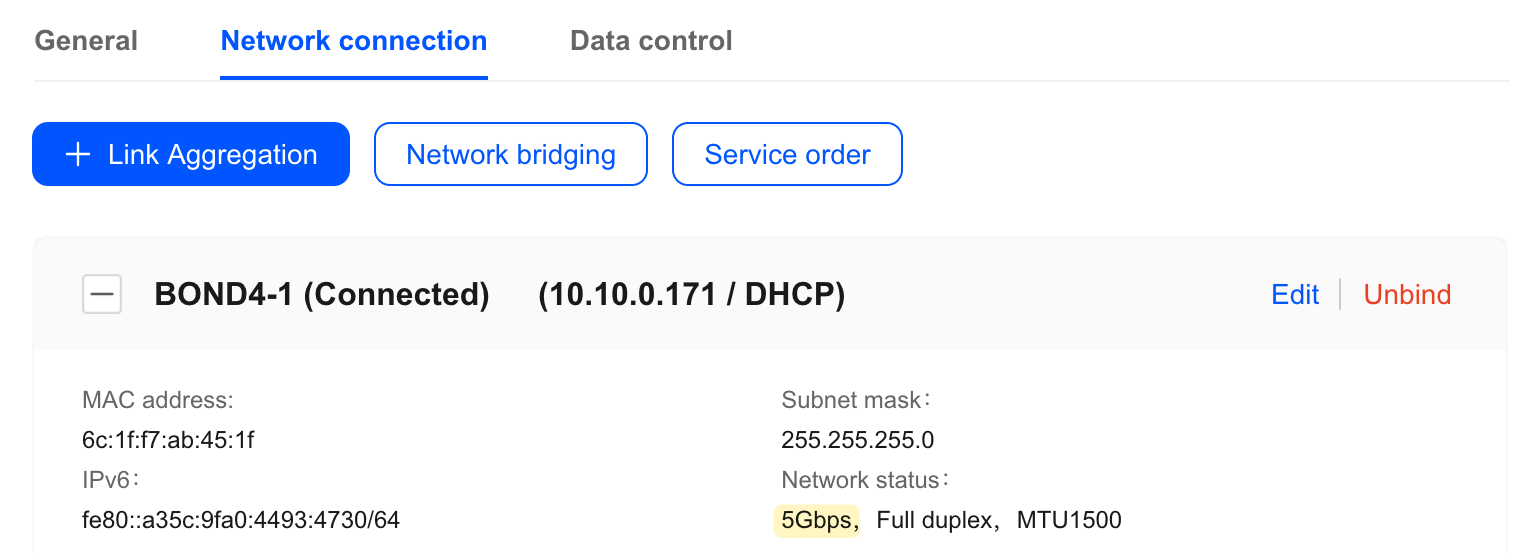
Once applied, both ports combine into a single BOND4-1 interface, and you can see the combined link running at a higher speed than either port individually.
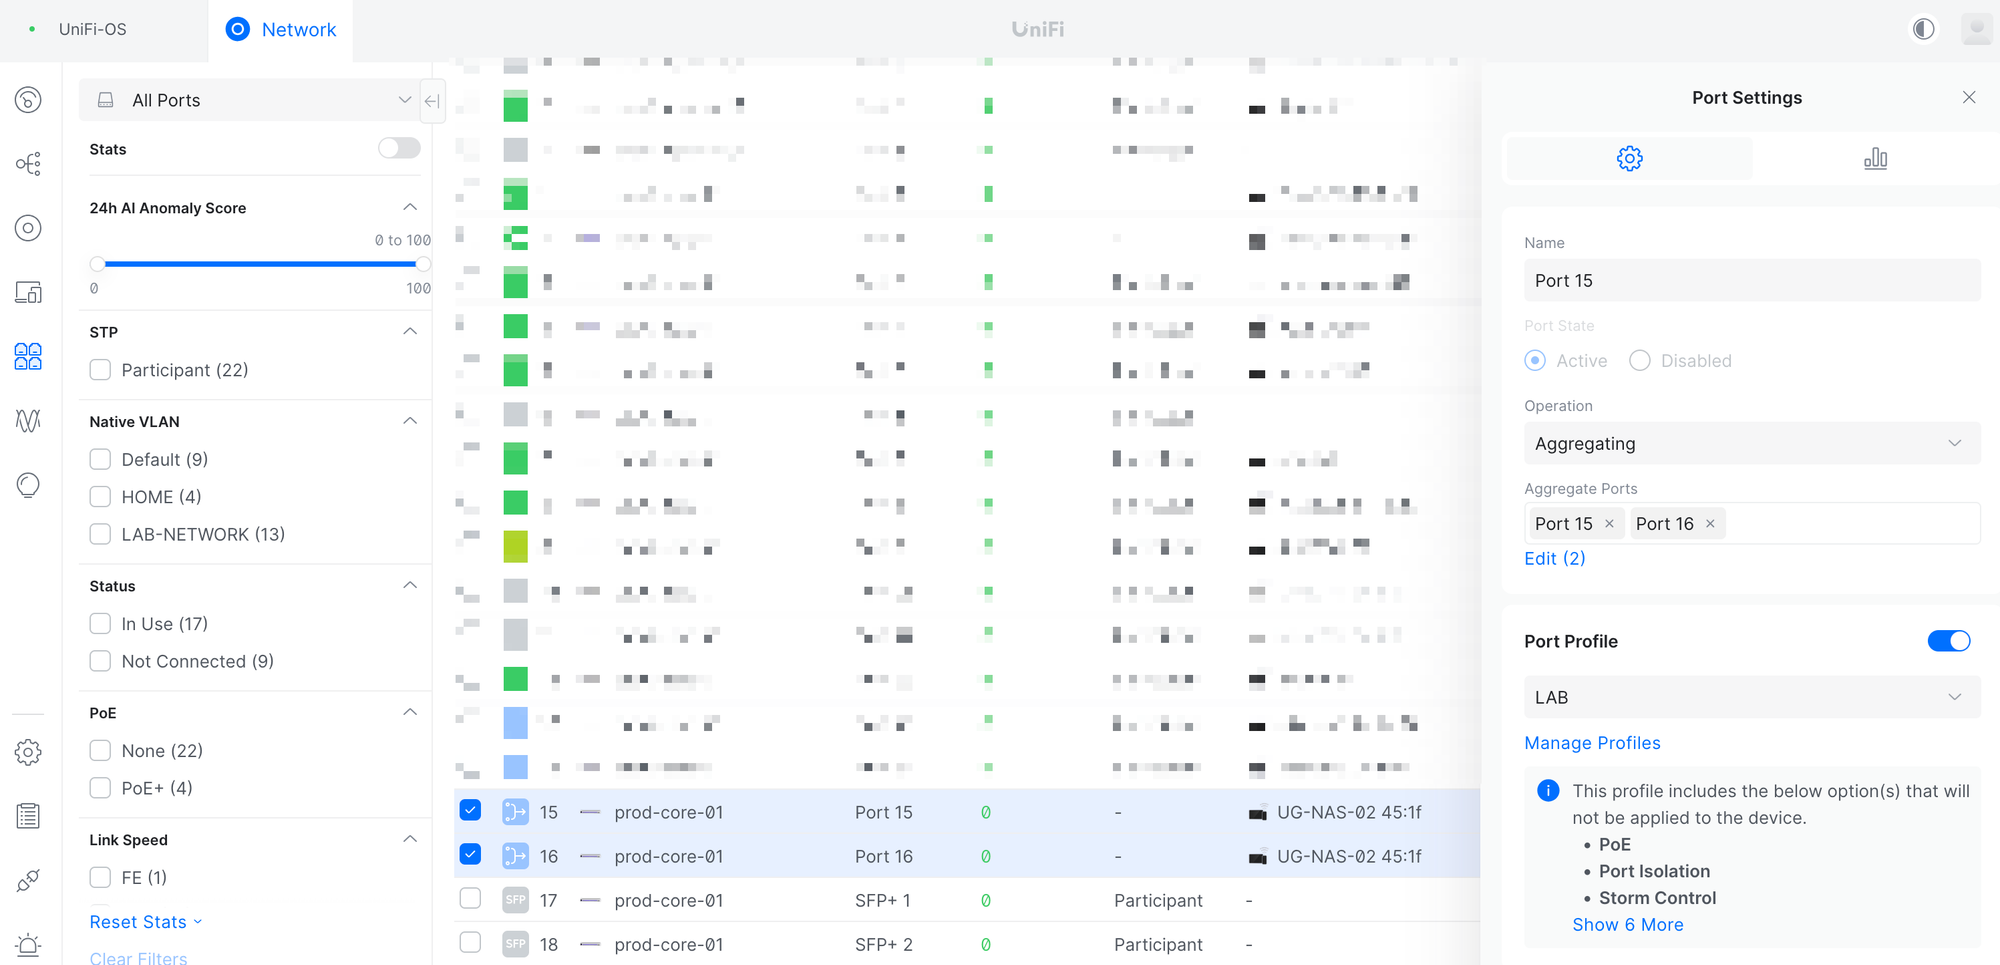
On the switch side, since I'm running UniFi, setting up the LACP side is just as simple. In the UniFi Network app, select the two ports connected to the NAS, in my case Port 15 and Port 16, then set the Operation to Aggregating and confirm the Aggregate Ports list shows both. Once applied, the switch treats those two ports as a single link, matching the bond already configured on the NAS side.
Please note that LACP doesn't mean a single device talking to the NAS suddenly gets the combined bandwidth. A single host is still limited to whatever one physical link provides, in this case 2.5Gbps, not the full aggregated 5Gbps. This comes down to how LACP distributes traffic across the links, it uses a hashing algorithm based on things like source and destination MAC or IP address to decide which physical link a given connection goes over, and once a connection is hashed to a link, it stays on that link for its duration. So the benefit of link aggregation really shows when you have multiple clients or multiple connections hitting the NAS at once, since those can be spread across both links.
What's Next?
For now, I've only scratched the surface of what this NAS can do. Going forward, I'm planning to add two SSDs to the U.2 bays so I can run multiple VMs without touching the HDD pool, which I'll keep dedicated to bulk storage. I'm also planning to add ECC RAM for better data integrity, along with an NVMe drive or two for caching. Once that's all in place, I'll put together a follow-up post covering VM performance and how the NVMe cache affects real-world read and write speeds.