I've been running Proxmox for maybe two years now, and I'd consider myself somewhat of a beginner. I set it up once using Proxmox version 8.x alongside Proxmox Backup Server and pretty much forgot about it. I can spin up new VMs and CTs, or remove existing ones, and that's about it. Fast forward to mid-2026, Proxmox released version 9, and I'd been meaning to upgrade. I went through a few guides and forum posts, and people tended to recommend backing up the VMs and CTs using PBS, then reinstalling Proxmox with the new version and restoring from backup.
TL;DR
I upgraded my Proxmox setup from version 8.x to 9 without doing an in-place upgrade. Instead, I used a spare node already on version 9 as a temporary home and rebuilt the other two nodes one at a time. The idea was to back up everything with PBS, restore onto the spare, then wipe and fresh install version 9 on each node before joining them into a new three-node cluster. Once the cluster was sorted, I also rebuilt pbs-01 to version 4 and cleaned up the old backups. The whole thing was seamless, I didn't lose anything, and it all worked the first time 😄
My Setup Before the Upgrade
Prior to the upgrade, I had two Proxmox nodes in a cluster - one mini PC (proxmox-02) and the other a more resourceful custom-built PC (proxmox-01). I also had a Proxmox Backup Server (pbs-01) running on a separate mini PC, plus a second PBS instance (pbs-02) running on my UGreen NAS. I covered PBS in detail in a previous post, so feel free to check it out.
I'd also bought another mini PC (proxmox-03) a while back and installed Proxmox version 9 on it, but never ran anything on it. It just sat idle for a few months outside of the cluster (standalone).
The Upgrade Plan
Since proxmox-03 was already sitting there on version 9 doing nothing, the idea was to use it as a temporary home while I rebuilt the other two nodes one at a time, rather than attempting an in-place upgrade on machines actually running things I rely on.
I'd start with proxmox-02, the mini PC, since it had less running on it. I already had PBS taking daily backups of everything, so I knew I had an up-to-date copy to restore from. One thing to note here is that before I could restore anything, I had to add pbs-01 as a storage target on proxmox-03 as well, otherwise it had no way to reach the backups. Once that was done, I restored those VMs and CTs onto proxmox-03, then wiped proxmox-02 and did a fresh install of version 9, joining it to a new cluster on proxmox-03.
Next was proxmox-01, the more resourceful machine. Same idea as before, back up everything with PBS and restore as much as I could onto the newly installed proxmox-02 and proxmox-03. A few VMs on proxmox-01 were too resource-heavy for the mini PC to handle, but I don't need those running all the time, so I was happy to have them shut down while rebuilding proxmox-01. Once I confirmed what had moved, I wiped proxmox-01, installed version 9, and finally restored everything, including the heavy VMs, back onto it from backup.
Two nodes on version 8, one spare already on version 9 doing nothing.
Back up the mini PC with PBS, restore its VMs and CTs onto proxmox-03, then wipe and fresh install version 9. Join it to a new cluster on proxmox-03.
Back up everything and restore what fits onto proxmox-02 and proxmox-03. The heavy VMs stay down for a bit. Once confirmed, wipe and install version 9.
Three node cluster, all on version 9. Heavy VMs restored back onto proxmox-01.
LVM-thin vs Directory Storage
I didn't actually know what LVM-Thin was before this. When I first installed Proxmox a couple of years ago, I just went with directory storage for my data disk, mostly because that's what I was used to, and it never occurred to me to look into the alternatives. It worked fine for spinning up VMs and CTs, so I never had a reason to question it.
This time, going through the rebuild, I figured it was worth understanding what LVM-Thin actually was before just defaulting to the same setup again.
Directory storage stores VM disks as regular files, qcow2 or raw, sitting in a folder on whatever filesystem you formatted the disk with. LVM-Thin works differently. Instead of files, VM disks become logical volumes. Basically, chunks of a shared storage pool, allocated thinly so you only use the space you actually need rather than reserving it all upfront. Snapshots are much faster and more space-efficient because LVM tracks changes at the block level rather than the file level.
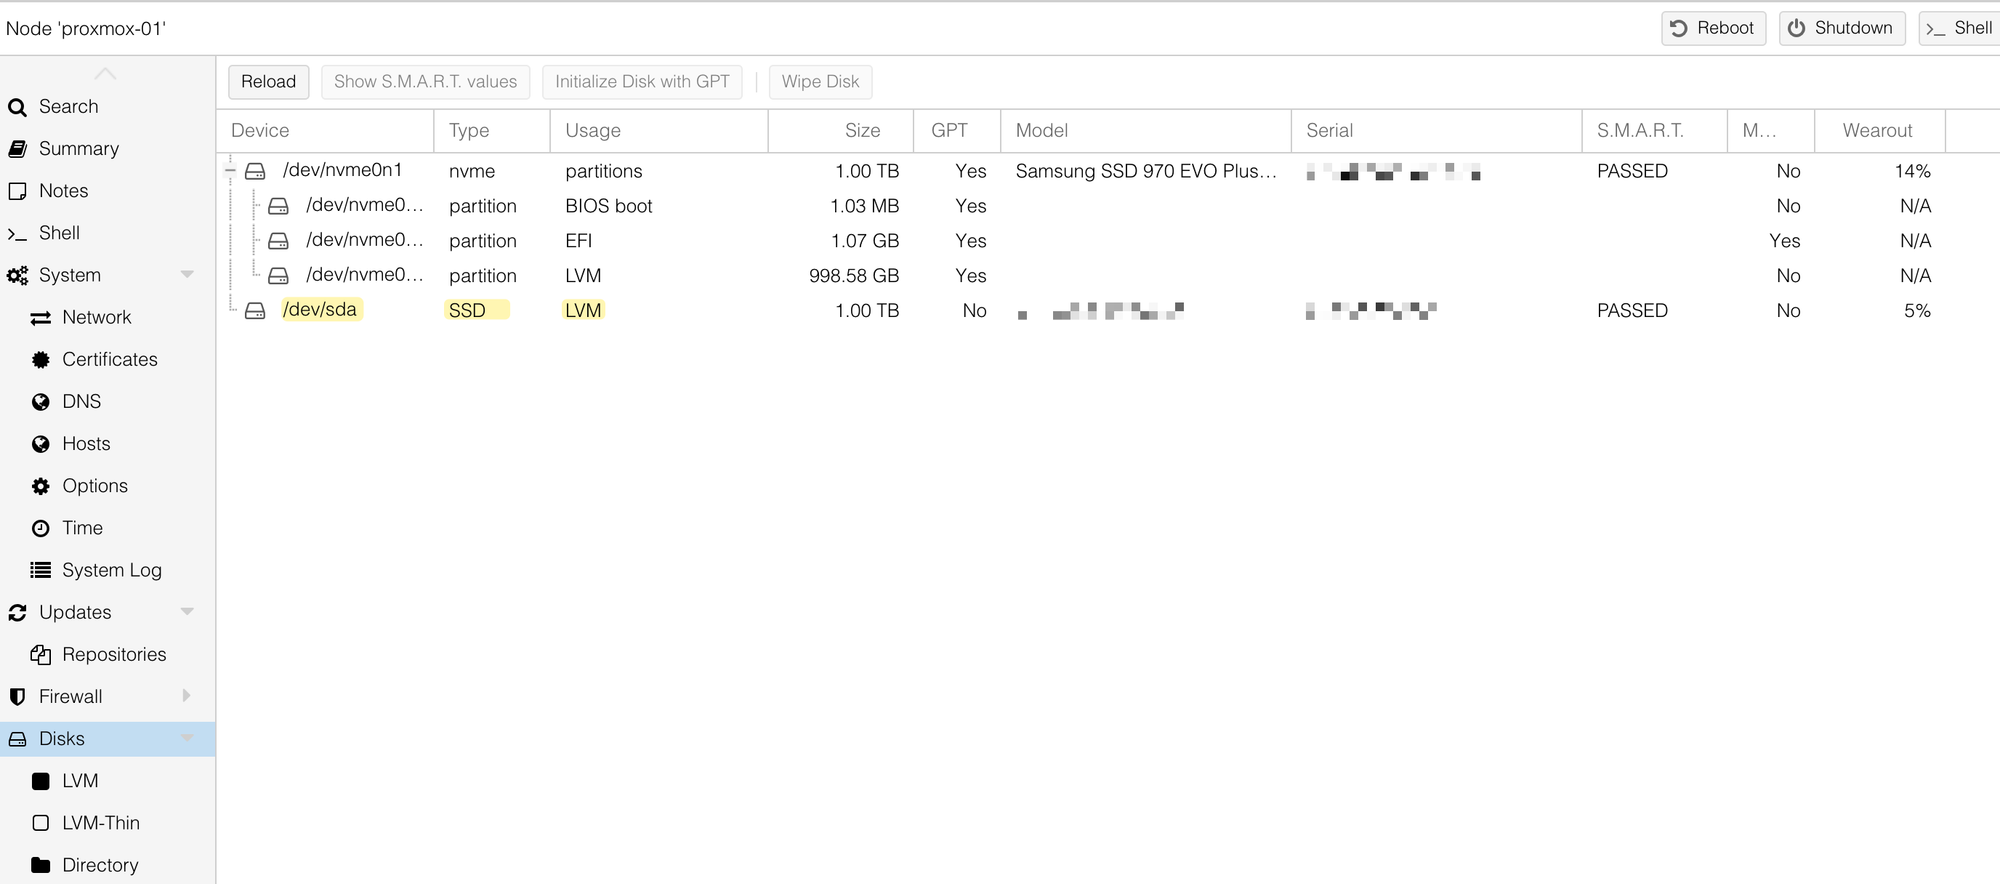
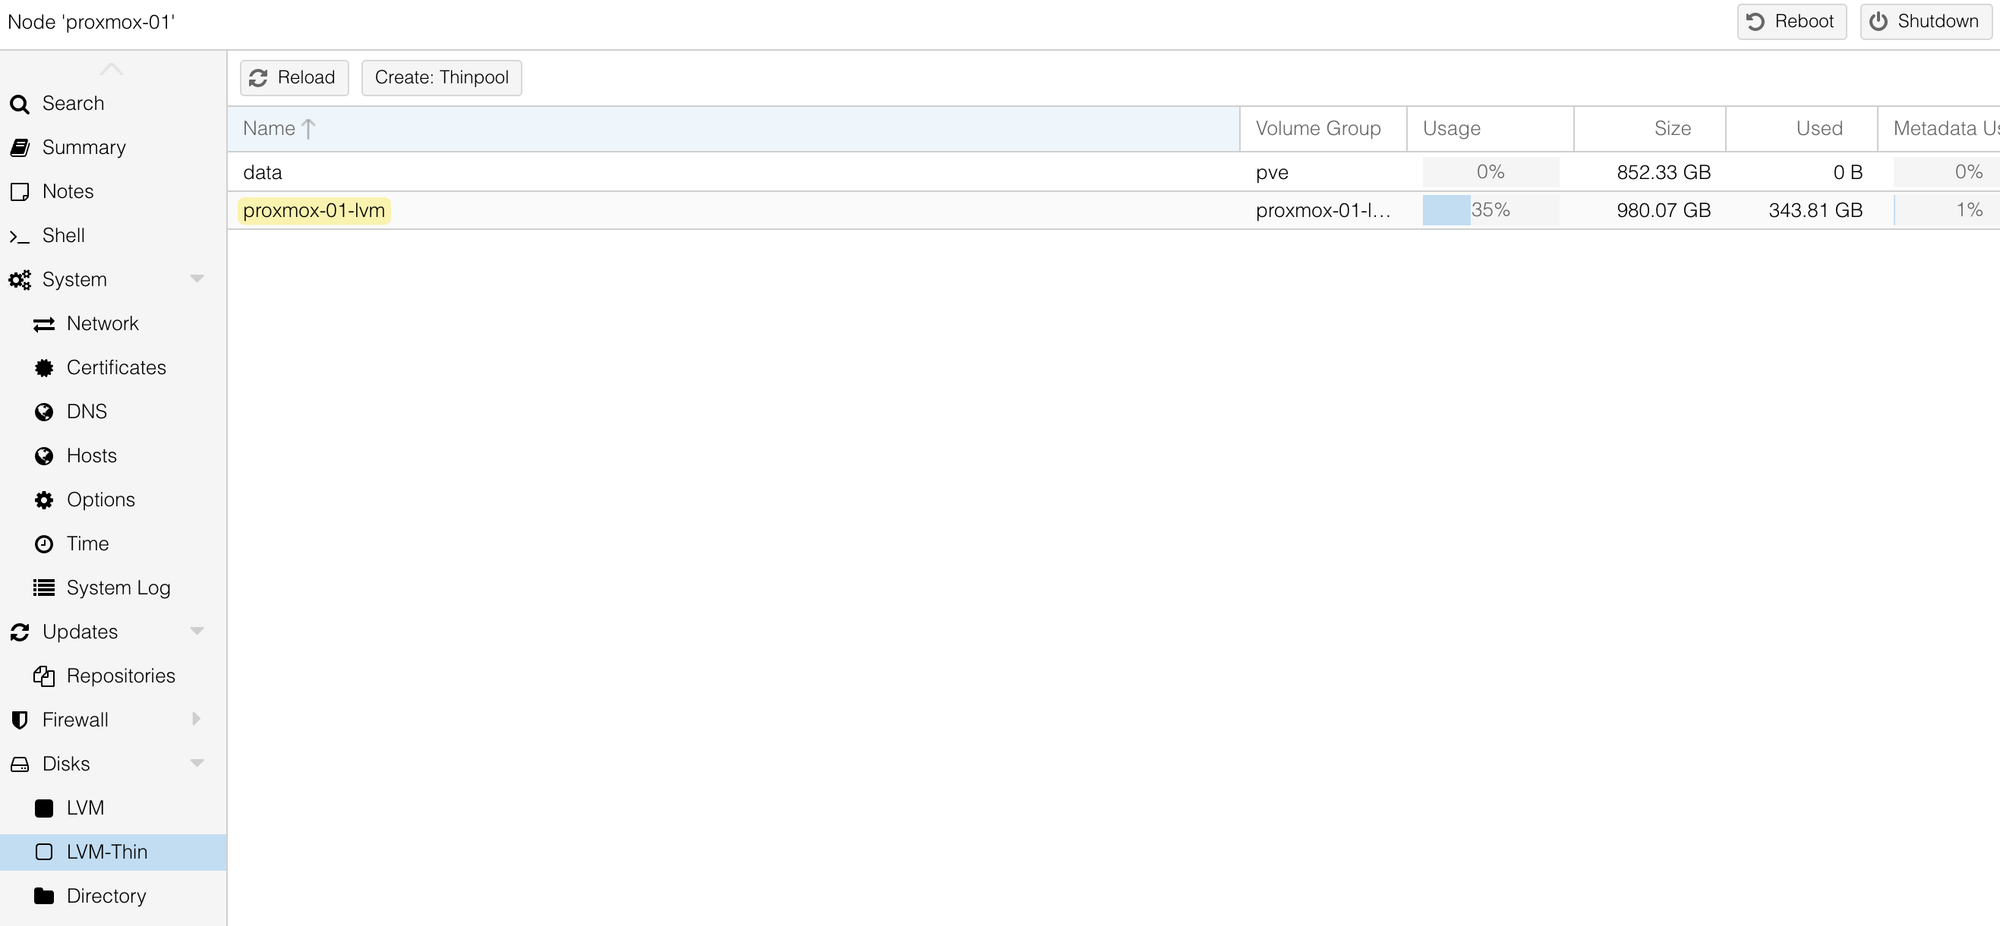
For my setup, since the disk was purely going to hold VM and CT disks (no ISOs or backup files), LVM-Thin made more sense. So when I wiped the 1TB disk, instead of recreating the directory storage I had before, I went with LVM-Thin instead.
PBS Upgrade
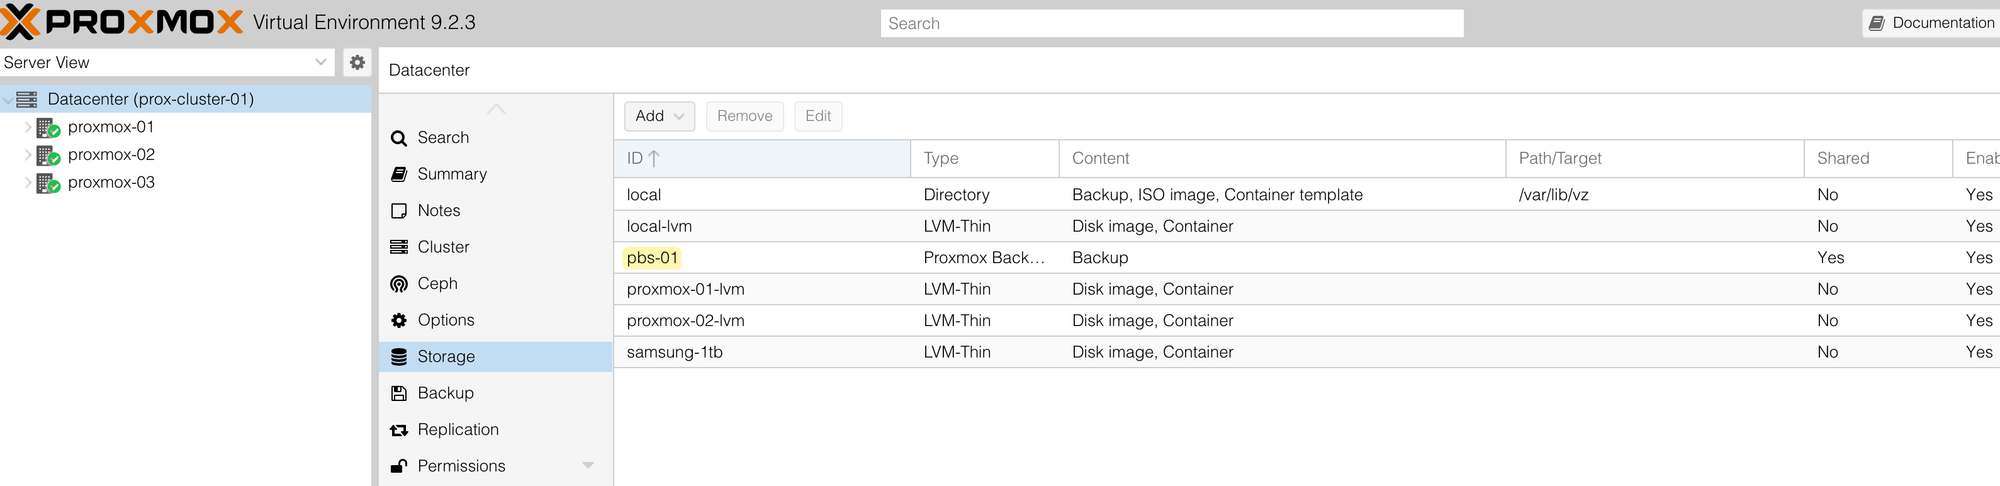
Once everything was restored, I waited a few days just to be sure all the VMs and CTs were stable before touching anything else. After that, I wiped pbs-01, which was still running version 3.x, and reinstalled it fresh with version 4. I didn't mind losing the old backups on it.
pbs-02 was already running version 4, so I didn't have to rebuild that. It was configured as a remote and pulled the backups from pbs-01. Since I'd erased pbs-01, it also made sense to remove all the old backups from pbs-02.
Since I'd reinstalled pbs-01 from scratch, I had to add it back into the cluster as a storage target under Datacenter > Storage. This part is important because that's how the three nodes know where to send their backups.
Closing Up
That's pretty much it. The whole thing went a lot more smoothly than I expected. It was very seamless, I didn't lose anything, and everything worked 100%. For my first time doing an upgrade like this, I was very pleasantly surprised at how well it went.